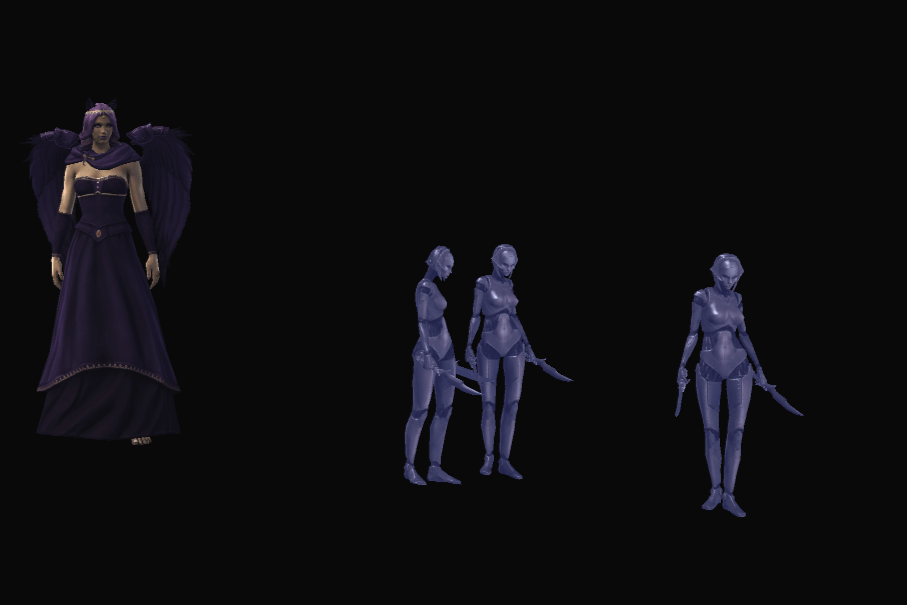
Number of Standard bosses: 5 Level of Standard bosses: 56-60 Number of Expert bosses: 5 Level of Expert bosses: 62
Solo at 70?: Yes All cheevos while solo?: Yes
A level 70 player can easily kill everything in this dungeon. This guide is mainly designed to show you how to get the cheevos and do the quests. If the content becomes ‘relevant’ again then I will expand the boss guides as needed and add more detail.
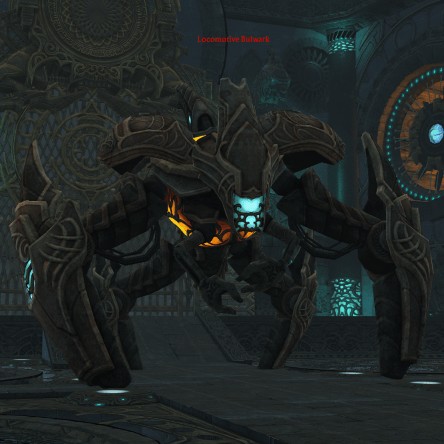
Boss 1 - Locomotive Bulwark
- Normal Mode + Expert Mode
Kill the trash in the room before engaging Locomotive Bulwark.
The main mechanic of the boss:
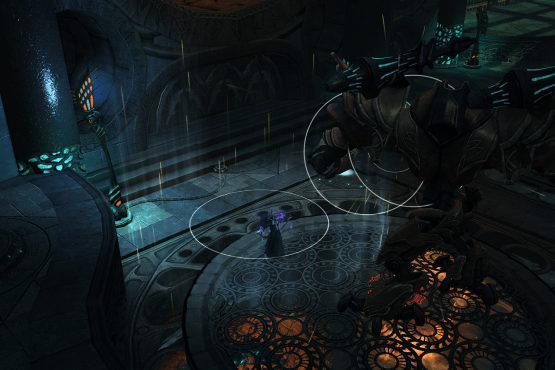
Orichalcum Plating, Electromagnetic Burst and Recharging The boss starts the fight with a buff called ‘Orichalcum Plating‘, this makes him highly resistant to damage. During the fight the boss will cast ‘Electromagnetic Burst‘. This will pull everyone to the boss at the beginning of the cast, and then 5 second later at the end of the cast the boss will do a big AoE in a 7 meter radius around himself. Players that have been pulled in will need to move out quickly to avoid this AoE. The boss will now have a debuff called ‘Recharging‘ this debuff replaces the Orichalcum Plating for 15 seconds. The boss will take 200% damage while Recharging is active.. this is the nuke phase!
The boss has a few other abilities to be aware of:
Ground Rake – Deals damage to anyone stood in front of the boss.
Iron Discharge – Cast for 4 seconds so you have time to move! Then a 7 second channel which throws a bunch of blue orbs from the boss in random directions. Don’t get hit by them! Move away from the boss during the cast so they are easier to avoid.
Plasma Arc – Red cone on the floor that deals damage, stay out the red!
Missile Volley – A 5 second channel – Deals damage on everyone but splashes to nearby players, stay spread out to reduce damage taken.
Locomotive Bulwark
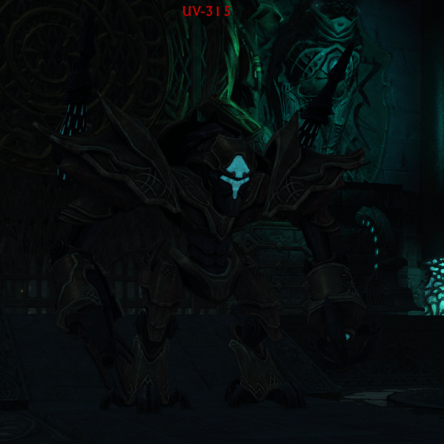
Boss 2 - UV-315
- Normal Mode + Expert Mode
Kill all the trash in the room to spawn UV-315
Step into the light to remove your stacks of Dread
The main mechanic of the boss:
Dread – Every player will gain a stack of Dread every second, each stack will increase your damage taken from the boss – If you reach 100 stacks then you will die.
Lamps – Every so often, one of the lamps around the room will become active. A circle of light will appear around the lamp. Players can stand in the light to slowly remove stacks of Dread. If you drag the boss to the light then he will be stunned and take extra damage.
The boss has a few other abilities to be aware of:
Dark Pool – This cast can be interrupted – Places a dark pool of bad where a player is stood, players need to move out of it or take damage. If the pool overlaps the light from the Lamps then that spot wont work for removing stacks of Dread, so it’s important to interrupt Dark Pool while a Lamp is active.
Eradicate Life – Places a red bubble where a player is stood, move out quickly as it deals a lot of damage! Any players that were in the circle will also receive a debuff (Called Eradicate Life) that will drain their mana/energy, this debuff can be cleansed.
UV-315
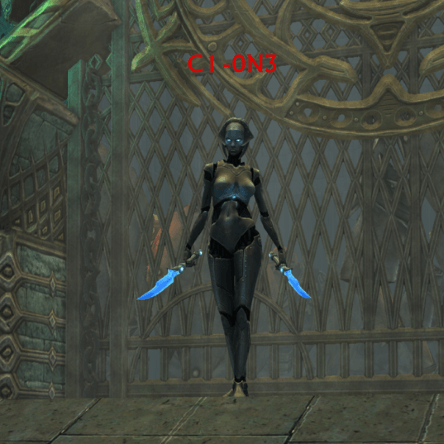
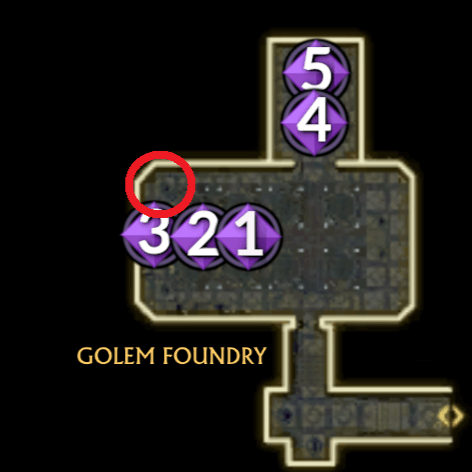
Boss 3 - C1-0N3
- Normal Mode + Expert Mode
There are 3 trash packs of C1-0N3s before the boss spawns. When they hit 15% health, the C1-0N3 trash will start spinning with a blue AoE around them, they will then explode, dealing damage to all nearby players. When AoEing them down, your tank will need to be careful to stay out of the explosions, especially if there are more than 2 in the same spot.
The boss has a few abilities to be aware of:
Lightning Quick – The boss teleports to a random location and summons an add. The add will explode after 15 seconds, dealing damage to all nearby players.
Static Tether – 2 players are linked together with a chain, the 2 players have 10 seconds to stand on top of each other to break the chain, or they will receive a lot of damage.
Caltrop Charge – Places an orange AoE on the floor, if you stand in it then you take damage depending how close you are to the middle of the AoE. Standing in the AoE will also apply a debuff that slows you by 30% (not cleansable)
C1-0N3
Boss 4 - Subversionary Liaz
- Normal Mode + Expert Mode
To spawn the boss, kill all the trash in the room to the side, each of the main trash mobs will spawn a few smaller ones when you engage them, so be careful not to pull too much at once!
Most groups will pull the boss into the larger main room so there is space to deal with the abilities.
The boss has a few abilities to be aware of:
Rapid Deployment – Spawns an Auxiliary Laser Turret – These turrets will fire Disintegration Laser beams and rockets, it’s best to AoE/cleave them down with the boss.
Volatile Catalysis – A 6 second channel on a random player. At the end of the cast damage will be dealt to any player stood nearby, so stay away from the targeted player!
Plasma Circuit – A 4 second cast on a random player. Deals a lot of damage to a low level player, the damage can be shared between nearby players, so stack up for this one!
Sea of Flame – Random red circles that spawn all around the room, starting with a pulsing red circle and then exploding in flames. These can be pretty much ignored unless you are going for the cheevo.
Subversionary Liaz
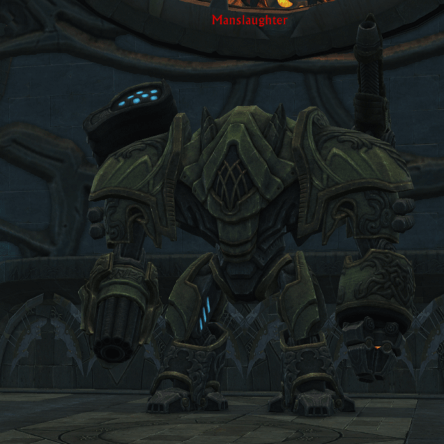
Boss 5 - Manslaughter
- Normal Mode + Expert Mode
Most groups will pull the boss into the larger main room so there is space to deal with the abilities.
The boss has a few abilities to be aware of:
Deploy Charges – The boss will place 3 explosive charges on the floor, move the boss away from them before they explode or he will be buffed.
Anti-Personnel Weapon – A 7 second channel – Deals huge damage to anyone stood in front of the boss.
Rotary Assault Cannon – A 10 second channel – Targets a random player and places a red circle on them, the player needs to run out of the circle and continue running as the circles follows them! Try to stay away from the group during the running around. Keep track of the cast bar so you know when it’s safe to stop running. (note: if every player is in melee then the boss doesn’t cast this!)
Gel Shot – A 3 second cast time ability that can be interrupted – Gel Shot will spawn a purple circle under the player it is cast on, Standing in the purple gives you a debuff (Gel Shot) that will cause damage and double your cast times! – The debuff can be cleansed.
Havoc Missile – Hits the player for 20k damage. (possibly only hits the tank)
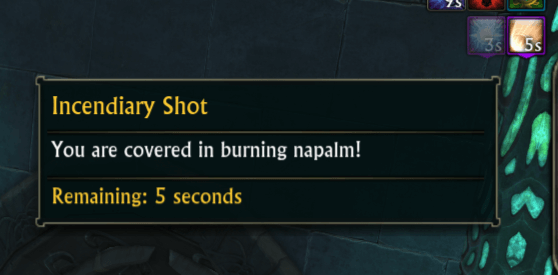
Incendiary Shot – Targets a random player and throws a missile at them. This gives the player a debuff that ticks damage for 10 seconds. The debuff can be cleansed.
Manslaughter
Neutral Quests
These quests are available for Golem Foundry and are for Guardian and Defiant Characters.
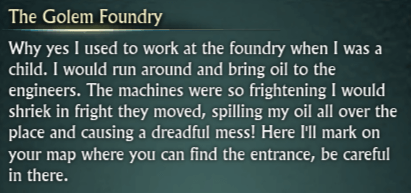
The Golem Foundry
Normal mode Golem Foundry PICK UP: The quest is picked up from Itoi Rinu in Tempest Bay at /setwaypoint 12925 11518 TO COMPLETE: Talk with Laura Redstaf in the Armory
Talk with Laura Redstaf in the Armory, Kingsward /setwaypoint 6198 8091
Your quest objective will now change to ‘Enter the Golem Foundry’
Enter the Golem Foundry dungeon (normal mode) at /setwaypoint 6228 7852
This quest will autocomplete when you enter the dungeon.
Core of the Problem
Normal mode Golem Foundry PICK UP: The quest is picked up from Lisa Milling in Golem Foundry at /setwaypoint 604 717 TO COMPLETE: Collect the core of the Locomotive Bulwark Collect the core of UV-315 Collect the core of C1-0N3 Collect the core of Manslaughter
Kill each boss and loot the cores from them.
Hand in the quest to Lisa Milling in Golem Foundry at /setwaypoint 604 717
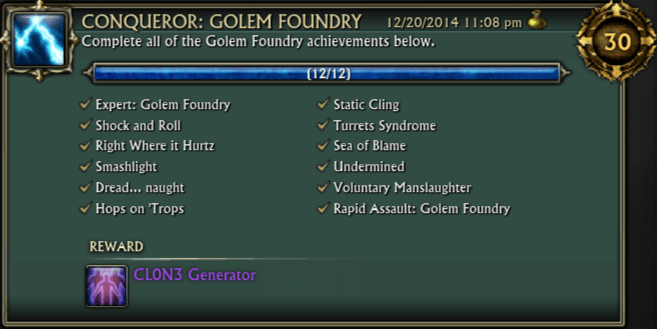
Achievements Available
Conqueror: Golem Foundry
Complete all the cheevos in Golem Foundry
Completing the cheevo will grant you the item ‘CL0N3 Generator’. This item will spawn 3 CL0N3s to help you fight, these are just fluff items, they don’t do a lot of damage.
Rapid Assault: Golem Foundry
Defeat all the bosses in Golem Foundry on expert difficulty within 20 minutes.
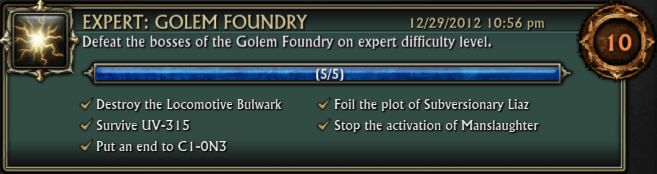
Expert: Golem Foundry
Defeat all the bosses in Golem Foundry on expert difficulty
Golem Foundry
Defeat all the bosses in Golem Foundry on standard difficulty
Locomotive Bulwark
Shock and Roll
Avoid the damage from the 3 boss abilities. See the boss guide above for descriptions of each ability.
Right Where it Hurtz
Stop all DPS just before the boss goes into his recharging stage. You will need to be careful of DoT abilities too, choose your spec carefully and use only abilities that cause no damage over time. The boss will need to complete a recharging cycle without you damaging it. Killing the boss before the recharge is cast will not grant the cheevo.
UV-315
Dread... Naught
Stay out the Lamp lights to allow your stacks of Dread to continue increasing. Low level players will likely need a dedicated healer to be able to survive when the stacks are this high.
Smashlight
Wait for all 5 lamps to activate and be destroyed before you kill the boss.
C1-0N3
Static Cling
Stay close together as a group to make it easier and quicker to break the tethers.
Hops on 'Trops
By ‘Initial explosion’ the cheevo means that you must be out of the Caltrop Carnage target spot before it even lands, so that the first tick of damage when it lands doesn’t hit anyone. The best way to do this is to keep moving! Move together as a group down one side of the room and then up the other side, repeat until the boss is dead. The Caltrop Carnages will be fired where your group is, but the group should have already moved further down when the Caltrop lands, so no one will get hit. You will know if someone has been hit as they will get the debuff ‘Caltrop Carnage’ so you can wipe and try again.
Subversionary Liaz
Turrets Syndrome
Don’t kill 4 of the turrets.
Sea of Blame
Sea of Flame are the random red circles that spawn all around the room, starting with a pulsing red circle and then exploding in flames. These can be pretty much ignored unless you are going for this cheevo. Watch for the red circles and move out of them before they explode.
Manslaughter
Undermined
Move the boss away from the Explosive Charges quickly.
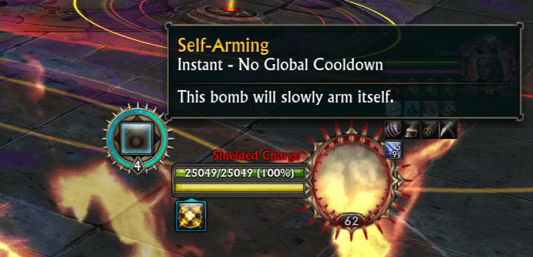
Voluntary Manslaughter
Keep the boss near the Explosive Charges to power them up. When you are targeted by Incendiary Shot, move on top of the charged Explosive Charge, which will now be called ‘Shielded Charge’. Make sure your healers don’t accidentally remove the Incendiary Shot debuff by cleansing!
You can see that the charge is fully powered up when it changes into a 'Shielded Charge' and is at level 4.
When you are hit by Incendiary Shot you will have a debuff for 10 seconds, while this debuff is still active, run into the Shielded Charge.
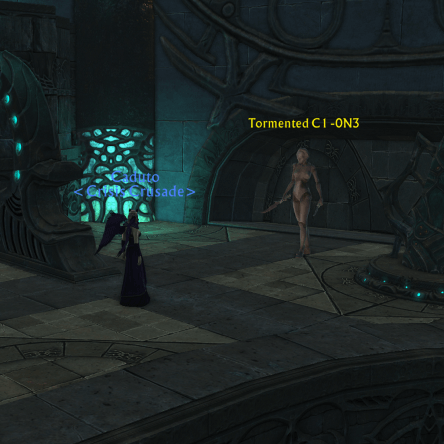
The Sinister Presence
Shadows of the Foundry
The Sinister Presence is on the ledge where the C1-0N3 boss spawns. /setwaypoint 549 624 Kill the Tormented C1-0N3 to spawn the Sinister Presence and then kill it.