A few small guides about the basic aspects of the game.
Quick Links for Guides on This Page
Choosing Gear For Your Class Focus Questing Your first death! PAXP Planar Charges Notorieties Zone Events WorldEvents Weekly and Daily resets Useful Chat Commands Ascended Trove Trading with other players / alts Mounts Minions Bags and Bank Guilds Heroes of Telara Discord Summons Logging more than one account Shard Switching What was Rift Prime? General Hints n Tips
Choosing Gear For Your Class
Which gear should you choose?
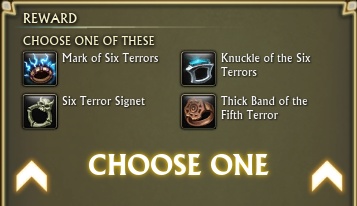
Often when you complete a quest you will be asked to choose a piece of gear as a reward.
Each of the gear items will have slightly different stats.
You will need to choose the correct gear for your class or you will not be able to wear it!
While you are levelling you can simplify your gear upgrades by just choosing upgrades that increase your primary stat. don’t worry too much about all the other stats, you will replace your gear so quickly it really doesn’t matter too much.
If the gear item available is not an upgrade for you then you may want to pick an item for the wardrobe unlock instead.
You can hover over each gear item to see if you still need the wardrobe skin. If you need more than one of them then you can CTRL + LEFT CLICK to see a wardrobe preview of what the skins look like to help you decide.
Warrior
Cleric
Mage
Rogue
Primalist
Primary Stat
Strength
Wisdom
Intelligence
Dexterity
Dexterity
Gear Material
Plate
Chain
Cloth
Leather
Leather
Focus
Holder of essences.
The only gear item that it may be a good idea to buy as you are levelling is a 6 slot focus. When you do the first few quests in the starter zone you will be given a 2 slot focus. If you use this focus then you will only be able to equip 2 essences at once as you are levelling. You can buy yourself a cheap 6 slot focus for 7500 planarite, this will give you a few extra stat slots as you level.
This cheap focus is bound to account, so you can buy it using a main character and send it to all your alts (when sending to alts, it doesn’t matter which faction they are).


There are 4 lesser essence slots and 2 greater essence slots, you can place lesser essences in all 6 slots, you do not have to use greaters. Greater essences are an extremely rare drop!
When you reach higher levels you start to loot nicer essences from normal rifts, you can continue to use this 6 slot focus to put essences in.
The best in slot focus can be bought at level 70 (See the level 70 gear guide), you will need to be revered with Planar Defence Force to be able to buy it. While you are farming the Notoriety you can start doing Raid Rifts every day, you should save Crit Power essences in your bags, so you can upgrade them before slotting them into the best in slot focus when you buy it. You can put other essences (not Crit Power) into your cheap 6 slot focus to give you a stat boost until you are ready to upgrade.
Questing
Types of Quests
Questing is one of the best ways to level up, get gear and earn notoriety.
As you are levelling, you may find some quests too difficult to complete at your current level, or you may find yourself needing to ‘skip zones’ in order to stay in the correct level zones. There is no issue at all with skipping quests while you level. When you reach higher levels you can go back and complete them all if you wish (for cheevos and wardrobe) or just ignore them.
You can find all of your current active quests in your quest log [ L ]

There are a few different types of quests in Rift..
- Story – Story quests are generally picked up from main quest hubs – Story quests need to be completed in order through a zone – They are clearly marked as story quests on the quest log – You need to be the correct level and have done the previous story quests in the chain to pick them up.
- Carnage – Carnage quests are always to kill a certain amount of a certain creature – You pick up the quest by killing the first creature of that type – Some carnage quests are just to kill one creature, others can be as much as 20 – These were made simply to replace the questgiver that told you go kill 10 wolves/rams/goblins etc – Carnages started in Ember Isle upwards, they were then reworked into the first 2 zones for each faction – They are clearly marked as carnage quests on the quest log – You need to be the correct level to pick them up.
- Onslaught – Found in most zones from Ember Isle level and up – These quests involve upgrading and then defending a wardstone, you generally have to kill 20 invasions that are attacking the stone – Can be used to farm the Notoriety for the zone – They are clearly marked as Onslaught quests on the quest log – You need to be the correct level to pick them up.
- Pick Up – Pick up quests are picked up from random items or questgivers throughout the world (not in quest hubs) – You need to be the correct level to pick them up – Can also be picked up as quest items that are looted from mobs, right click the item to start the quest – You need to be the correct level to be able to right click the item.
- Dailies – Generally picked up from one main quest hub in a zone or in main cities – Dailies will reset everyday at 4am server time – Most zones require you to finish certain stages of the story quests before dailies will unlock.
- Weeklies – Weekly quests will often have raid currencies as the rewards – Always choose the highest tier reward, even if you are not running that raid tier yet – Weeklies will reset on a Wednesday at 4am server time – You will be able to pick a few current tier weeklies as you level from 65-70, most will unlock at level 70.
- Breadcrumb – At the end of a zones story questline you may pick up a quest which tells you to visit another zone, these are breadcrumb quests (creating a trail between zones) – You can also find some breadcrumb quests in the capital cities.
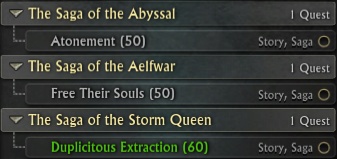
- Saga – Long and interesting questlines that will take you through many of the zones and often in dungeons, PVP and raids too – Saga questlines are clearly marked in your quest log.
- World Event – Quests that you can only pick up and hand in during the World Events – They may stay in your quest log after the event has finished, but you wont be able to hand them in.
Filters and Limits
The filter buttons at the botton of your quest list also have counters next to them to keep track of how many quests you have.
- For the carnages, you can store up to 25 carnages in your log.
- For the repeatable (daily/weekly) quests, you can store as many quests as you like, but you can only hand in 30 per day as a non-patron or 40 per day as patron.
- For the other/normal quests, you can store up to 25 in your quest log.
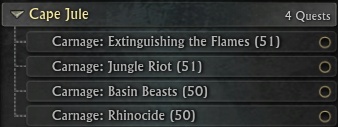
the zone the mobs are in.

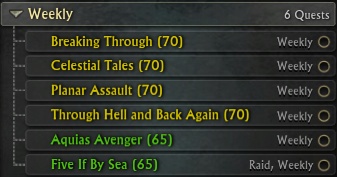
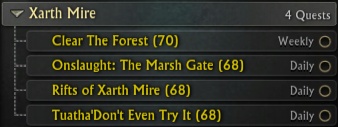
the zone/city where you picked them up.

Your first death!
What happens when you die?
When you die you will be able to choose between 3 different ways to come back to life.
Dying does not damage your gear in any way. Dying will not decrease your stats unless you reach 0% soul vitality (explained below).
In a raid/dungeon your only options will be a battle rez or waiting til the whole group wipes/dies and then you can soul walk. You will be able to hit respawn, but most bosses have shields around the encounter that will prevent you rejoining the fight. Most groups would rather you stay dead so they can battle rez you during the fight or resurrect you once the fight is over.
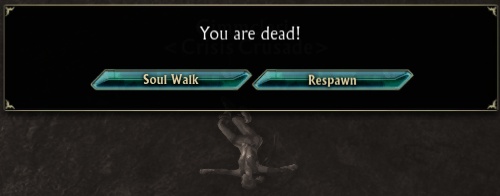
Soul Walk
If you hit soul walk then you will rise up as a ghost in your current location and have 15 seconds to move around as a ghost before becoming alive again. When you are back alive you will only heal half your health points, be sure to heal up quickly!
Soul walking can only be used once an hour. You can reduce this cooldown with PA talents and Guild Perks.
If your soul walk is still on cooldown next time you die then you can hit respawn to go to the graveyard.
You can also pay credits to reset your soul walk cooldown. There is no need to do this, the option is there if you have money to burn..
Respawn
Hitting respawn will teleport you to the nearest graveyard (or entrance to the raid/dungeon). You then have 2 options..
You can speak to the Resurrection Technician (Defiants) or a Messenger of the Vigil (Guardians) to resurrect at the graveyard (In high level zones these NPCs may have different names).
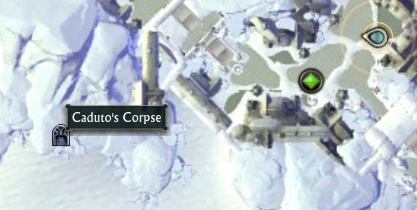
Or you can run in your Incorporeal state all the way back to where you died to resurrect there. If you get lost, just hit the ‘return to graveyard’ button.
Being Rezzed (Resurected)
Other players can also bring you back to life!
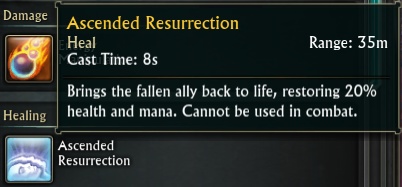
Every player has the Ascended Resurrection ability, you can find it listed under Ascended Powers in your ability book.
Ascended Resurrection can only be used out of combat.
While you are in combat, most healer souls have a battle rez to resurrect players during the fight.
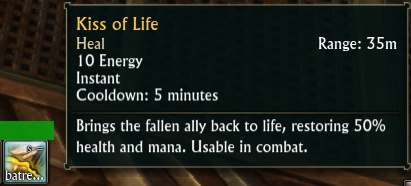
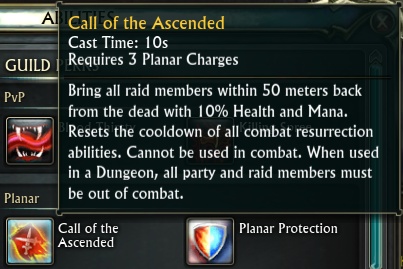
Your guild may also have the Call of the Ascended perk, to rez up the whole raid with one cast after a wipe.
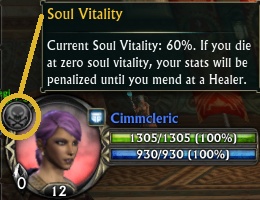
Dying will cause damage to your soul Vitality (unless you are patron). You will take 10% when you initially die and then different amounts of damage depending how you become alive again. Resurrecting at the graveyard will lose you another 10% Vitality, Walking to your gravestone will not reduce your Vitality any more.
Some deaths do not damage you soul, such as deaths inside a PVP Warfront.
Patrons do not suffer from soul damage.
If you get down to 0% Soul Vitality then you will get a debuff (Soul Exhaustion) that will significantly reduce your stats.
You will need to mend your soul at a soul healer to remove this debuff and put your Vitality back at 100% – Mending your soul will cost platinum, different amounts depending on your characters level.
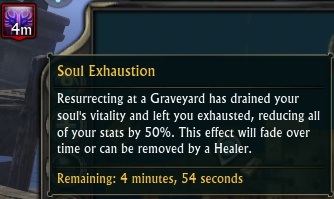
You will also get the Soul Exhaustion debuff from respawning at the graveyard (instead of soul walking or running back to your gravestone). This debuff will last for 5 minutes, or you can clear it by mending your soul at a soul healer.
You will find soul healers next to every graveyard or you can buy an ability to summon a soul healer where ever you are (especially useful in raids!).
The ability costs 15k Planarite and can be bought from the Ascended Powers vendor in the home cities, it is called ‘summon rescue medic’.

In Meridian, College of Planar Studies - /setwaypoint 5941 5274

In Sanctum, Bottom floor of central tower - /setwaypoint 7474 3006
PAXP
Planar Attunement Experience
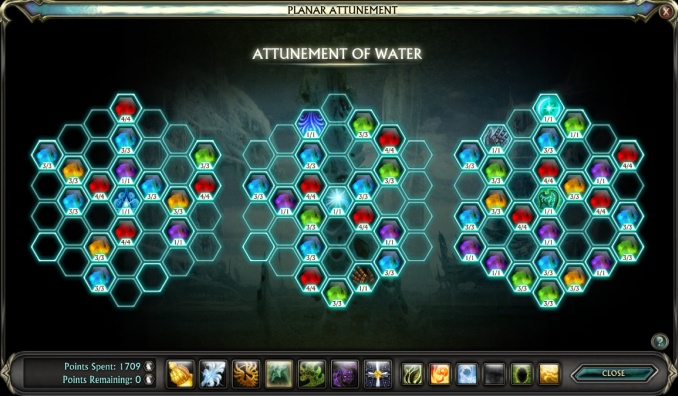
When you hit level 50 you will open up your Planar Attunement.
You will likely have a few points already to spend, and will be earning points very quickly, you will gain PAXP every time you earn normal levelling XP. Simply click the hexagons with the buffs you want and hit save.
The maximum amount of points is 1709. You will likely max this out long before you are tier 2 raiding.
Planar Attunement will give you loads of cool little buffs, such as increases to mount speed or Teleports to Mathosian lands.
The blue and red Hexagons will increase your stats, this is quite a noticable increase at level 50, but by the time you hit level 70 the numbers are very small compared to your actual gear.
In general, it really doesn’t matter how you spend your points.. you may want to concentrate on getting the hexagons with the stats your class uses first (dex for rogues etc) or you may want to concentrate on getting mount speed and soul walking buffs first.
You will eventually max out all the points and fill every hexagon, giving you every buff and skill available.
You can reset your PA points at a class trainer if you want to spend them differently, there really isn’t any need to do this though.
Planar Attunement is Region Wide (NA/EU), so if you create an alt on the same Region and start levelling up then any PAXP you already earned on your other characters will be available to use once they hit 50 and will continue to be earned for all your characters to use.
Planar Charges
Pretty blue crystals
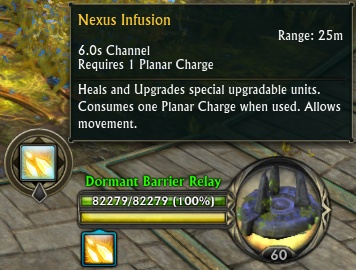
What are they used for?
The main use of planar charges is to upgrade wardstones, turrets and healing stones found around onslaught locations and defence points in the world.
When you select one of these items, you will have the temporary ability ‘Nexus Infusion’ pop up. You can upgrade the item to make it stronger/more powerful.
There are many different places in the world where this is useful; onslaught locations, items in rifts and even some planar mobs can be infused.
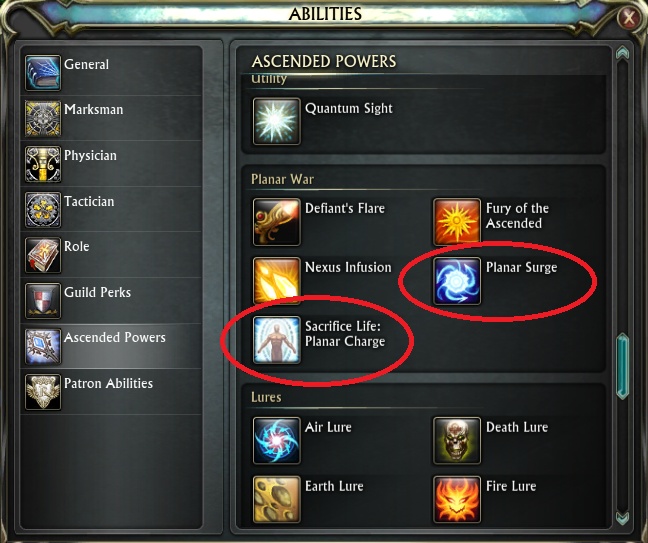
Planar charges are also used to cast some Ascended Powers, Found in your ability book.
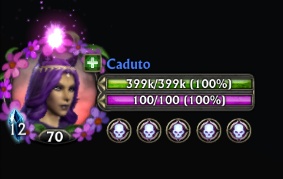
How many can I store?
You can see how many planar charges you have by the number on the blue crystal on the bottom left of your character portrait.
You will start with a max amount of 3 charges.
When you hit level 50 you will be able to spend points in your PA trees, some of these points will increase the planar charges you can carry.
The maximum is 12, with all PA points spent.
How do I earn Planar Charges?
Every time you close a rift you will gain 1 planar charge.
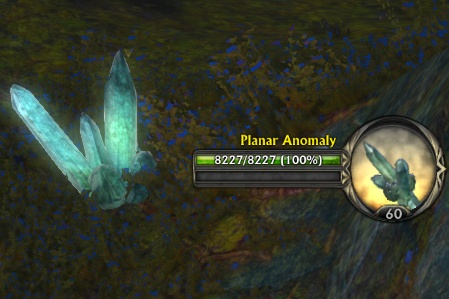
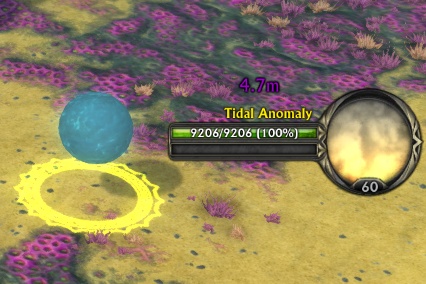
You can also destroy Planar Anomaly crystals or Tidal Anomaly spheres and stand in the blue bubble created to earn planar charges. You will find these crystals/spheres near onslaught and defence locations.
From spending PA points you will gain 2 Ascended Powers that will grant you a planar charge when you use them.
There are also PA perks that will make it so that you earn planar charges quicker, gaining 2 or 3(max) per credit rather than just one.
Notorieties
Becoming friends with the world!
During your levelling from 0-70 you will encounter many different Notorieties.
Only the Notorieties found in the level 65-70 content (Prophecy of Ahnket) will actually matter at end game. You may want to eventually max out the lower level notorieties in order to buy all the things from the notoriety vendors (mostly wardrobe skins and pets/minions etc).
When you finish the story quest lines in each of the PoA zones you will be able to pick up the daily quests for that zone.
As you level from 65 to 70 you should go back each day to the zones you have completed and do those dailies.
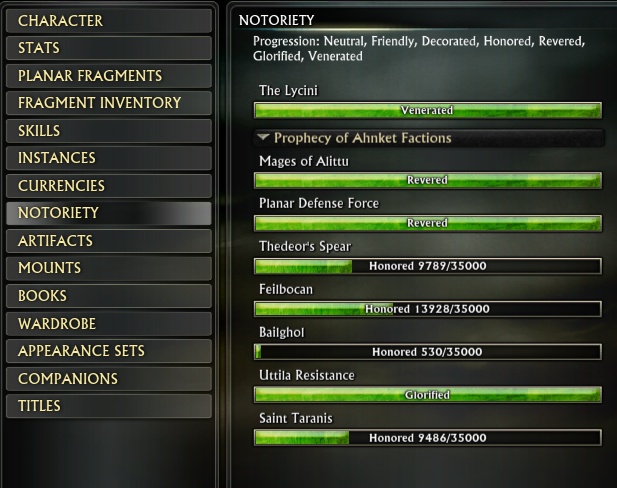
Notoriety progression is:
Neutral > Friendly > Decorated > Honored > Revered > Glorified > Venerated
Most of the Notorieties stop at Glorified.
Most of the Notorieties will pop a cheevo when you max them out.
You can find a full list of Notorieties and how to farm them on the Notoriety Guide.
Sigils of Valor
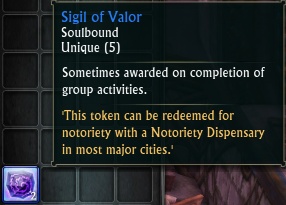
You will earn Sigils of Valor during Instant Adventures or as loot from zone events (You can also buy them with Affinity, though there really is no need to).
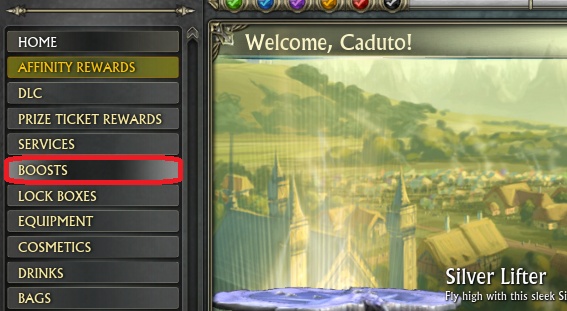
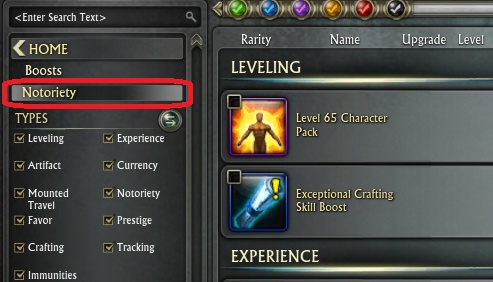
To spend them, open up the Rift store, go to Boosts > Notoriety
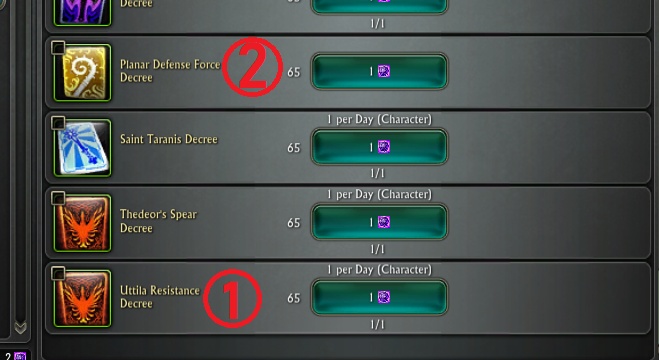
Here you can buy Decrees that will grant Notoriety for most of the in game factions.
You should concentrate on levelling up the Prophecy of Ahnket Notorieties first, prioritising Uttila Resistance and Planar Defense Force.
Depending on how many Sigils you generally earn each day, you may want to stick to just these two factions, or you can spread out spare sigils to the other PoA factions.
You can only hold 5 Sigils at a time in your bags, so make sure you check at least once a day and spend the ones you have earned.
Zone Events
We’re under attack!
Zone events are dynamic invasions from planar creatures effecting the whole zone. The zone will become over run with Rifts and Invasions which you need to destroy and then usually an end boss will spawn somewhere in the zone for you to kill.
Zone events happen in every zone! Most of them have cheevos for the first time you complete them.
Player population determines when a zone event pops, more players in a zone will mean it is more likely a zone event will pop, but be aware that there is an internal cooldown between zone events.
Most low level zone events can be soloed by a high level character. But make sure you prioritise defence!
Objectives and rewards
You can see the zone event objectives on the top of you list of quest stickies.
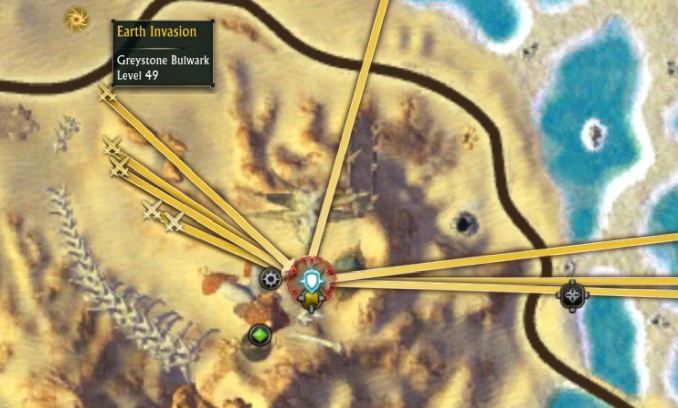
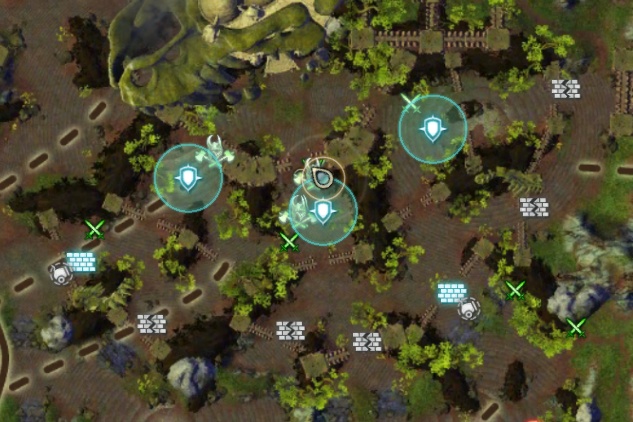
Most low level zone events will have a defense element (usually to defend at least one of the highlighted wardstones) these are shown on the map as a blue shield. If you fail to defend at least one wardstone then you will fail the zone event.
Other areas of importance (such as footholds to destroy) for the zone event will also be highlighted in blue on the map.
When you have completed the objectives of the zone event you will be able to claim your reward in the rift loot bag.
Mentoring down will mean you get rewards more suited to your characters level and will allow everyone the opportunity to hit the boss (as you wont be able to kill it too fast).
Tracking Zone Events
You can use a zone event tracker like YARET to see which zone events are running in every zone. Its a good idea to keep YARET open on a second screen while you are playing.
There is also an in game message in the in game chat every time a zone event pops, these messages will be in each of the level chats and in the Events channel. You may want to create a chat box that only shows the events channel if you are trying to find specific zone events.
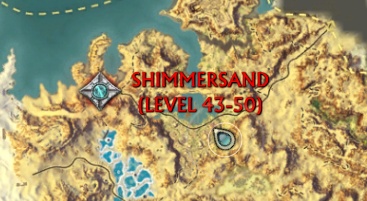
You can also open your map and see zone events in other zones on the same continent. Zones with a zone event running will have their name written in red and a large quest marker, you can hover over this quest marker to see which event is up.
Fate Stones
Fate stones are items that will pop a specific zone event for the zone you are stood in.
You can buy fate stones for some of the zone events in the Rift Store (Rifts > Zone Events).
Most fate stones are only available for purchase using credits, with exceptions being call to action event lures (available during CTA weekends).
Fate stones are re-usable! Be sure to ask friends/guildies if they already have them before you buy them yourself.
Unstable Events
Lower populations in Mathosian and Storm Legion zones mean that Unstable Events pop there more often than other events.
Unstable events are 30 minute long events where Unstable Artifacts will pop up all over the zone and you need to collect them. There will also be squirrels running around that you can catch with nets made by dreamweavers to collect the artifacts they have stolen.
There are 138 unstable sets to collect, rewarding pets, mounts and fun transmorgs as well as other fun items.

World Events
Participation is key.
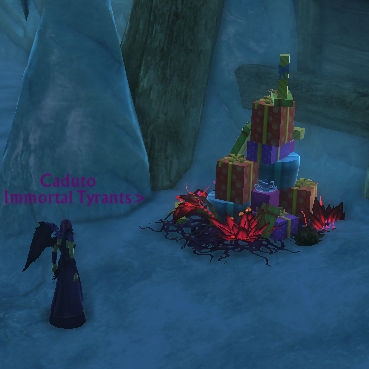
While you are playing there may be a world event running.
If it is one of the 4 main world events then you should participate and make sure you do all the weeklies.
With the currency earned from the weeklies you should buy the best in slot item related to the event, even if you are not level 70 yet, just buy it and pop it somewhere safe for when you hit 70!
If you want to buy any of the other event items (mounts, costume etc) then you will need to do the quests with alts too, if you don’t have alts yet, then create some! Generally the event quests can be picked up and completed by an alt over level 15, with the exception of Summerfest that requires higher level characters for some of the quests.
You can find information about all the world events on the world events guides.
Weekly and Daily resets
When can you do that again?
Some content can be repeated over and over with no penalty, some content can be run as much as you like but you will need IRC to get the good loot and some content you can do just once and then you will have to wait for reset before you can do it again.
Chronicles can be selected and completed once per day each, you can then choose the random chronicle button to try to get that chronicle again, be aware that this button has limited choices, once past level 65 you will always get the same chronicle on repeat!
Normal Mode Dungeons can be run over and over as many times as you like!
Expert Dungeon Lockouts will lock you from being able to choose a ‘specific’ dungeon once a day, but if you queue for random dungeons then you can still get that specific dungeon pop and repeat it. For instance: You can solo queue or walk into the ‘Temple of Ananke’ dungeon once a day, after that run is finished and you are ‘locked’, walking into the portal will get you an empty instance with all bosses killed, but you can queue for random PoA dungeons and still have a chance for the ‘Temple of Ananke’ dungeon to pop in that queue with fresh bosses to kill.
Expert dungeons will reset every morning at 4am (server time). The two master mode dungeons reset twice weekly, on a Wednesday and Sunday morning.
LFR Raids have no proper lockout, instead you will get 2 ‘free’ runs per week and then will need to spend IRC to get full loot. If you don’t spend IRC then you will still get the INTEL currency (which is the important stuff) and a chance for loot.
Tiered Raids can be run once per week. To do these raids you will need a strong group of 10 people (20 man raids can be found in the older content). A single person from the group needs to enter the raid portal and the other 9 will get a pop up asking them to teleport in. Once you kill the first boss (or rarely a trash pack) you will be locked to the instance. If you do not kill all the bosses then you can regroup another day to try again. These raids will reset weekly on a Wednesday at 4am.
Instance ID
When you enter a portal into a raid or Expert dungeon in Rift the game creates your group your own little instance of that raid/dungeon and an ‘Instance ID’ is generated. When you kill your first boss (or sometimes a trash pack will be enough), you will become ‘Locked’ to that instance ID. If you leave a raid and re-enter the portal you will find yourself back inside the same instance ID, with the same boss/trash killed.
These instances will reset either daily (dungeons and chronicles) or weekly (normal raids).
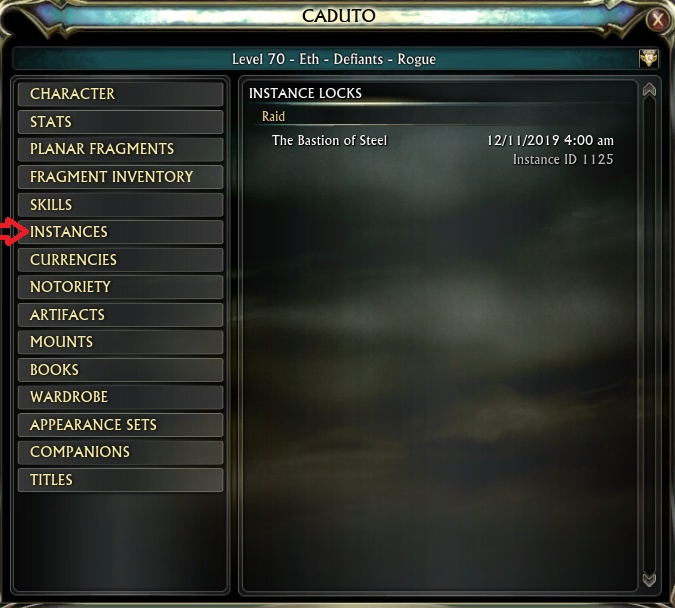
You can check your instance locks on your character screen.
Here you will see a list of all the dungeons/raids you are locked too.
You can also see each instance ID. Players with the same instance ID can regroup to go back into the instance and try to kill any bosses that were left alive.
If you group with a player that has a different ID, even if it is for the same raid, you will not be able to enter the raid together. You can group with players with no ID for that instance to fill the group.
Reset Instances
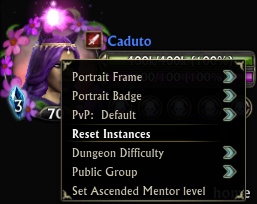
Right click your character portrait to reset your instances.
Unfortunately this is not a magic button to clear all your raid locks!
This will do a soft reset on any instance you are currently locked to..
This reset can be used if your instance bugs, maybe a boss wont spawn or a quest inside is bugged?
It can also be used to reset things you don’t technically get locked too, such as Toks Dungeon or Normal Mode Dungeons.
To use the reset, make sure you and your whole group have left the instance then hit the reset instances (only the group leader can do this). You will see a note in your chat telling you which instances were reset, or you will get an error if there are still people inside.
A soft reset will also happen automatically 15 minutes after you leave an instance.
Useful Chat Commands
A short list of useful commands.
/reloadui – Will reload all your UI – Useful if a window has bugged or if an add on has stopped working correctly.
/cast last resort – Will kill you instantly – Macro it and press it when a wipe is called in raid!
/setwaypoint #### #### – Used to set a waypoint on the map at those particular co-ordinates.
/loc – Type this into chat to be given the co-ordinates of your location (X,Z,Y)
/target ‘name’ – Used to target a mob that you may not know the exact location of or cannot see – Very useful for finding quest mobs and rares.
/stuck – Will port you to the nearest graveyard – There are limitations of when and where you can use this.
For help with setting up your chat box UI, see the UI and Settings page.
Ascended Trove
Open every 10 levels
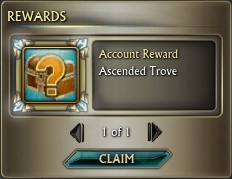
When you hit level 10 you will have a pop up telling you to visit the store to claim your Ascended Trove. When you open the store the trove will be on the top right of the main screen. Hit the claim button to loot it. You open the trove every 10 levels up to level 60 to receive various boosts and items.
Make sure you have at least 10 empty slots in your bags before you open it.
Level 10
- Transcendent Experience Vial – 160% extra XP from all sources for 2 hours.
- Void stones
- A level 10 weapon suitable for your class.
- A rune to put on a piece of gear (random) or Vials/Weaponstones.
- Ascended Trove for level 20
Level 20
- Transcendent Skill Sphere – 160% extra Skill gained from all sources for 2 hours.
- A rune to put on a piece of gear (random) or Vials/Weaponstones.
- Void Stones
- A random Mount – 90% speed
- Ascended Trove for level 30
Level 30
- Imbued Satchel – 20 slot bag
- Transcendent Favor Vial – 160% extra Favor for 2 hours.
- Void stones or Abyssal Crusader Marks
- A rune to put on a piece of gear (random) or Vials/Weaponstones.
- Ascended Trove for level 40
Level 40
- New level 40 weapon(s).
- A rune to put on a piece of gear (random) or Vials/Weaponstones.
- Spring Loaded Pow Kickers – Reduces time to mount by 50% for 30 minutes.
- Void Stones
- Ascended Trove for level 50
Level 50
- Underwater Mount Training – Use on any of your mounts to be able to ride underwater – Best to save for a pretty mount.
- A random Mount – 110% speed
- A rune to put on a piece of gear (random) or Vials/Weaponstones.
- Void stones or Abyssal Crusader Marks
- Ascended Trove for level 60
Level 60
- Transcendent Experience Vial – 160% extra XP from all sources for 2 hours.
- Fragments of Madness or Void Stones (depending on level)
- Crafting Skill Boost – Levels a craft skill to 375.
- A rune to put on a piece of gear (random) or Vials/Weaponstones.
- Ascended Trove – Contains random gear and currency
- Alt 1 received: Transcendent Notoriety Vial, Level 65 Neck, Level 65 rune for a ring, 443 Abyssal Crusader’s Marks.
- Alt 2 received: Fragments of Madness, Transcendent Notoriety Vial, Level 65 Neck.
- Note: You will receive level 65 items even if your character is not level 65 yet.
Hint: Save those Transcendent Experience Vials for levels 65-70!
Trading with other players / alts
Sharing is caring!
There are a few different ways to trade with other characters or to send items to your alts..
Can I trade it?
The first thing to figure out is can the item be traded?
On the item tooltip just under the name of the item it will tell you if the item can be traded..
- Soulbound: Cannot be traded. Item is bound to the character that holds it.
- Bound to Account: Can be traded to alts on the same shard by mailing the item using the mail box or by placing the item in the shard bank vault (purchasable with credits only). You can move the char to a different shard to trade items to alts on different shards.
- Bind on Pickup: This item will become soulbound after you loot it.
- Binds to Account: This item will become Bound to Account once a player right clicks it. While it still says ‘Binds’ it is tradeable. It gets tricky when you link it in chat, as the chat system changes the text to ‘bound’ instead of ‘binds’ which confuses people.
- Tradeable: Usually the item will not specifically say that it is tradeable.. instead you are looking for an absence of all the other markers that would make it bound to you in some way.
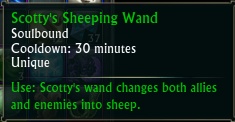
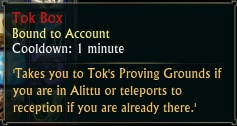
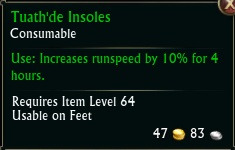
How to trade it
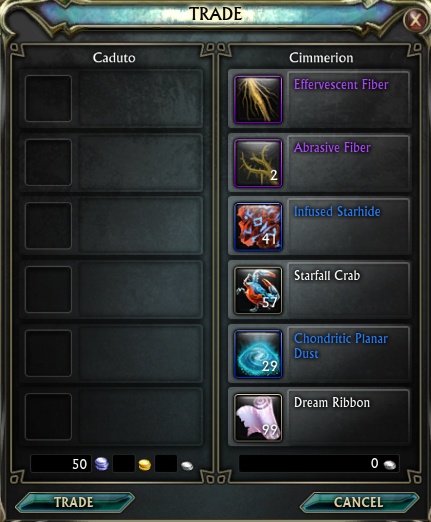
- Trade Window: Select a player, right click their portrait and select trade. This will work with players across all shards! You can trade up to 6 items and some platinum. The good thing about the trade window is that you can see straight away what you are trading for. If you are trading an item for platinum, then you can see the platinum and the item in the same window to check it is all correct. The trade will complete when both players hit the trade button.
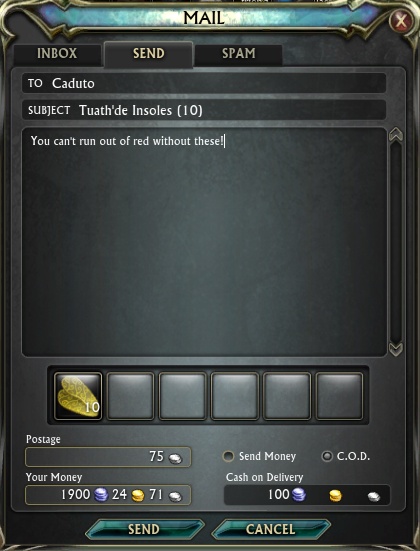
- Mailbox: Mailboxes can be found in all the major cities and in most quest hubs, some players have mailboxes inside their dimensions. Patrons and players with purrple loyalty tier can summon their own mailboxes anywhere int he world. Mailing items will only work with players on the same shard. It is especially useful if the recipient is offline, or in an instance! (Getting a friend to post you insoles during a raid is fine!). The mail system has an automatic Cash On Delivery (COD) option, this will charge the recipient a set amount of platinum before they can take the items from the mail. The platinum will be sent to the sender via mail.
You can use the mailbox to send bound to account or tradeable items to your alts on the same shard. You cannot mail soulbound items. - Using an alt account: If you play with alt characters across a few different shards then you may want to take the time to create a second rift account, logging both accounts at the same time and then trading between them will save you having to create mule characters to transfer items from shard to another.
- Mules: To transfer items/plat to another shard without a second account (or a very good friend) you will need to create a mule. A mule is a character made specifically for transporting goods. It will need to be at least level 15, to be able to switch shards. Ideally you will want to get it to over level 45, this will remove the plat carrying restrictions, a character less than level 45 can only carry platinum up to 3 times their current character level (for instance: a level 27 can carry 81plat).
- Auction House: If you don’t have a buyer for your goods, you can try your luck to sell in the Auction House, you need 1500 loyalty to use the Auction House to sell items, items can be placed for sale at the price you think they are worth, the auction house will even suggest a price for you! Auction Houses are not cross shard, even when you visit/teleport to another shard you will still see your home shards Auction House. You will need to have characters on the other shards if you wish to compare prices, a second account will again come in handy here.
Mounts
Cos walking is for NPCs
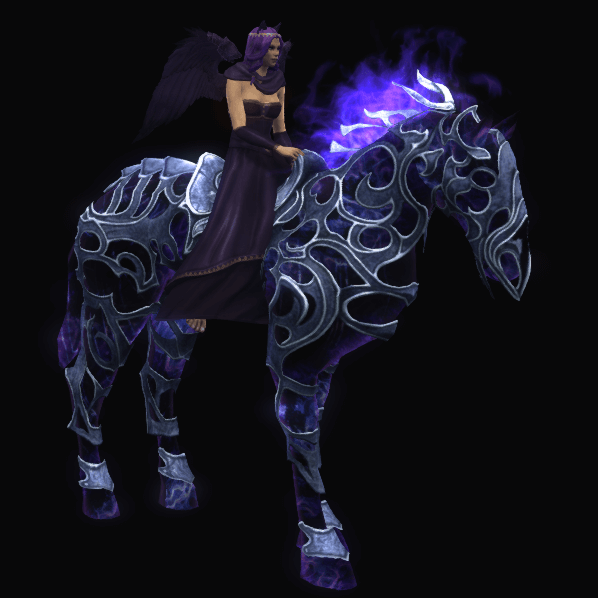
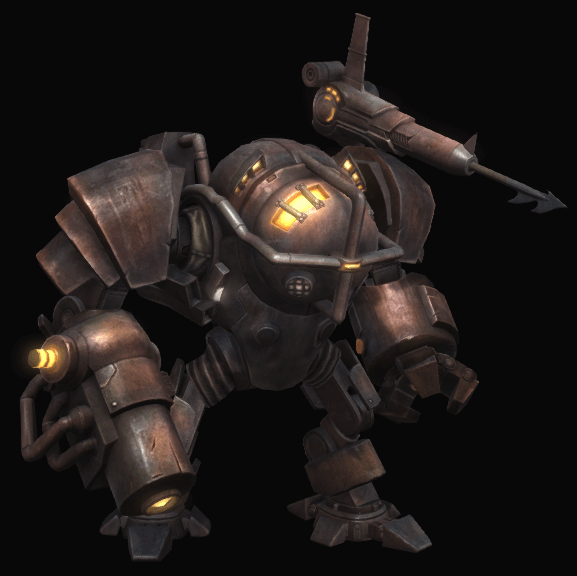
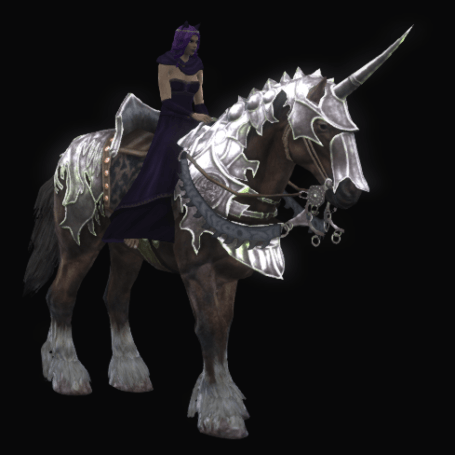
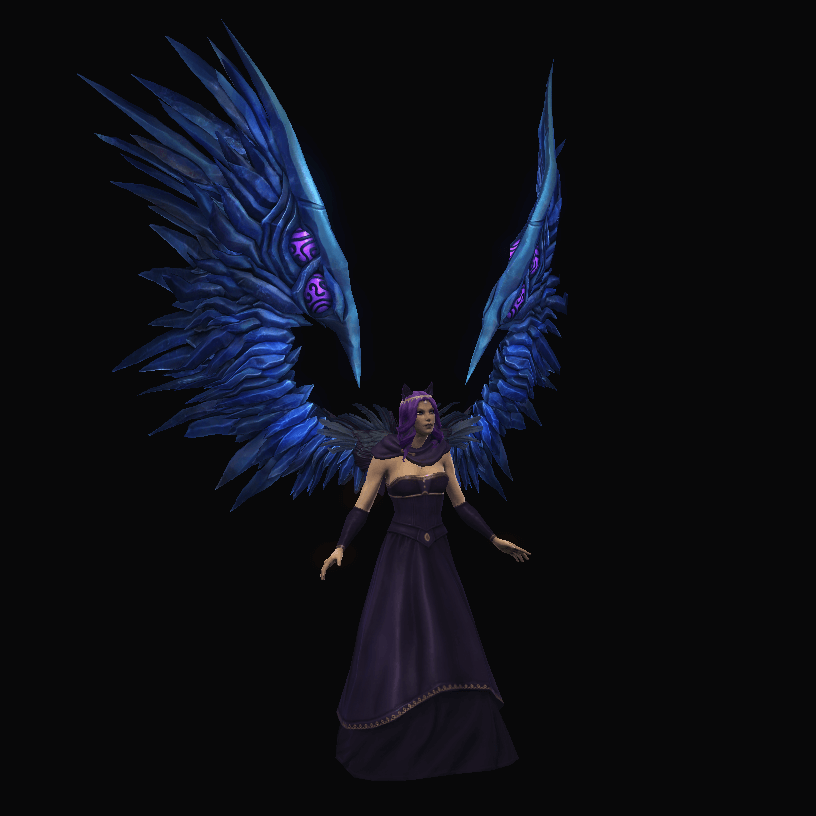
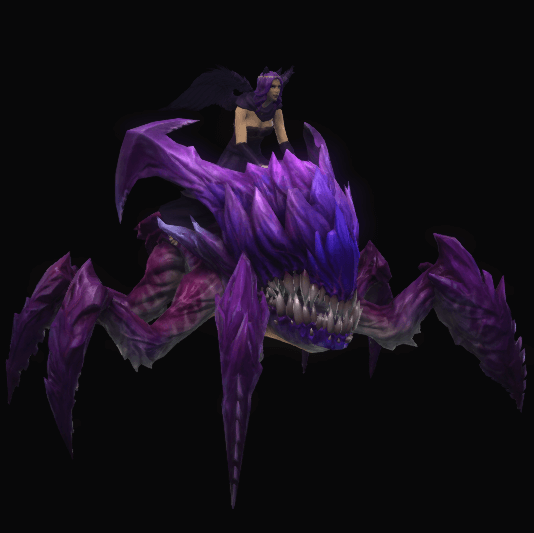
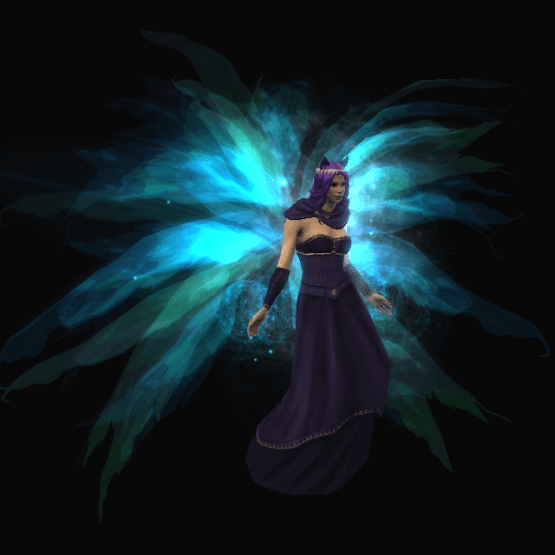
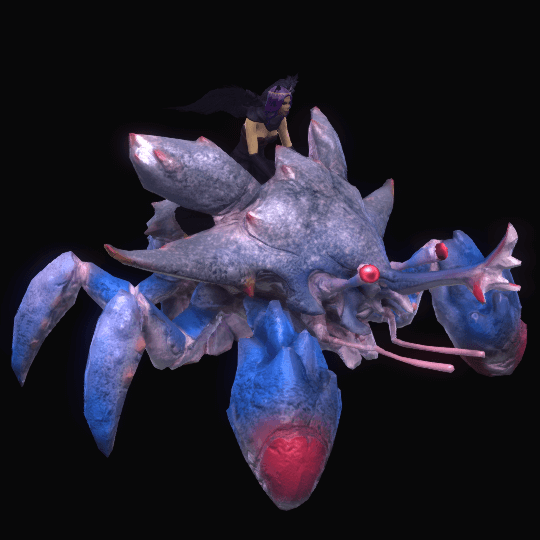
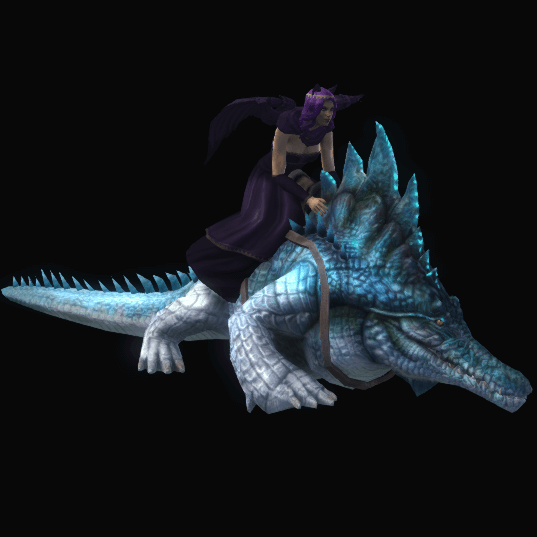
There are hundreds of mounts available in Rift, with many different shapes, sizes, colours and themes. There are also many different ways to acquire these mounts! Some are available for small amounts of easy to earn currency, others require much more farming of limited currency and some much rarer mounts can be found at the end of huge farms involving long quest lines or puzzles. Some mounts are only available for credits, but most of these also have duplicates in the calendar mount box.
You may want to visit the Mount Skins Database to see the variety available!
Free Mounts as you Level
As you level up you will get 2 free mounts from your Ascended Trove, a 90% speed at level 20 and a 110% speed at level 50.
Buying mounts with in game currencies.
Open up the rift store to find many mounts available for various amounts of platinum, the faster they go the more they cost!
You can also buy a 150% mount for 200 lucky coins, these are rewarded from completing artifact sets.
Be aware that a lot of these mounts have a level requirement.
During world events there will be even more mounts to buy! This is when you are likely to find the more unique styles. Most world event mounts will autoscale to your fastest mount, so you are just buying them for the skin.
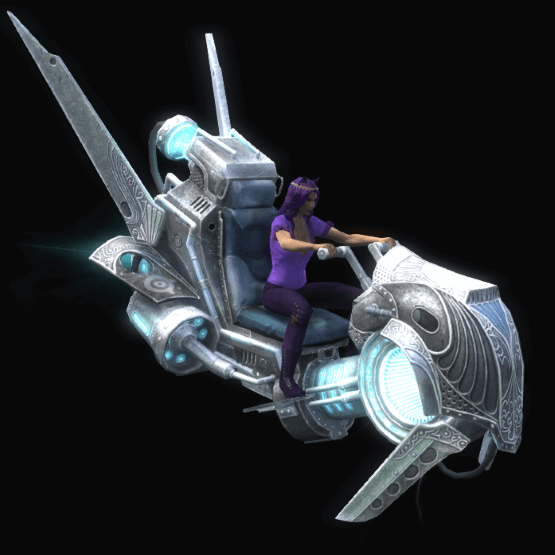
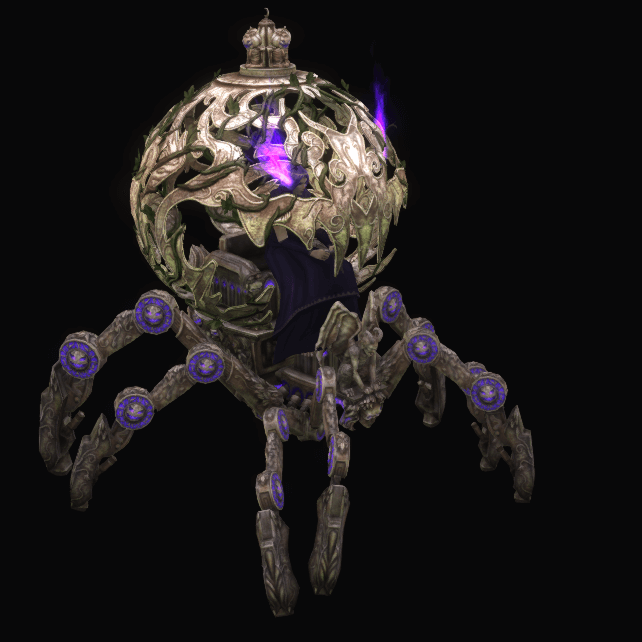
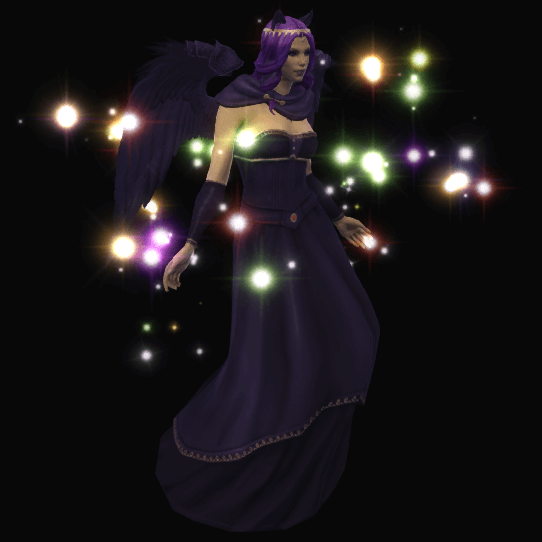
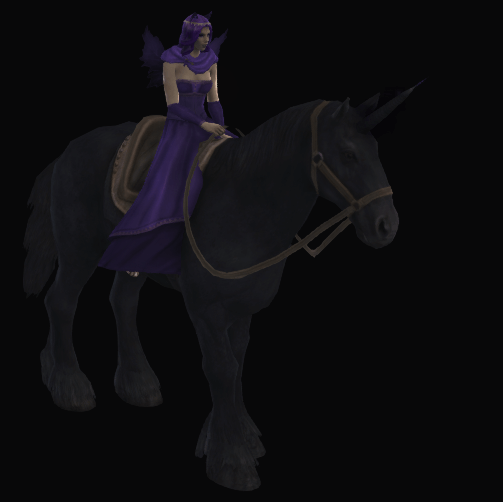
Fastest Mount Speeds
The fastest mount speed is 160%, you can get a 160% mount at the end of the Vostigar Peaks Jet Pack questline (level 68-70)you will need to farm a bit of Intel (in game currency) to buy it.
You can also loot 160% mounts from Supply Crates, other players will often sell these on for platinum. Or you can buy 160% speed mounts directly with money. Most mounts bought with credits or direct cash will be an account wide unlock, so you can have a super fast mount on all your characters for just one purchase.
You only have to buy a speedy mount once, then that speed will apply to all of your autoscaling mounts on that character! So once you have your jetpack, feel free to go back to using your autoscaling chocolate horse at 160% speed!
Calendar Mount Trove
On the 21st day of the log in calendar you will receive the ‘Trove of Mounts’.
This Trove contains a random mount from a huge selection of different mounts. Most of the skins are duplicated elsewhere in game, meaning you could end up with the same ‘skin’ that you already have from another source, but also meaning that you could end up with a very unique or expensive mount!
The Trove will always give you a mount that you are able to collect, so even though the skin may be a duplicate to one you already have, you will still be able to collect your mount to increase your total number of mounts.
Minions
Helpful little guys!
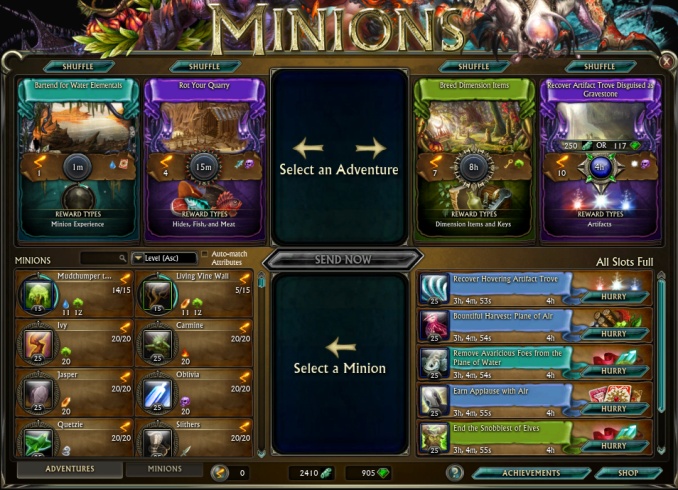
Minions are a type of pet. You send them out using a card system in game. The rewards they bring back depend on the mission you have sent them on.
You can find a full guide to the minion system on Riftgrate.
You can find a database of all available minions here.
You will start off with just a handful of minion cards. But as you progress through the nightmare tide and Prophecy of Ahnket zones, completing quests and earning achievements you will loot many more minion cards!
Extra minion card slots are a good investment if you are looking to spend some credits.
If you are completely new to minions then I highly recommend you use the in game system for a few days to familiarise yourself with the process and what is actually happening. Then you can download the Minion Sender Add-on to make sending and levelling your minions much much easier!
Bags and Bank
Storing all your cool stuff!
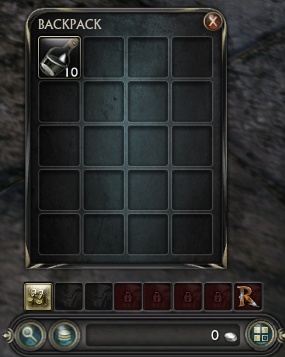
Bag Slots
You will start with 3 open bag slots, one with a 20 slot bag in.
Buying the Ascended Essentials Pack will open up another 2 ‘normal’ bag slots plus the 8th slot with the R on it.
The other two (or more if you don’t buy the pack) bag slots need to be unlocked by spending credits. Click the bag slot to see how many credits it costs to unlock, be aware that this a single character unlock. only unlock these slots on characters that you will be using regularly or for extra storage on bank characters.
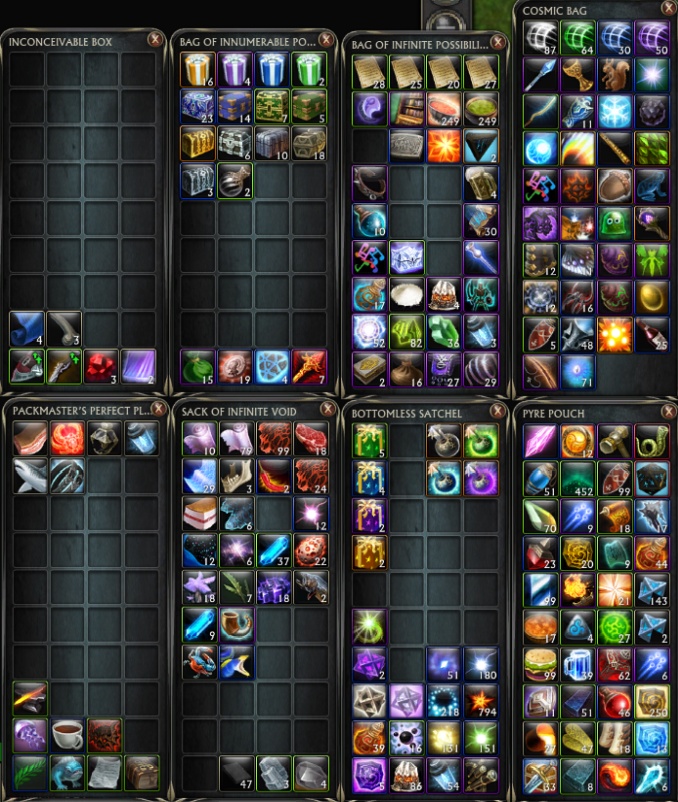
Where to get bags
The most common method to quickly fill up your bag slots with decently sized bags is to get a friend or guildy to craft them for you or to buy them off the auction house.
You will loot small bags while questing in Mathosia, starting with 4 slots in lower zones and increasing as you go til 20 slots in level 50 areas. These bags will do you nicely if you are unable to get the larger crafted bags straight away.
You can get much bigger bags (32,34,36,38 and 40 slots) from various power pack purchases (available for limited times throughout the year).
The biggest bags available for free are: The Crafted Cosmic Bag (38), Greatfather’s Grand Sack (36) from Fae Yule, Empyrean Knapsack (32) bought from the Rift Store, and Amended Bag of the Tide (30) bought from the Rift Store. These bags are all unique equip.
Crafted Bags
Crafted bags are made using the Outfitter Profession. You can ask friendly players to craft you some bigger bags, or train Outfitting to craft them yourself.
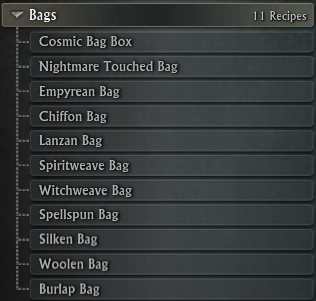
| Name | Slots | Materials From? | Notes |
| Cosmic Bag Box | 38 | Nightmare Tide | Requires item drop from MoM raid. Unique equip. |
| Nightmare Touched Bag | 28 | Nightmare Tide | 4.5plat in vendor mats to create, mats are easy to farm. |
| Empyrean Bag | 28 | Storm Legion | 2.5plat in vendor mats to create, mats are harder to farm. |
| Chiffon Bag | 26 | Storm Legion | |
| Lanzan Bag | 24 | Storm Legion | |
| Spiritweave Bag | 22 | Mathosia | |
| Witchweave Bag | 20 | Mathosia | |
| Spellspun Bag | 18 | Mathosia | |
| Silken Bag | 14 | Mathosia | |
| Woolen Bag | 10 | Mathosia | |
| Burlap Bag | 6 | Mathosia |
Personal Bank
You will first meet your personal bank when you reach your main city..
Defiants: Meridian – Banker is in the main Plaza at /setwaypoint 6067 5215 – There is another banker in the craft area
Guardians: Sanctum – Banker is in the Craft area at /setwaypoint 7393 2998 – There are more bankers near the pub.
Most players over level 50 will use Tempest Bay as their main city, here you will find the bankers, craft stations and Auction Houses all in one easy to navigate area /setwaypoint 12791 11676. If you find that this area gets very busy and its sometimes hard to interact with the NPCs as other players are in the way, try using your ‘hide other players’ button, switching shard or you can use [ Ctrl + e ] to interact with the nearest NPC.
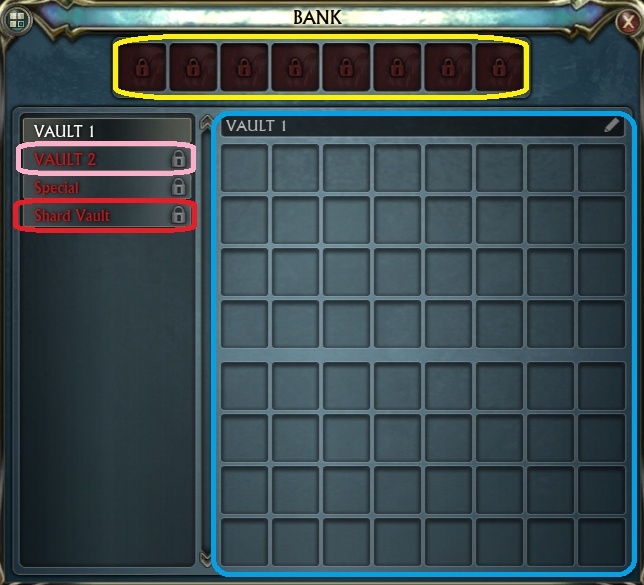
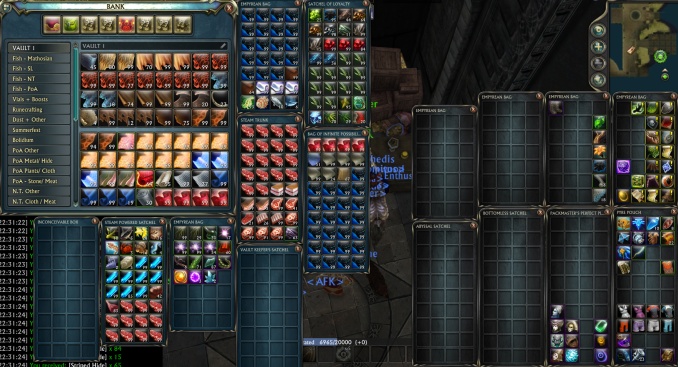
Bags that are slotted into your bank will have a different background colour to your character bags to help you distinguish between them easily.
You can name your Vaults to make it easier to keep track of where you have placed items.
Bank Bag Slots
These slots are purchased with Platinum, they increase in price as you buy more. Place normal bags inside each slot to massively increase your banks capacity.
Extra Vaults
Vaults are purchased with credits only and only unlock on the character you buy them on.
You can buy up to 35 extra Vaults, each adding an extra 32 slots to your bank (you technically buy half a vault), you can then extend each Vault by spending more credits to gain another 32 slots for that vault.
The ‘Special Vault’ is unlocked by buying a special power pack.
You are unlikely to ever need anywhere near as much storage as is available to buy.
Even committed hoarders are going to have a hard time filling all those Vaults, as long as you use storage alts of course!
Special
The Special Vault is opened if you buy the Ascended Essentials Pack.
Shard Vault
This Vault is shared by all the characters on the same shard. You will be able to place Tradeable and Bound to Account items in this Vault and then take them out of this Vault with any alt on that shard.
Buying this vault will unlock it for use on every shard (It’s not a separate per shard purchase)
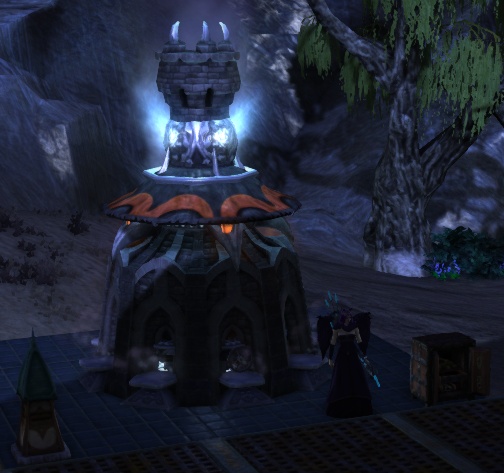
be placed in Player Dimensions.
You can use the Rift store for easy bag clearance while you are away from the main cities. Open the Store and choose a tab on the left to go into the shop, then right click items in your bags to sell directly to the store, there is also a ‘sell grey items’ button on the bottom.
You can also find dimensions (player housing) with banks and mailboxes inside them (premium items), so you can hop in to sort bags then hop back out to where you are questing.
Guild Banks
Guild banks are large vaults that can be accessed by members of the same guild.
Your access to your guild bank will be determined by your rank, usually higher ranked players within a guild will have access to more of the vaults.
Items in the guild bank are placed there by other members of the guild, so be courteous, only take what you need and try to replace like for like when you can.
Your own guild will have their own rules for accessing and using items from the guild bank, be sure to follow them!
Guild bank NPCs can be found next to your personal bank NPCs.
Summon Bank/Guild Bank NPCs
In you patron abilities you can find abilities to summon a bank or guild bank, this can be especially useful during raids/group content. The abilities have a 90 min cooldown.
Guilds
Joining or creating a guild
Your first character on a new shard will most likely be placed in the starter guild.
Defiants and Guardians have separate starter guilds, called Defiants of Telara and Guardians of Telara.
The starter guild is just to give you an example of what a guild is for, very few people stay in these starter guilds, instead they will leave the starter guild and find a casual guild to hang around in as they level up.
You can press [ Shift + G ] to find the list of guilds that are advertising for new members on your shard.
Use the ‘Message’ button to send a short friendly message to the guild leaders/officers. This will let them know that you wish to join and open up a line of communication to help you make a decision.
Each of your characters can join one guild, you can have all your characters in the same guild, or join different guilds with alts.
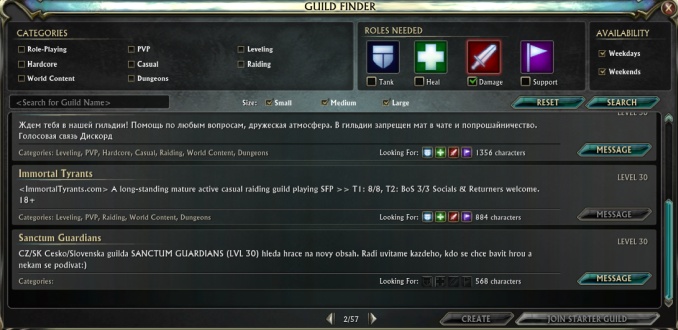
Why join a guild?
The main reason to join a guild in an MMO is to join a group of like minded players to play the group content with. Grouping for dungeons and raids is much easier if you have a good guild with lots of friendly people who also enjoy running group content.
Most guilds will have a set time to raid on certain days of the week, this will allow you fit raiding into your real life schedule.
Raiding with a guild will often be a more relaxing and forgiving experience for your first few times. As your guild progresses on a boss there will be wiping a plenty and you will be expected to stay and die with the team, but once the boss is on farm you will be rewarded with a pretty much guaranteed easy kill each week.
Guild Perks
Another feature to enjoy from joining a guild are passive guild perks. These buffs and services can be enjoyed by all members of the guild. Press G to bring up your guild info UI and have a look at which perks your guild gives you!
Buffs can include..
Cooldown reduction for Soul Recall ability
Increase of coin from looting mobs
Cooldown reduction for Soulwalking
Increased loot of Favor, Planarite and raid/dungeon currencies
Increased Notoriety gain
Guild Quests
The current maximum level for a guild is level 30. When you create a guild, you will need to complete guild quests to level it up. At each level you will receive more perk points to spend. You can reset the perk points by visiting the Guild Charter NPC.
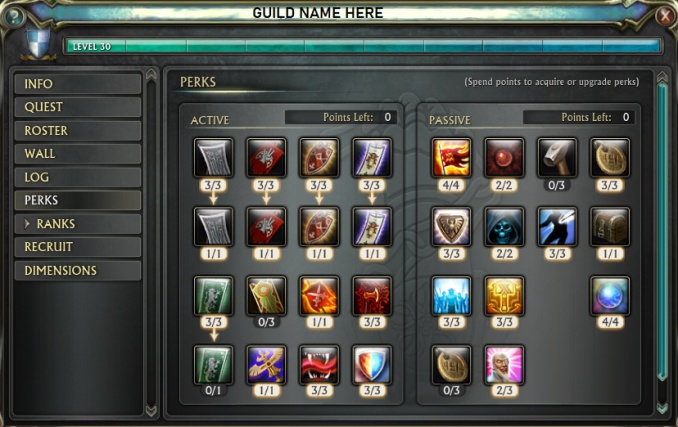
Storage Guilds
Guild banks are very big!
Creating your own guild on an alt just for storage purposes can be very helpful.
To create a guild, go to the Guild Charter Magistrate at..
Meridian – Defiants – /setwaypoint 6012 5152
Sanctum – Guardians – /setwaypoint 7609 3105
Tempest Bay – Everyone – /setwaypoint 13109 11541
Buy the Guild Charter for 1 plat and right click it to create your guild.
You can then buy vaults in the guild bank with platinum for extra storage.
Historic
You used to buy a guild charter and then need 4 people to sign it before the actual guild was created.
This was changed a while back as more peeps started to use guild vaults for storage on alts.
Now once a character right clicks the charter the guild is created instantly.
Heroes of Telara Discord
Come and have a chat!
https://discordapp.com/invite/4w3wPeV
Rift news and announcements, Discussions, Giveaways and a thriving community of players ready and waiting to answer your questions and share your love of the game.
Summons
My summons bring all the boys to the yard.
Summons can be used to teleport a single player or your entire group to your current location, there are a few different summons available .
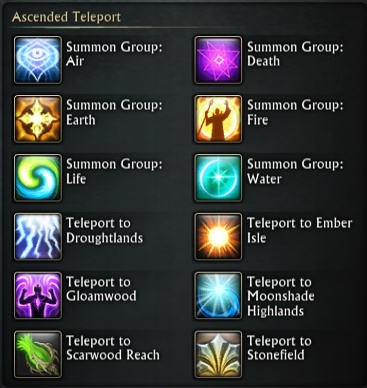
Free Group Rift Summons
You can summon anyone who is grouped with you (up to 20 people) to a specific Rift using the Rift group summons. These are unlocked from Planar Attunement, found in the 3rd section of each of the basic planar attunements. When you have unlocked them you will find the skill in your abilities book under Ascended Powers.
These summons have a one hour cooldown and can only be used while stood in a rift of the same planar type as the summon.
These summons are especially useful during Daily Raid Rift groups and CRift groups.
They can also be useful during open world content such as zone events or the open world instant adventures to bring your group to you.
Macro It!
To save space on your bars you can macro all these summons together, simply stand in a rift and hit the macro and it will cast the correct summon for that rift (as long as its not on cooldown!)
raid summon incoming!
cast Summon Group: Air
cast Summon Group: Death
cast Summon Group: Earth
cast Summon Group: Fire
cast Summon Group: Life
cast Summon Group: Water
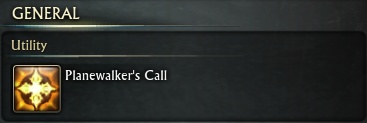
Planewalkers Call
Planewalker’s call is an AoE summon that will summon your whole group to you (up to 20 people), you don’t need to be stood at a rift and it even works inside instances (Not Dimensions).
Planewalkers call is no longer available to buy, it was only purchasable as part of the extremely expensive ‘Ultimate Nightmare‘ edition of the Nightmare Tide Expansion.
Ascended's Call
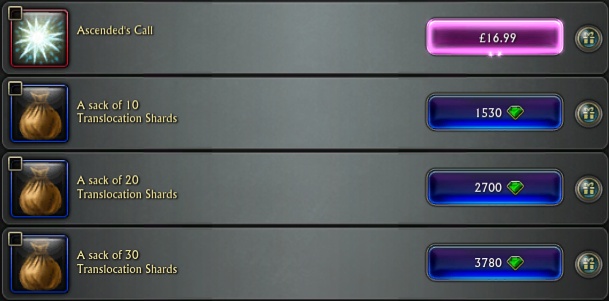
After many, many requests from the playerbase to bring back Planewalkers call this was finally done in December of 2019.. However it was not very well received at all, mostly because of the horrific pricing of the butchered ability.
Ascended’s Call is reasonably priced to buy, but each summon will cost a Translocation Shard, which cost credits, quickly making this a super expensive item!
Currently (Feb2020) there is no way to earn these shards for free in game and the community is still very angry about how the ability was changed. Most people agree that they would rather have a slightly higher cost to buy the ability but want the charges gone, the cooldown could just be much longer than Planewalker’s Call.

Guild banners and scrolls
Members of the same guild can summon each other by one player placing a Rally Banner anywhere in open world (these wont work in instances) and the other guild members using a Rally Scroll to teleport to the Banner.
Guild Banners and Rally Scrolls can be bought from the guild charter NPCs in Sanctum/Meridian/Tempest Bay or bought directly from the store under the Services tab.
When you buy the Banners/Scrolls from the store you will be buying a bundle of 20, you need to right click this bundle to open them up before you can use them.
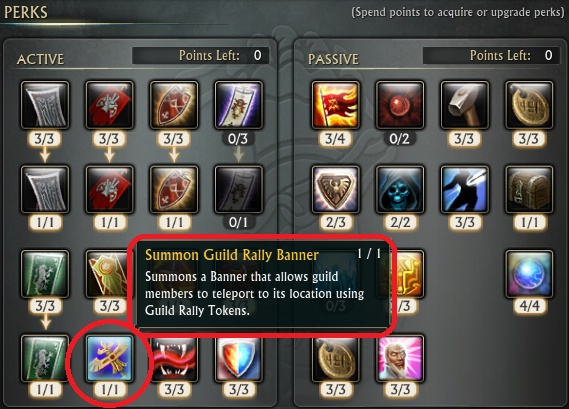
You will only be able to use a Guild Rally Banner if your guild has spent a perk point in the Summon Guild Rally Banner perk.
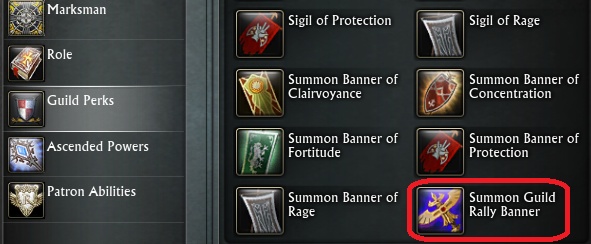
To place a banner, open up your ability book, go to guild perks and find the ‘summon Rally Banner ability. Drag this ability to your bar (not an actual banner from your bags). Click the ability when you are stood where you would like to summon your guild members to.
To use a Scroll, simply click the Scroll (you can drag the actual Scroll to your bar) when someone has placed a guild Banner.
A message will appear in guild chat when someone places a Banner, anyone in the guild can use a Scroll to teleport to the Banner, even if they are not in group with the player that placed the Banner.
A player that logged on after the banner was placed can still use a scroll to go to the banner.
The banner can last up to an hour (if perks are spent in longer banner times) but will disappear if the player that placed it moves more than a set distance away or dies.
Friend Summon
There are two different versions of the friend summon.
From Ascend a Friend – This has limited functionality, you can only summon the characters on the account which is linked to you with the Ascend a Friend.
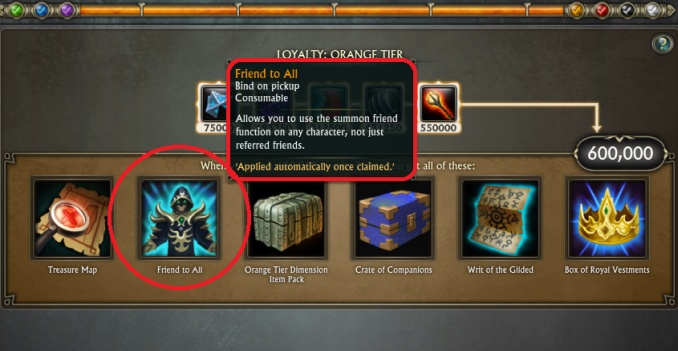
From Orange Tier Loyalty ‘Friend to All’ – This single summon can be used on any player (even those not on your friends list).
These abilities are both the same, with the same name of ‘summon friend’. If you already have the ability from the Ascend a Friend program and then finish orange tier your ability will change so you can use it on any player, you will not be granted an additional ability with a separate cooldown.
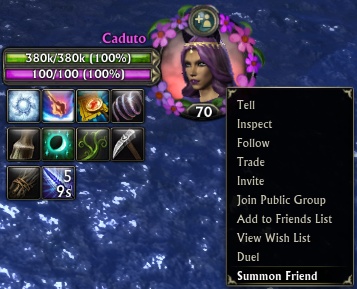
To use the Summon Friend ability, right click the portrait (or raid/party frame) of the player you wish to summon and select ‘Summon Friend’.
You can also right click a player on your friends list to summon them.
To get the summon friend option, the player you want to summon will need to be in your friends list or in your party/raid.
The person who is being summoned can accept the summon and be teleported even if they are in combat or moving, which makes it really handy for getting friends out of tricky situations!
This summon works in the open world and in instances (Not Dimensions).
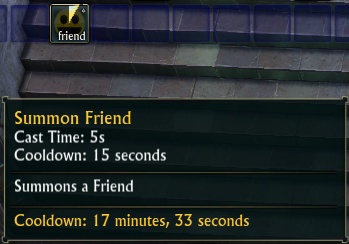
The friend summon has a cooldown of 30 minutes, this cooldown is reduced to 15 mins if you get the summon friend boost from black tier loyalty.
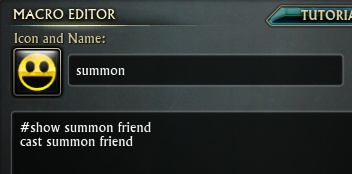
You can create this macro and drag it to your bar and then hover over it to see the cooldown remaining.
#show summon friend
cast summon friend
Dungeon / Raid Summons
If you join the queue for a dungeon/raid in the LFR/LFG UI, your group will be automatically summoned into a Dungeon/Raid once your group is full. You can queue solo, as a partial group or as a full group.
If you are grouping for a Raid that requires you to walk through the entrance in the open world then only one player needs to go, when that player walks through the entrance all other group members will get a pop up asking if they want to teleport in too.
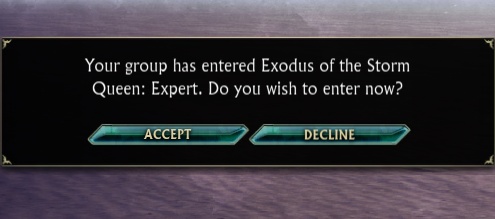
NMR and Stronghold Summons
You can find both these summons at the NMR and Stronghold vendors or in the Rift Store under Rifts.
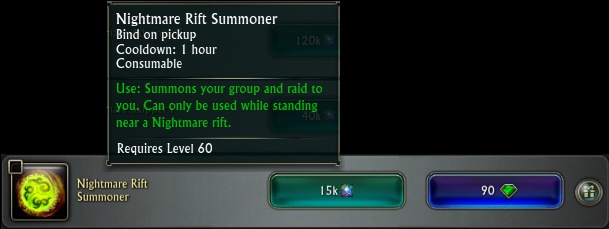
Nightmare Rift Summoner
Teleports your group to join you in a Nightmare Rift.
Very few people will use these, Nightmare Rifts tend to last a long time and its very easy for people to just run to the rift. Most people doing NMR are farming planarite, so spending planarite on a summon is counter-productive!
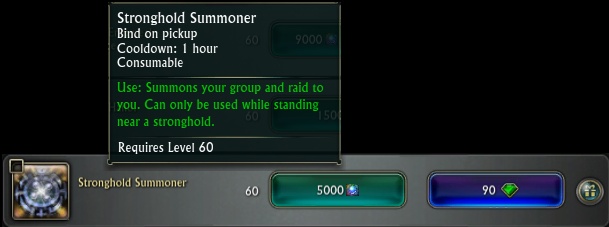
Stronghold Summoner
Teleports your group to join you at a Planar Stronghold. These Strongholds are only found in the Dendrome zone.
This is old level 60 content, so again not many people will use these.
Most peeps will only do Stronghold now for the cheevos. They can be good for farming planarite if you are in a group of at least 5 people and sharing the cost of the lures, but even then an NMR would likely be more planarite for the time cost (as long as you are able to complete each stage with ease).
Logging more than one account
Be in two places at once!
One way to make your life easier in Rift is simply by making another account!
You will need to set up another Glyph account with a second E-Mail address.
Make sure you use your Ascend a Friend code from your main account on your second account.
Then log into your main account, alt-tab out to go back to Glyph (it helps to play in ‘fullscreen windowed’ mode) and use the drop down in the top right of Glyph to log in again to your second account, hit play again to open up a second instance of Rift! You will need a semi-decent PC to be able to play properly with both accounts open at the same time, so this may not be for everyone, even so you can still log your second account by itself to at least run extra minion missions.
In the Glyph general settings, tick the box to save multiple accounts in the drop down so you don’t have to keep typing in the details!

Your second account can be useful for..
Summons – Go to that out of reach spot with just one character then summon your alt account there, then you can relog all the alts on your main account to get summoned to the same spot. This is especially useful during world events when you want to farm the quests on every character!
Minions – Use your second account to run extra minion adventures and send all the materials to your main account.
Levelling – Power level yourself! You can use your main account to power level your alt account, then you can power level all your alts on your main account with your alt account.
Quest help – Use your second character to tank adds away from quest objectives or to buff your main to make you stronger.
Trading – Easily trade with other shards by using your second account, trade your second character your items then log on the shard you need the items on and trade them over.
Auction House – Check the Auction House on other shards with your alt account while your main is online, easily trade the money over to buy what you need and trade the items straight back to your main with no waiting time!
Shard Switching
The same but different!
The term Shard Switching can be confusing for peeps who are not used to the way the Rift shards are set up!
In Rift, your character is stored on a shard called your home shard. You can only join guilds on that shard, you will only have access to the Auction House on that shard and can only send mail to other players on that shard.
However you can interact with and even ‘visit’ all the other shards! You can chat and group up with players from other shards, you can open up trade windows with those players to trade goods/plats, PVP and Dungeon queues are all cross shard.
Switching Shards!
To visit (teleport to) another shard, simply right click your character portrait and select the shard you want to visit!
The shard that you are currently stood on will have a tick next to it. If you are not currently stood on your home shard then an extra option to ‘Return to Home Shard’, clicking this will teleport you to your home shard.
You can visit other shards as many times as you like with no cooldown and no penalty.
In game most people will call this ‘shard switching’.
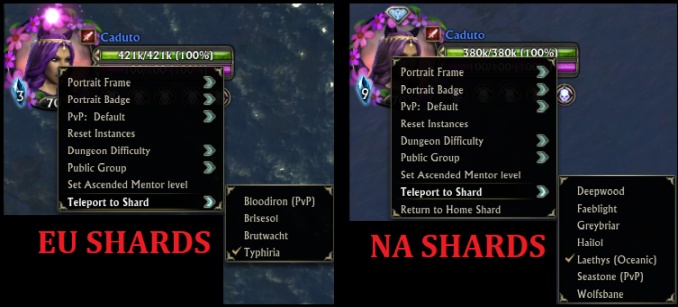
Shard switching can be very useful!
Quest Objectives – For quests when you need to pick up items, find one item then switch through all the other shards picking up the item again from the same spot.
Zone Events – One of the main reasons to be switching shard is so you can tag zone events that are up on different shards. You can use YARET to track which zone events are up on all the shards, then just switch to the shard that the zone event is on and go complete it!
Quest hub over-run – If your quest hub has been over-run by planar invaders, try switching shard and you will likely find your quest NPCs are there on another shard.
Farming – While farming for materials if you find a good cluster of mining or foraging nodes then you can switch shard and grab them all from every shard!
Trade – You can trade with players from other shards by switching to the same shard and then right clicking them to open up the trade window.
Artifact hunting – Stand where the artifact spawns and switch shard to collect it on every shard. This is especially useful when you know the artifact spot is a ‘rare’ spot and you want the highest chance of collecting a rare artifact.
Rare Hunting – If the rare you need isn’t up on your home shard then you can check all the other shards and see if its up there!
Cross shard groups
You can group up with players from other shards by simply inviting them to your group!
A summon from a player on another shard will automatically switch you to their shard and location when you accept.
You can right click the players portrait in the raid frames to ‘join instance’ generally you will need to be on the same continent as the other player. You do not have to be out of combat, so this can be used for getting out of tricky situations!
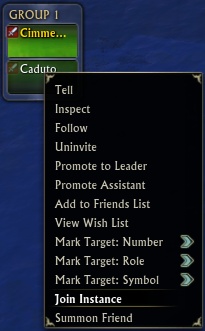
Changing Shards!
To change your characters home shard you need to log off and use the transfer button on the character screen. Select which shard you would like to transfer your character too.
You can change shards every 7 days for free with no penalty.
Switching shards will remove you from your guild, you wont be able to switch if you have active auctions or mail in your mail box (even mail that has been read will need to be deleted).
What was Rift Prime?
Rift Prime was a progression server that was opened to give players a chance to run through all the old content again as a group.
When Prime was opened (spring 2018) the level cap was set to 50, players reaching level 50 were able to progress through all the old level 50 expert dungeons and raids. It was a LOT of fun levelling through all the old zones with loads of other players to join you again.
The original plan for Prime was to go through all the 0-65 content within a year, with a fast paced progression, each expansion lasting around 4 months of playtime, when the year was up, the shard would close and the players would be transferred to the Live shards to continue their journey to 70.
Unfortunately, the Prime shard didn’t quite live up to expectations.. Content release was much slower than intended and generally badly balanced, meaning it was either too easy or too hard for the players to complete. The long waiting times with nothing to do, coupled with badly balanced mentoring and souls, made players unwilling to continue playing. Just after storm legion was released on Prime (around 6months after opening), Trion was bought by Gamigo, a few months later the Storm Legion T1 raids were released on Prime but it was too little too late, the Prime shard was empty.
Prime closed in Spring of 2019.
General Hints n Tips
Little tips to make life easier.
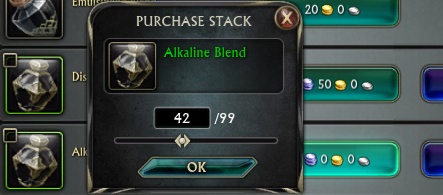
Buy items in bulk
When shopping in the store you can buy multiples of the same item by holding shift down while clicking to buy.
A box will pop up allowing you to buy up to a certain amount of the same item (usually up to 99, sometimes it will be a different amount depending on the item you are buying).
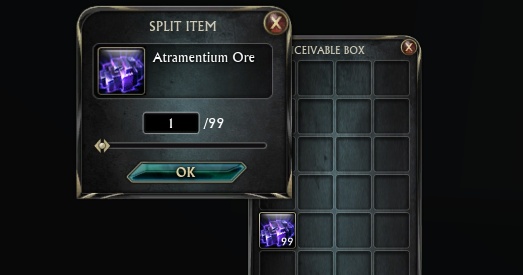
Split stacks of items in your bags
Hold down shift and left click a stack of items in your bags to split them up into smaller stacks.
This can be useful when trying to trade with other players or spliting items up for auctioning.
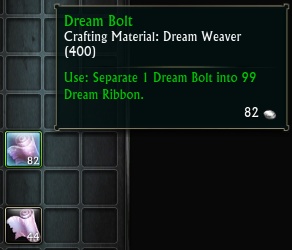
Dream bolts and Dream Ribbons
Dream Ribbons are created when a player with the Dreamweaver profession ‘salvages’ an artifact. Dream Ribbons are used primarily to create dimension items, but also to create dream orbs and unstable artifact squirrel nets.
You can right click a stack of 99 Dream Ribbons to create a Dream bolt.
Right click the Dream Bolt to create a stack of 99 Dream Ribbons.
This means you can store thousands of Dream Ribbons in a much smaller space!
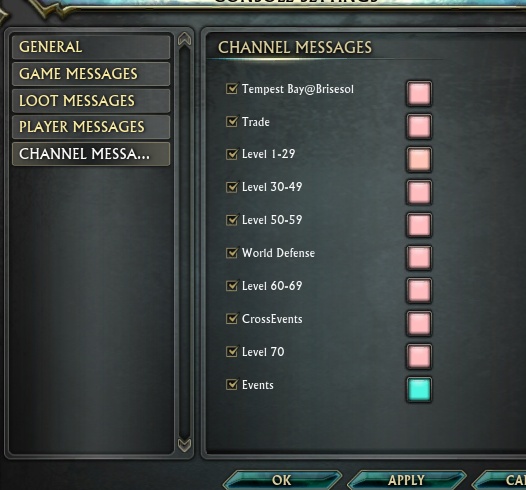
Level chat channels
As you level up through the game you will automatically join all the level chats, you can right click the tab at the top of you chat box and select which chat channels you want to see, or you can /leave a channel.
To join a chat channel you use the command /join
If you have left any of the level chats and wish to rejoin, you can type in..
/join level 1-29
/join level 30-49
/join level 50-59
/join level 60-69
/join level 70
You can find out more about the chat box in the UI and Settings guide.
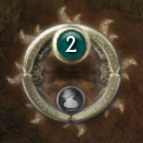
Rift Loot Bag
As you kill planar creatures you will earn Planarite, Planar dusts, and other loot.
These items will be placed in your Rift Loot Bag. This bag will only hold a limited amount, so you need to be sure to collect your items often, especially when farming planarite, for instance in an NMR. Click the little bag symbol to collect your loot.
If you can’t see your Rift Loot Bag, go into Edit Layout and find the box called ‘Rift Meter’, move it to somewhere you can see it! If you cannot find the box, you may need to reset your layout settings.
Default position is in the upper rift near your mini-map.
PUG chat channels
On EU shards, 70 chat is used for most PUG group forming.
On NA shards, 70 chat is rarely used, instead players form PUG groups in the crossevents channel. Type ‘/join crossevents’ and make sure the channel is ticked to show in your chat tab.

