Vostigar Peaks

Vostigar Peaks
  • Vostigar Peaks is a level 70 zone.
  • To get to this zone you can just walk in from the southern entrance, you need to be at least level 68 to pick up quests.
  • There are 3 portals in the zone.
  • Main quest hubs include.. Uttila East, Kilcual and The Magician’s Tower.
  • Other points of interest are..
    — Entrance to Bastion of Steel Raid at /setwaypoint 4024 1685

Below is a guide for all 81 quests in Vostigar Peaks.
With 39 Main Quests, 7 Jetpack Quests, and 35 Carnages.
At the end of the Main Quests is a full guide to the Maze of Steel fight.

For the Vostigar Peaks rares go here
For the Vostigar Peaks puzzle go here
For the other Vostigar Peaks cheevos go here

Hitting level 70 - 'The Maze of Steel'

It is recommended that you do not hit level 70 until after you have completed one of the last story quests of VP called ‘The Maze of Steel’.
The Maze of Steel is a difficult quest, it is a fight against two bosses in an instance. You have to solo it! However, if you are under level 70 then you will be able to group up with a level 70 outside of the instance and then sidekick up to gain extra power and make the quest much easier!

You can only start questing in VP when you are level 68, so if you start as soon as you hit 68 then you will have no issue and won’t be 70 by the end. If you start VP at level 69 then you will not hit 70 if you don’t use vials or boosts. If you have patron then you may want to turn off the extra XP until after The Maze of Steel quest. Try not to finish too many side quests or carnages until after Maze of Steel is done.
If you are already level 70 when you get to Maze of Steel, then give it a go. If it’s awful then try to run some dungeons or LFR raids for better gear. You will not be able to do VP dailies until Maze of Steel is done!

You can find the full guide to ‘The Maze of Steel’ quest at the bottom of the Main Quests section.

Quest Cheevos

If you are missing a quest in the zone and don’t know where or what it is…

  • If you are 80/81 and still have the 4 items to buy for the jetpack quest, you will complete when you hand that quest in.
  • If you have finished the jetpack quest and all the story quests (endless war cheevo) and still don’t have 81/81 then check your cheevo to see if you have done all 35 carnages, if you have, then check the pick up quests between the story quests.
  • It is also possible you may have missed the very first story quest, this is picked up in Alittu not in VP!

There are 81 quests in Vostigar Peaks, you will have to complete all of them to get the cheevo.

Celestial Clean Up
Endless War

Completing the Endless War cheevo awards you with:

  • Freelancer Skin: Asha Catari – This is a useless item! It unlocks a skin in another game, called ‘Atlas Reactor‘, But this game has been shut down for years now. You will need to destroy this item by dragging it out of your bags.
  • Wardrobe unlock: One Hand, Sword, Asha Catari’s Blade. Pictured to the right.

39 Main Quests

An Urgent Vision

QUEST 1

PICK UP
The quest is picked up when you receive a mail from Fayne Doran.
Right click the ‘letter from Fayne Doran’ to pick up the quest.
The mail is sent to you when you reach level 70. If you are not level 70 yet, but are at least level 68, then just go straight to Alittu to pick up the next quest.

TO COMPLETE
Speak with Fayne Doran in Alittu

Take the ‘letter from Fayne Doran’ and right click it to start the quest.

Hand in the quest to Fayne Doran in Alittu at
/setwaypoint 4133 6310

Prophocy of Ahnket

QUEST 2

PICK UP
The quest is picked up from Fayne Doran in Alittu
/setwaypoint 4133 6310
You need to be at least level 68 to be able to pick up this quest.

TO COMPLETE
Witness the Prophocy of Ahnket

Next to Fayne a small play will act out showing you the terrible future that has been foreseen, there is also some chat/story to read.

Hand in the quest to Fayne Doran in Alittu at
/setwaypoint 4133 6310

Journey to the End

QUEST 3

PICK UP
The quest is picked up from Fayne Doran in Alittu
/setwaypoint 4133 6310

TO COMPLETE
Convince Asha to Accompany you

Go to Asha Catari in alittu at
/setwaypoint 3984 6292
Right click to speak with her and go through the conversation.

Your quest objective will now change to ‘Kidnap Orphiel’

Go to Orphiel Farwind in Alittu
/setwaypoint 4085 6476
Asha will talk with the guards.

Your quest objective will now change to ‘Travel to Vostigar with Asha and Orphiel or Teleport There’

You will have a quest item attached to your sticky called ‘Teleport to Vostigar’ click to use it.

Using the Teleport skips the next 3 objectives, ‘Ascend Infected Descent, Find the Blindspot, and Discover the Stairs’
For some characters the Teleport may not tick these off correctly, thus they will need to back-track south to the marked spots before coming back up to Vostigar.

Your quest objective will now change to ‘Enter Vostigar’

Travel up the stairs and path to
/setwaypoint 3845 3578

Your quest objective will now change to ‘Arrive in Uttila’

Go to the door of Uttila East at
/setwaypoint 3916 3427

Hand in the quest to Fayne Doran in Uttila East at /setwaypoint 3998 3456

Monitoring the Peaks

QUEST 4
PICK UP: The quest is picked up from Hologram of Dr. Raina Worthey in Path of Destruction at  at /setwaypoint 3826 3747
TO COMPLETE: Repair Geospatial Monitors X8

There are Geospacial Monitors all along the path leading up to Vostigar Peaks.
You will have a quest item attached to your sticky called ‘Monitor Locator’
When you click this ability, the Monitors will show up as white diamonds on your mini map..
Stand on the white diamonds and use the Monitor Locator ability again. This will make the Geospatial Monitor visible and you can right click to collect it.
The one pictured is at /setwaypoint 3810 3696

Hand in the quest to Dr. Raina Worthey in Uttila at /setwaypoint 3946 3486

Uttila

QUEST 5

PICK UP
The quest is picked up from Fayne Doran in Uttila East
/setwaypoint 3998 3456

TO COMPLETE
Talk with the NPC’s listed..

Talk to Sozad Carnage
/setwaypoint 3926 3411

Talk to Marie-Francoise Thibodeaux
/setwaypoint 4002 3354

Talk to Dr. Wesley Norris
/setwaypoint 3946 3392

Talk to Monstermoon
/setwaypoint 3950 3369

Talk to Zurde
/setwaypoint 3965 3442

Your quest objective will now change to ‘Learn about Damaged Cognitive Patterns’

Speak to Chreipent, an NPC laying on the table in Uttila East at /setwaypoint 4027 3453

Your quest objective will now change to ‘Gather Baryonic Luxium from Utukku x5, and Gather data from Tenebrean Automata x5’

These mobs can be found just north of Uttila East /setwaypoint 3957 3229, kill them and loot them!

Your quest objective will now change to ‘Replace Cognition Pattern for Quinn-Ro’

Go back to Uttila East and click the large head on the table at
/setwaypoint 4026 3448

Hand in the quest to Fayne Doran in Uttila East at /setwaypoint 3998 3456

Crush the Mush

QUEST 6
PICK UP: The quest is picked up from Poisoned Uttilian in Path of Destruction at /setwaypoint 3910 3268
TO COMPLETE: Destroy Toxic Sporebursts x12

Right click the Toxic Sporebursts found all over the Path of Destruction, this one is at
/setwaypoint 3892 3249

This quest will autocomplete when you are finished.

Order of the Fallen Star

QUEST 7

PICK UP
The quest is picked up from Fayne Doran in Uttila East
/setwaypoint 3998 3456

TO COMPLETE
Learn about the Abjor-Utgasr Cultilogical Aptitude Test

Speak to the Personality Test Expert in Uttila East at /setwaypoint 3963 3487
Your quest sticky will change to a massive list of objectives!!!
But then! The questgiver will change his mind and your quest objective will change to ‘Just say Hail Crucia!’

Order of the Fallen Star quest bug

This quest can sometimes bug out and not move onto the second stage, this is more likely to happen if you move away from the questgiver before she has finished her speech.
If you get stuck on the long list of objectives and it doesn’t switch to the Hail Crucia stage then abandon the quest, pick it up again and stay next to the questgiver til it changes, you may need to do this a few times before it works properly. Give it at least 2mins to change!

You will have a quest item attached to your sticky called ‘Hail Crucia’

Stand in the marked spot at
/setwaypoint 3960 3471
Use the quest ability.

Your quest objective will now change to ‘Expose and Kill OFS Infiltrators x5’

You will granted the temporary ability ‘Hail Crucia’

All around Uttila East you will find NPC’s with the simple name of ‘Uttilan’, like these two at /setwaypoint 3940 3402

You need to select these NPC’s and use the Hail Crucia ability on them. Most of them will turn red and attack you (or yellow and you can attack them!), kill those ones 5 times to complete the quest.

Hand in the quest to Fayne Doran in Uttila East at /setwaypoint 3998 3456

The Dangerous Prophet

QUEST 8

PICK UP
The quest is picked up from Fayne Doran in Uttila East
/setwaypoint 3998 3456

TO COMPLETE
Help Orphiel Scavenge Ahnket’s Heads x4

/setwaypoint 3947 3453

You should be able to see 4 spots marked on the map in Uttila East. At each of these spots is a large broken head, inside the head is a big cuboid object to pick up.

/setwaypoint 3953 3392
/setwaypoint 3976 3409
/setwaypoint 4027 3413

Your quest objective will now change to ‘Power up Orphiel’s Device’

Go into the building to
/setwaypoint 4024 3464
Stand near the device.

Your quest objective will now change to ‘Let Orphiel Go’

Stay near the device while the NPCs talk.

Your quest objective will now change to ‘Cross the Path of Destruction’

Head west out of Uttila East to the spot marked at /setwaypoint 3819 3410

Your quest objective will now change to ‘Find the Fallback Device’

Go to the Fallback Device in the building at
/setwaypoint 3669 3469
Orphiel will appear on the device!

Your quest objective will now change to ‘Find the Conspiracy Wall’

Go inside the other building at
/setwaypoint 3759 3299

Your quest objective will now change to ‘Gather Ahnket Intelligence x4’

There are notices on the wall in front of you.. right click all 4 of them to collect.

Your quest objective will now change to ‘Confront the OFS Leader’

Go to the room next door to find the OFS Leader at /setwaypoint 3725 3314
Stand next to Phanuel and listen to him talk.

Your quest objective will now change to ‘Escape back to Utilla East’

Go to the entrance to Uttila East at /setwaypoint 3915 3427

Hand in the quest to Fayne Doran in Uttila East at /setwaypoint 3998 3456

A Game of Chess

QUEST 9

PICK UP
The quest is picked up from Fayne Doran in Uttila East
/setwaypoint 3998 3456

TO COMPLETE
Discuss Asha’s Plan with Chreipent

A Libritor Storm Cannon
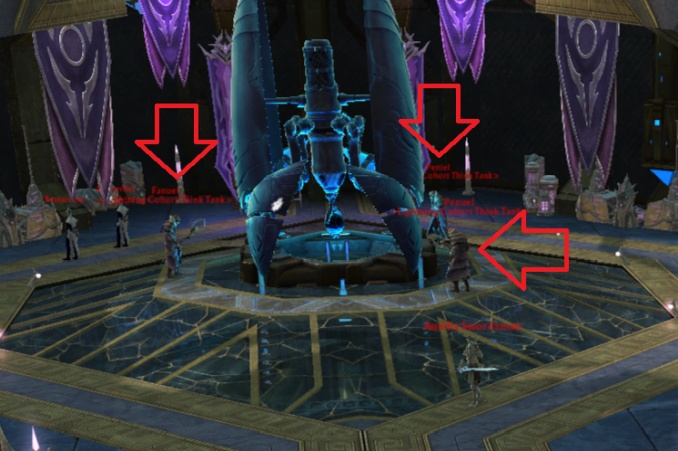
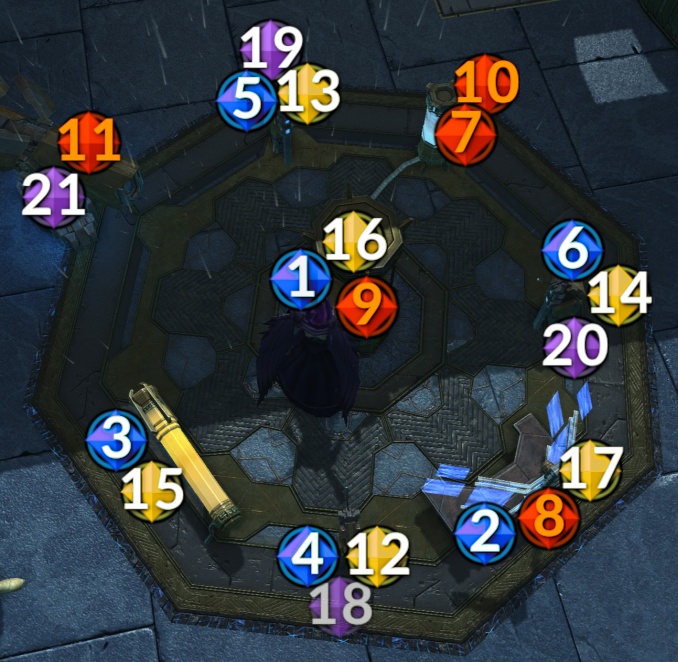
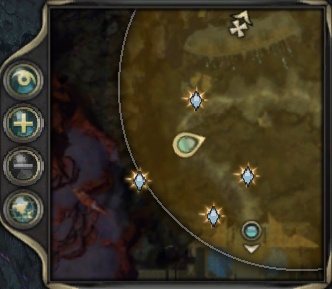
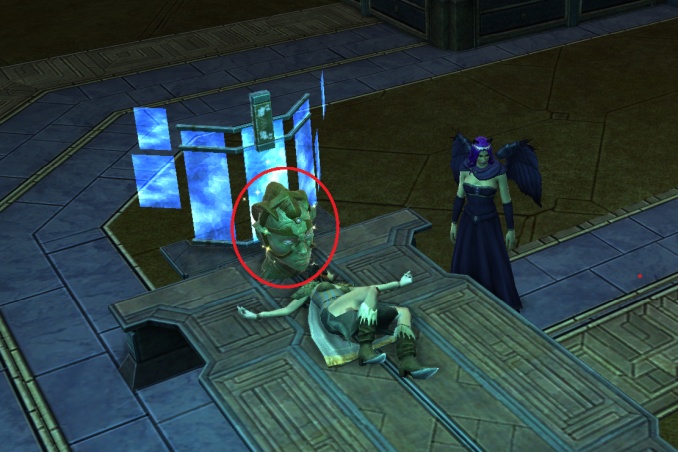
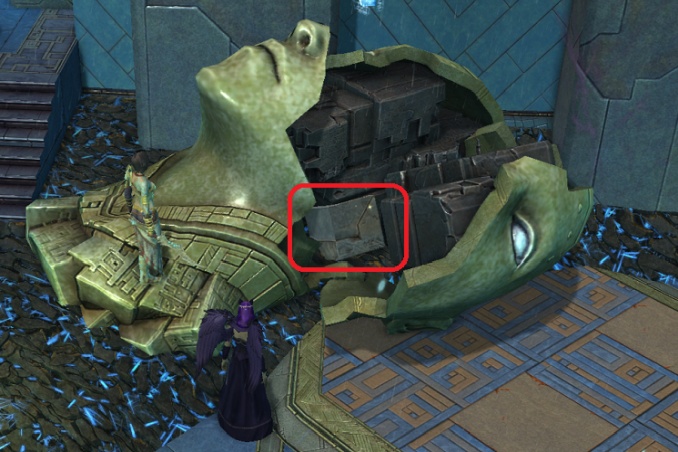
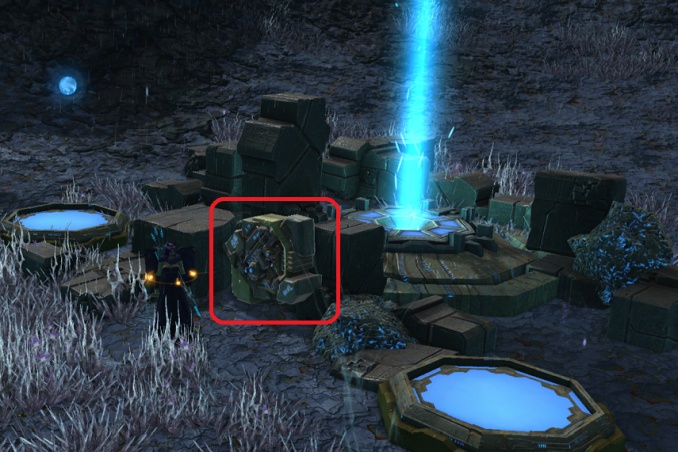
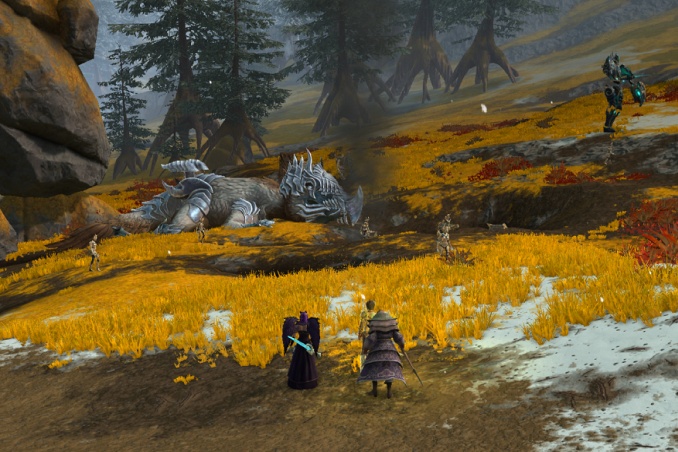
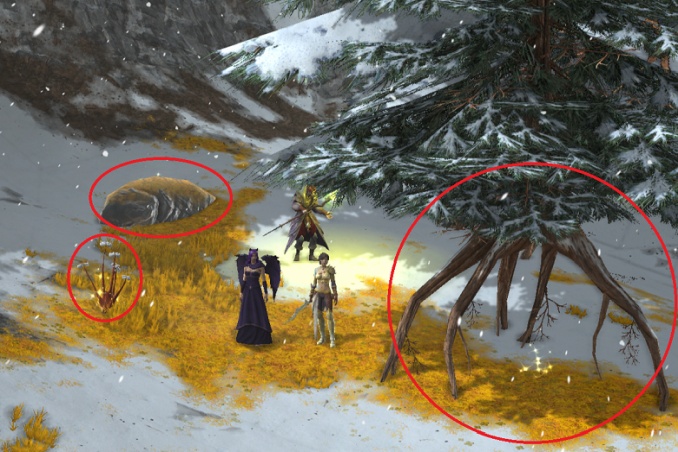
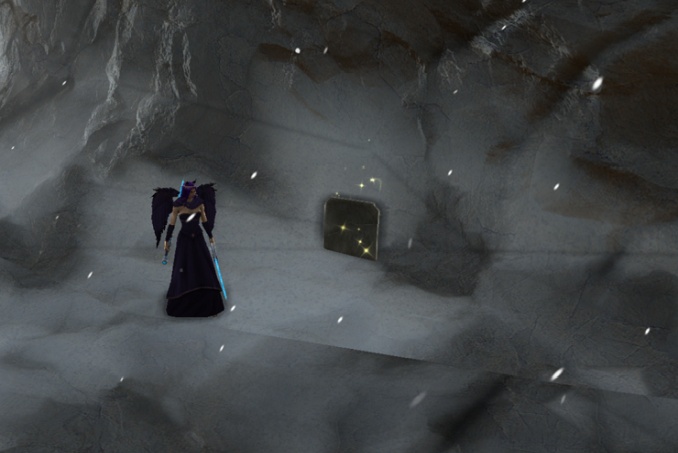
This one is at /setwaypoint 3628 2937

Go to Chreipent, who is led on the table at
/setwaypoint 4027 3455
Stand near Chreipent to listen to the plan.

Your quest objective will now change to ‘Collect a Cognitive Pattern from a Lamassu, Collect Alloy from Libritor Storm Cannons x3, and Collect Source Stone from the Legion x9’

Go to the area north of Uttila West in the Path of Destruction.
Kill and loot a Lamassu mob for the Cognitive Pattern.
Kill a Libritor Storm Cannon and loot the Alloy from it. (Just one kill gives all 3 Alloy)
Kill and loot 9 Storm Legion mobs for the Source Stone.

Your quest objective will now change to ‘Construct Components’

Go back to the building in Uttila East
/setwaypoint 4011 3450
On the table is a large Components Constructor to click and then a smaller T3A-Brain Constructor to click. (Construct a T3A-Brain)

Your quest objective will now change to ‘Install the Ahnket Brain into Chreipent’

Go to Chreipent, laying on the table
/setwaypoint 4027 3455
Click the large head (Automatic Brain Replacer) at the end of the table

Your quest objective will now change to ‘Have Asha play Conquest’

Go to /setwaypoint 3952 3483 on the other end of the Uttila East building.

Your quest objective will now change to ‘Randomize the Conquest Map x5’

Simply click 5 of the different items on the large game board nearby.

Hand in the quest to Fayne Doran in Uttila East at /setwaypoint 3998 3456

Toxin, Tox Out

QUEST 10
PICK UP: The quest is picked up from Vikter Tolswick in Path of Destruction at /setwaypoint 3675 3061
TO COMPLETE: There are 4 objectives to the quest..

A Bitterleaf plant
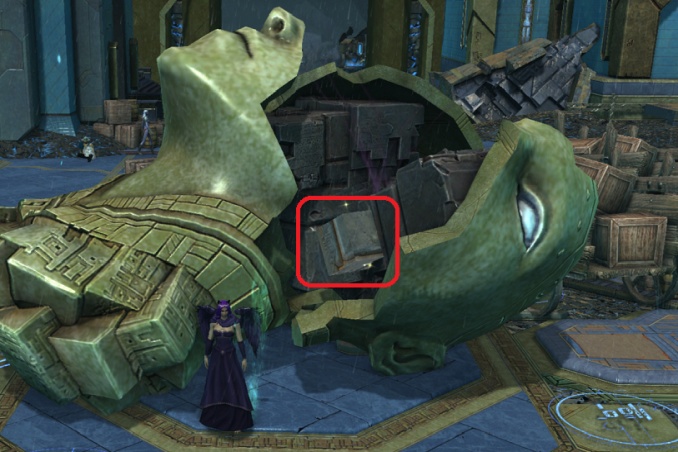
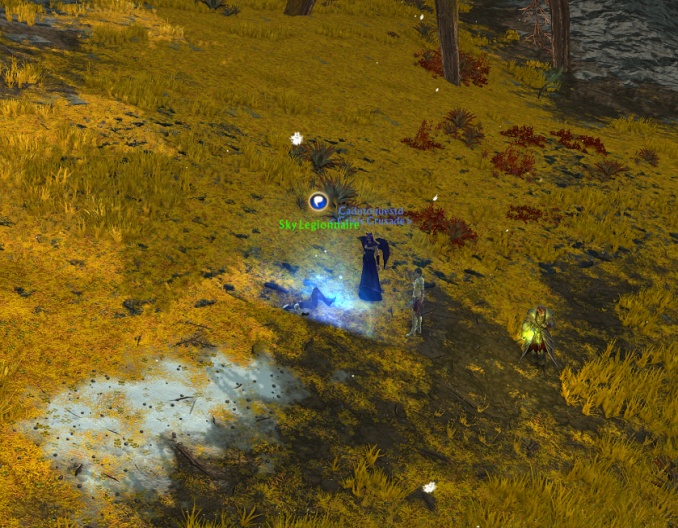
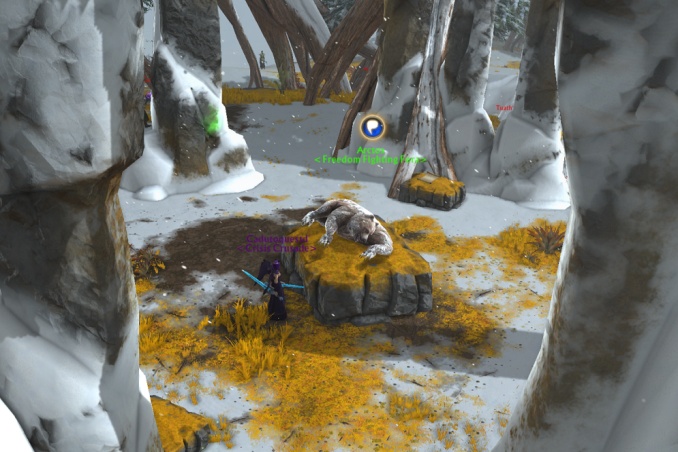
/setwaypoint 3685 3086
A Pack of Adrenal Tabs
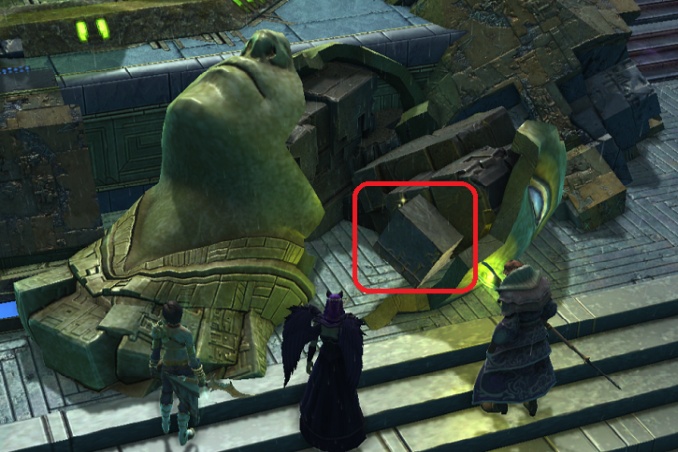
/setwaypoint 3694 3025
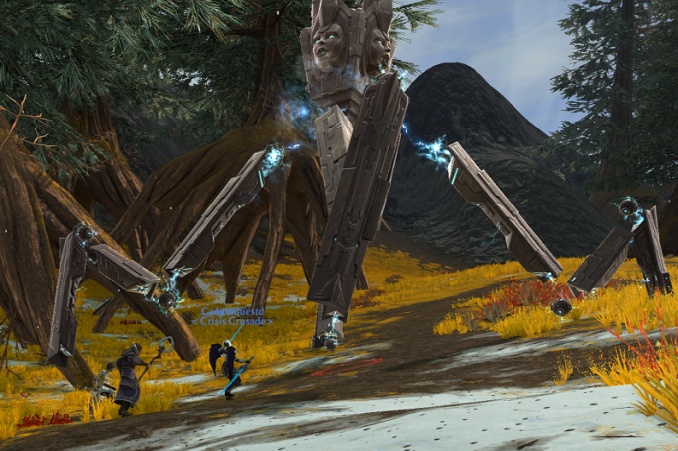
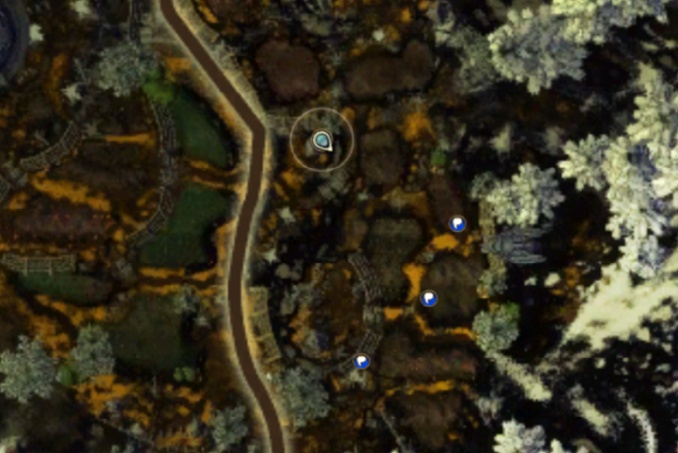
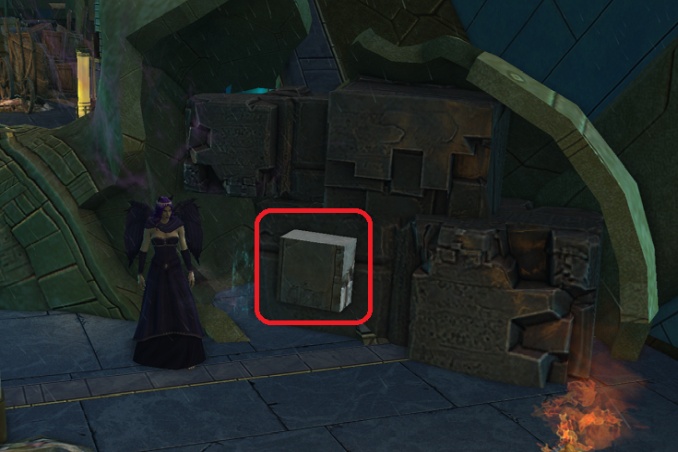
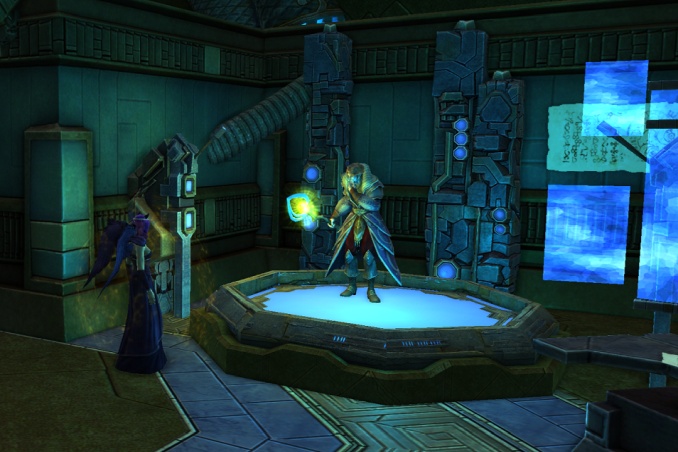
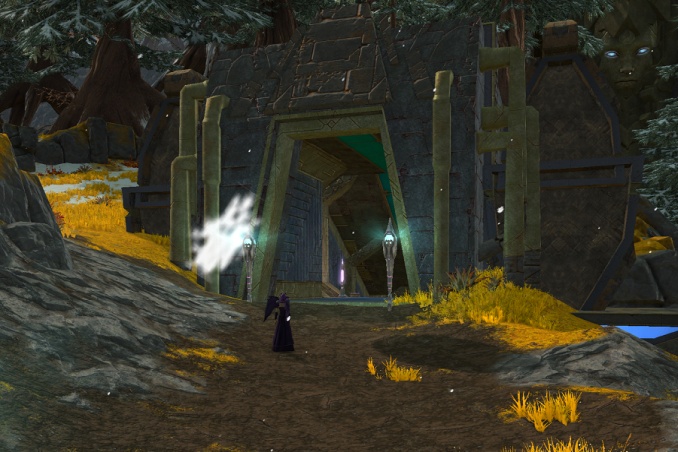
— Collect Lamassu Nutrient Rations — Kill and loot a Lamassu.
— Collect Bitter Leaves x6 — These are small plants found on the ground.
— Collect Packs of Adrenal Tabs x5 — Very small square cubes found near the tents and other small buildings in the camps.
— Collect Source Infused Water — In the middle of the water at /setwaypoint 3584 3045 use the quest sticky item ‘Empty Container’ to collect the water.

Your quest objective will now change to ‘Place the ingredients in the Cooking Pot’
Go back to Vikter Tolswick at /setwaypoint 3675 3061 right click the little pot on the fire next to him, you will then be able to hand the quest in to him.

Cracking the Mirror

QUEST 11

PICK UP
The quest is picked up from Fayne Doran in Uttila East
/setwaypoint 3998 3456

TO COMPLETE
Listen to Asha’s Plan

Stand in the spot north of Uttila West in the path of destruction at /setwaypoint 3767 3060 here Asha will describe her plan.

Your quest objective will now change to ‘Taunt a Tenebrean Lamassu’

You will have a quest item attached to your sticky called ‘Tenebrean Taunt’
Find a green/friendly prototype lamassu at /setwaypoint 3649 3119 use the Tenebrean Taunt on it.

Your quest objective will now change to ‘Kite it to the Wind cohort’

With the Lamassu following you, go to /setwaypoint 3724 3016

Your quest objective will now change to ‘Steal a Storm Marker’

Go into the camp and find one of the Storm Markers, a telescope looking device, like this one at
/setwaypoint 3673 2988
Right click to steal it.

Your quest objective will now change to ‘Mark the Factory Shield’

Go up the factory steps to the top
/setwaypoint 3669 3206
Click the Storm Marked Location (Another telescope device)

Your quest objective will now change to ‘Get to a safe distance’

Just go slightly down the stairs.

Your quest objective will now change to ‘Try to enter the Factory’

Go back up the stairs

Your quest objective will now change to ‘Break open the power cables’

To the left and right of the small stairs in front of you are cables on the ground to click. When you click one you will be teleported into the factory.

Your quest objective will now change to ‘Sabotage Factory Controls x5’

Walk around the small room and find the controls to sabotage, like these ones towards the back of the room.

Your quest objective will now change to ‘Escape the Factory’

Go back to the platform where you ported in and click it to port back out.

Hand in the quest to Fayne Doran in Uttila East at /setwaypoint 3998 3456

Source Decay

QUEST 12

PICK UP
The quest is picked up from Fayne Doran in Uttila East
/setwaypoint 3998 3456

TO COMPLETE
Learn about Source Decay

Head north west to the spot marked at
/setwaypoint 3413 3065

Your quest objective will now change to ‘Disable an Active Source Collector’

You need to find a Source Collector with a beam of light active on it.
Then find the Source Controller and click it.
This is quite hidden on some of the source collectors so look carefully!
This one is at /setwaypoint 3300 3124

Your quest objective will now change to ‘Punch Source back into Source Zombies x5’

You will gain a temporary ability called ‘Punch Source Decayed’
Select nearby Source Zombies and use the ability on them.
If you lose the temp ability due to shard switching just click the item on the quest sticky (Source Remover) to get it back.

Your quest objective will now change to ‘Melt Extraction Automata in Active Collectors’

Find Active Collectors and drag Source Guardians or Utukku Workers into the beam of light. This will turn the mobs into goo, you don’t need to kill the goo.

Your quest objective will now change to ‘Confront Ahnket’

Go to Ahnket at
/setwaypoint 3419 3099
Listen to her speak

Hand in the quest to Fayne Doran in Uttila East at /setwaypoint 3998 3456

The Dource of Alacrity

QUEST 13
PICK UP: The quest is picked up from Hologram of Dr. Raina Worth in The Source Collectors at /setwaypoint 3421 3052
TO COMPLETE: Absorb Energized Byproducts x15

All around the source collectors area are blue floating orbs.
Simply run over these orbs with your character to collect them up, they will also give you a slight speed boost!

This quest will autocomplete when you are finished.

Owl Help You

QUEST 14
PICK UP: The quest is picked up from Extraction Operation Log (A book) in The Source Collectors at /setwaypoint 3272 2981 (The book is not always in the same location, I have also found it at /setwaypoint 3337 3032)
TO COMPLETE: Free owls from Calcified Deposits x4

Around the Source Collectors area are large tree roots with beams of light coming from inside them. Near them you will find the Owls that are trapped in the Calcified Deposits.
Locations include..
/setwaypoint 3345 2987
/setwaypoint 3350 2929
/setwaypoint 3285 2924
/setwaypoint 3271 3013
Of course you can just find one and then keep switching shard to loot the other 3.

This quest will autocomplete when you are finished.

Queen Takes Rook

QUEST 15

PICK UP
The quest is picked up from Fayne Doran in Uttila East
/setwaypoint 3998 3456

TO COMPLETE
Destroy Ahnkets Forces in the Front x25

Head north to the middle of Vostigar Peaks to the area called The Front at
/setwaypoint 3640 2438
There are loads of mobs here that will credit the quest, mouseover them to see if the quest is listed in their description, the area you can find the right mobs is also much larger than the quest circle.

Your quest objective will now change to ‘Bring Down Sky Legionnaire with Gravitic Inducer’

You will have a quest item attached to your sticky called ‘Gravitic Inducer’

Go to the spot marked at
/setwaypoint 3790 2559 where you will notice a blue pulsing circle on the ground.
Use the Gravitic Inducer, then talk to the Sky Legionnaire that appears.

Your quest objective will now change to ‘Convince Legate Servillius to join forces’

You will have a quest item attached to your sticky called ‘Storm Legion Disguise’

Target yourself and use the Storm Legion Disguise. You can still mount up while disguised!

You will note that most of the mobs now appear as green.. if you get into combat and lose your disguise just get out of combat, target yourself and use the disguise ability. Be sure to use this disguise to your advantage, do the ‘Legion Non-Proliferation’ quest below and grab any plants/rock/artifacts that you can!

Head east to the camp at
/setwaypoint 4020 2271

Your quest objective will now change to ‘Defeat Ahnkets Walker’

Go back west to /setwaypoint 3422 2643
Here you will need to defeat a large (Though pretty squishy) Walker mob.

Your quest objective will now change to ‘Confront Ahnkets Forces’

Continue along the path to
/setwaypoint 3387 2696 you will need to stand right on the yellow quest dot.
At the end, you may .. or may not (if you are in a party) get ported back to Uttila East.

Hand in the quest to Fayne Doran in Uttila East at /setwaypoint 3998 3456

Legion Non-Proliferation

QUEST 16
PICK UP: The quest is picked up from Legion Munitions Crate in The Front at /setwaypoint 3452 2436
TO COMPLETE: Sabotage Legion Munitions Caches x10

These caches can be found in the fenced off camp areas around The Front

Locations include..
/setwaypoint 3472 2439
/setwaypoint 3457 2413
/setwaypoint 3555 2379

You can use the disguise from the ‘Queen Takes Rook’ storyline quest to grab these caches with ease.

This quest will autocomplete when you are finished.

Prophecy of Crucia

QUEST 17

PICK UP
The quest is picked up from Fayne Doran in Uttila East
/setwaypoint 3998 3456

TO COMPLETE
Witness the Prophecy of Crucia

Next to Fayne Doran will be a small re-enactment of the Prophecy of Crucia, then the quest will complete (In about 5 seconds).

Hand in the quest to Fayne Doran in Uttila East at /setwaypoint 3998 3456

All's Quiet on the Vostigar Front

QUEST 18

PICK UP
The quest is picked up from Fayne Doran in Uttila East
/setwaypoint 3998 3456

TO COMPLETE
Talk to the Intelligence Liaison about the Horned Knight

At /setwaypoint 4002 3467 (In the same room as Fayne Doran) is the Intelligence Liaison, talk to him.

Your quest objective will now change to ‘Navigate the Eastern Pass to the Drained Forest’

Go to the start of the Drained Forest area at /setwaypoint 4072 3173

Your quest objective will now change to ‘Kill Ahnket Forces to clear the pass x8’

Kill the Ahnket Forces in the Drained Forest /setwaypoint 4124 3136

Your quest objective will now change to ‘Investigate Source Collector’

Go to the Source Collector machine at /setwaypoint 4188 3052
Right click to investigate it.

Your quest objective will now change to ‘Investigate Source Decayed Trees’

Go to the Source Decayed Tree at /setwaypoint 4288 3037
Right click on the ground beneath the tree in the middle of the path.

Your quest objective will now change to ‘Investigate Damaged Source Collector’

Go to the Damaged Source Collector at
/setwaypoint 4372 3022
Right click to investigate it.

Your quest objective will now change to ‘Speak to Fora Recruit Renard’

Continue along the path and speak to Recruit Renard (A fox) at
/setwaypoint 4365 2958

Your quest objective will now change to ‘Rescue Renards Squadmates’

Go to the spot marked at
/setwaypoint 4392 2878

Your quest objective will now change to ‘Stand with Balin against the Energy Shambler Assault’

Stay in this location and there will be a few waves of mobs to kill.

Your quest objective will now change to ‘Talk to Balin at the Fallback Point’

Go to /setwaypoint 4306 2797 at the start of Ahnket’s Glen.
Hand in the quest to Balin.

Operation Cleanup

QUEST 19
PICK UP: The quest is picked up from Auxila Researcher Corpse in The Drained Forest at /setwaypoint 4083 3146
TO COMPLETE: Collect energy from Source Energy Motes x10

You will have a quest item attached to your sticky called ‘Source Energy Collector’

All around The Drained Forest are floating Source Energy Motes. Target them and use the Source Energy Collector on them.
This one is at /setwaypoint 4146 3130

This quest will autocomplete when you are finished.

Element Zero

QUEST 20
PICK UP: The quest is picked up from Crystallised Source Shard, looted from Drained Wretches in The Drained Forest at /setwaypoint 4329 3015
TO COMPLETE: Collect Crystallised Source Fragments x10

Kill more of the Drained Wretches in The Drained Forest area and loot the Crystallised Source Fragments from them.

This quest will autocomplete when you are finished.

The White Tigress

QUEST 21

PICK UP
The quest is picked up from Balin in Ahnket’s Glen
/setwaypoint 4306 2797

TO COMPLETE
Kill Steel Cohort mechs in Ahnket’s Glen x5

In Ahnket’s Glen at around
/setwaypoint 4255 2665 are lots of large mechs called Mk 99 Bombardier, kill 5 of them.

Your quest objective will now change to ‘Talk with Balin past the Steel Cohort Lines’

Go to /setwaypoint 4251 2567  in Ahnket’s Glen and speak with Balin.

Your quest objective will now change to ‘Kill a Wolf Guard and copy its appearance’

Go further into Ahnket’s Glen to
/setwaypoint 4496 2516
Here you will find a few guard wolves, kill them and loot them, this will grant you a quest ability called ‘Wolf’s Clothing’.

Your quest objective will now change to ‘Use Wolf Clothing to enter the Farm covertly’

Continue into the farm, your costume should auto-apply, if it doesn’t just click the Wolf’s Clothing ability.
You are now a wolf! A slow… annoying wolf… you can cancel the costume and then reapply it at any time, I suggest you cancel it while moving around and only reapply while you need to.

Your quest objective will now change to ‘Meet with Czarina Zimra’

Talk to Zimra in The Farm
/setwaypoint 4507 2369

Your quest objective will now change to ‘Question fora x3’

In the farm area there are now 3 speech bubbles to go to..
Go to one of them and speak to the Guard Wolf there.
Then the speech bubbles will change to different spots, follow them and speak to the Worker Rabbit there.
The speech bubble will change a third time, go speak to the Worker Bear.

Your quest objective will now change to ‘Scheme with Czarina Zimra’

Go back to Zimra at /setwaypoint 4507 2369 and speak to her

Your quest objective will now change to ‘Steal Storm Legion Reports x3’

There are now 4 yellow quest circles at the camps around The Farm area for you to go find reports in. This one is at
/setwaypoint 4531 2432

You have 2 options here.. change into the wolf so you can bypass most of the NPCs at these camps, but you will still have to avoid the NPCs with the red cone, if you walk into the cone you will be teleported away.
Your second option is to get rid of the disguise, go into the camp and kill anything in the way and loot the reports.

Your quest objective will now change to ‘Plot with Czarina Zimra’

Go back to Zimra at /setwaypoint 4507 2369 and speak to her.

Your quest objective will now change to ‘Present plan for Ahnket’s Glen to Augustus’

Go to Primus Augustus at
/setwaypoint 4371 2337
Right click to talk with him.

Hand in the quest to Zimra in The Farm at /setwaypoint 4507 2369

Power To The Legion

QUEST 22
PICK UP: The quest is picked up from Power Cell in Ahnket’s Glen at /setwaypoint 4234 2703 (There are quite a few in this area)
TO COMPLETE: Destroy Power Cells x7

On the ground around Ahnket’s Glen are Power Cells to click and destroy.

This quest will auto-complete and hand in by itself once you are done, it does not appear in your completed quest queue.

A Better Place

QUEST 23
PICK UP: The quest is picked up from Feeble Fox in The Farm at /setwaypoint 4499 2382 (Or from many other similar animals!
TO COMPLETE: Help the fora x15

Warning: This quest is TIMED – You have 6 minutes to complete it.

Target the small green animals and use the temporary ability ‘Ascended Aid’ on them.
Use /target feeble to help you find them, you can switch shard.
The quest will auto-complete and hand in by itself once you are done, it does not appear in your completed quest queue.

Low Moral

QUEST 24
PICK UP: The quest is picked up from Justice Deer in The Farm at /setwaypoint 4505 2362
TO COMPLETE: Stick up for the fora x7

Warning: This quest is TIMED – You have 5 minutes to complete it.

Find 7 of the ‘Mean Mechs’, these are mostly floating above the ponds around The Farm, use the temporary ability ‘Bravely Insult’ on them.
Use /target mean to help you find them, you can switch shard.
The quest will auto-complete and hand in by itself once you are done, it does not appear in your completed quest queue.

Zimra's Heroes

QUEST 25

PICK UP
The quest is picked up from Zimra in The Farm
/setwaypoint 4507 2369

TO COMPLETE
Report to Primus Thrakkus in Ahnket’s Glen

You will have the Wolf’s Clothing Disguise again. You will want to use it for the whole quest.

Speak to Primus Thrakkus at
/setwaypoint 4415 2084

Your quest objective will now change to ‘Use Quigleys Nose to sniff out and kill Simulacra’

You will gain a new quest reactive called Quigleys Nose. Target the NPCs around the camp and use the nose on them, one of them will turn red and attack you, kill it!

Your quest objective will now change to ‘Get orders from Primus Thrakkus’

Speak to Primus Thrakkus at
/setwaypoint 4415 2084

Your quest objective will now change to ‘Sniff out Simulacra in Ahnkets Glen’

A new yellow quest circle will appear just outside the camp, here you will find lots of different green mobs, target them and use Quigleys Nose until you find more Simulacra to kill, find 5 of these to complete the quest objective.

Your quest objective will now change to ‘Report back to Primus Thrakkus in Ahnket’s Glen’

Speak to Primus Thrakkus at
/setwaypoint 4415 2084

Your quest objective will now change to ‘Report back to Primus Augustus in The Farm’

Go to Primus Augustus at
/setwaypoint 4371 2337
Right click to talk with him.

Your quest objective will now change to ‘Depose The Pig’.
Go to /setwaypoint 4525 2444 in The Farm.
A large boar called ‘Mr Pig’ will appear and start talking, kill Mr Pig!

Hand in the quest to Zimra in The Farm at /setwaypoint 4507 2369

Fora's Fortune

QUEST 26
PICK UP: The quest is picked up from Lost Intel (Small book on the ground) in Ahnket’s Glen at /setwaypoint 4440 2055 (This can be picked up in many locations form all the books!)
TO COMPLETE: Collect Intel x15

All around the roots of the trees in Ahnket’s Glen are small books of intel to pick up. You can switch shard at each location to speed this up.
This one is at /setwaypoint 4471 2064

This quest will autocomplete when you are finished.

The Magician's Tower

QUEST 27

PICK UP
The quest is picked up from Zimra in The Farm
/setwaypoint 4507 2369

TO COMPLETE
Journey to the Magician’s Tower

The MK 1 Libritors are elites and hit pretty hard, they also have a huge agro range!
This one is at
/setwaypoint 3931 2156
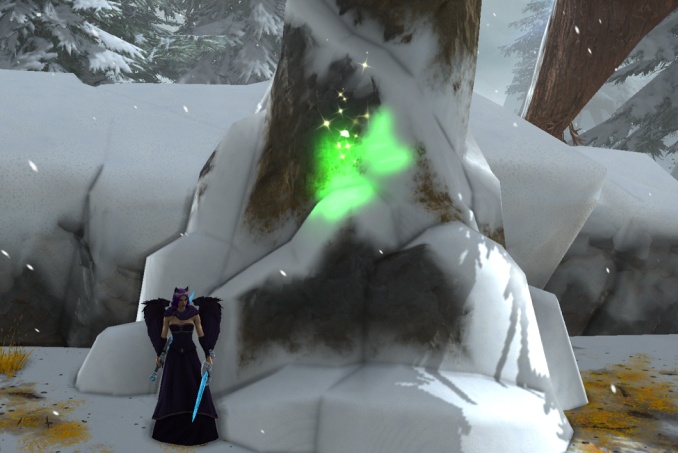
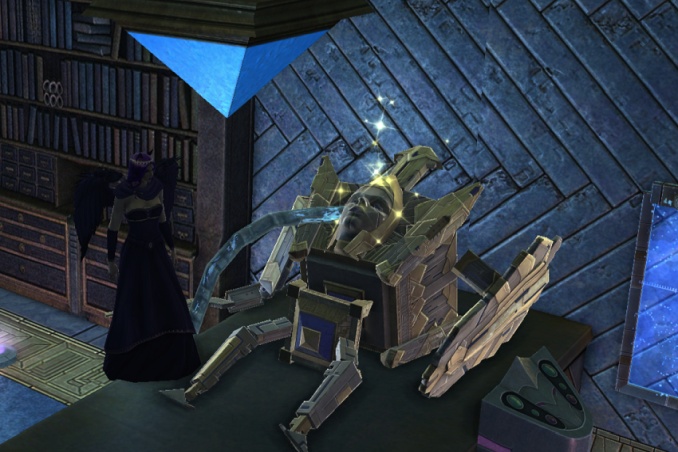
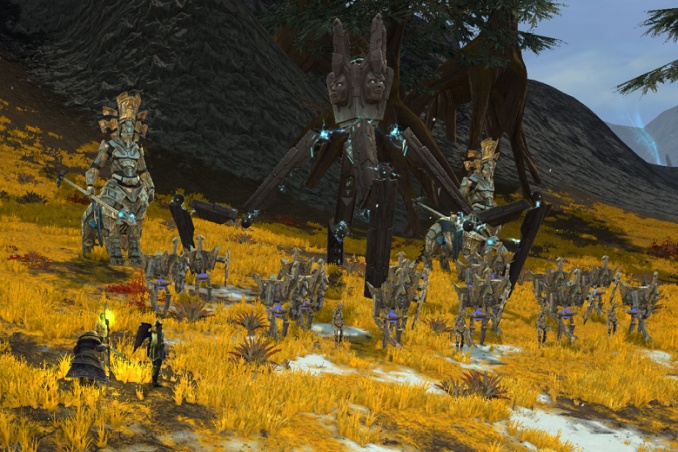
Head west to the marked spot in The Front at /setwaypoint 4148 2181

Your quest objective will now change to ‘Find a way into the Tower past the Iron Cohort’

Continue along the path into the Magician’s Tower.

Your quest objective will now change to ‘Talk to Arlan Merkur’

Speak to Arlan Merkur at
/setwaypoint 3987 2052

Your quest objective will now change to ‘Reunite with Balin, The Horned Knight’

Speak to Balin at /setwaypoint 4015 2038

Your quest objective will now change to ‘Kill the Iron Cohort artillery x3’

Outside of the Magicians Tower building there will be 3 yellow quest circles on the map, around these areas there are large ‘Tanks’ called MK 1 Libritors, kill 3 of them.

Hand in the quest to Arlan Merkur in the Magicians Tower at
/setwaypoint 3987 2052

The Fora of Kilcual

QUEST 28

PICK UP
The quest is picked up from Arlan Merkur in the Magicians Tower
/setwaypoint 3987 2052

TO COMPLETE
Talk to Balin about the plan

Speak to Balin in the Magicians Tower at /setwaypoint 4015 2038

Your quest objective will now change to ‘Meet Balin at the Rendezvous Point’

Head east to the marked spot at /setwaypoint 3622 2246

Your quest objective will now change to ‘Talk to Balin about entering Kilcual’

Right click Balin to talk to him.

Your quest objective will now change to ‘Kill Thunder Cohort Patrols x8’

In The Front area, there are a few camps with Thunder Cohort mobs patrolling, kill 8 of these mobs. They are mostly in groups of 3 mobs.
These ones are at around
/setwaypoint 3521 2367

Your quest objective will now change to ‘Meet Balin in the Forgotten Forest’

Go to Balin in the Forgotten Forest at /setwaypoint 3226 2286
Right click to speak with him.

Your quest objective will now change to ‘Talk to Keldain in Kilcual’
Continue north east to Kilcual and talk to Keldain at /setwaypoint 3032 2212

Your quest objective will now change to ‘Gather components for Glamour Spell x7’

Find the components around the outside of the Kilcual Village, you will find rocks, plants, and trees to pick up.
The plant, tree, and rock pictured are at
/setwaypoint 2998 2303

Your quest objective will now change to ‘Have Orphiel weave the Glamour’
Go back to Kilcual and stand at
/setwaypoint 3044 2220

Your quest objective will now change to ‘Use glamour on Thunder Cohort Scouts x5’

You will have a quest item attached to your sticky called ‘Fora Glamour’

Head south of kilcual to around
/setwaypoint 2996 2416
Target the Thunder Cohort Scouts and use the Fora Glamour on them. You can use the Fora Glamour 5 times on one scout!

Hand in the quest to Keldain in Kilcual at /setwaypoint 3032 2212

The Sacrifices of the Lost Circle

QUEST 29

PICK UP
The quest is picked up from Keldain in Kilcual
/setwaypoint 3032 2212

TO COMPLETE
Talk to Asha

Talk to Asha in Kilcual at
/setwaypoint 3020 2179

Your quest objective will now change to ‘Spy on the Tuath’de Ritual’

Head to the lost circle area and stand at /setwaypoint 3087 2431 to spy.

Your quest objective will now change to ‘Rescue Arctos’

Go to Arctos in the middle of the stones at /setwaypoint 3084 2448
Right click to speak with him.

Your quest objective will now change to ‘Steal Tuath’de Ritual Scrolls x5’

Pick up the scrolls from around the Ritual Stones in the Lost Circle.
This one is at /setwaypoint 3090 2456

Your quest objective will now change to ‘Kill Tuath’de Ritualists in The Lost Circle x5’

These are specific mobs in one of the ritual circles at /setwaypoint 3009 2709

Your quest objective will now change to ‘Kill Zwayguar’

Zwayguar is the larger mob in the middle of the ritual circle at /setwaypoint 3009 2722

Your quest objective will now change to ‘Reunite Arctos with his comrades’

Go back to Kilcual and stand at
/setwaypoint 3023 2203

Hand in the quest to Balin in Kilcual at /setwaypoint 3024 2204

Eyes in the Woods

QUEST 30
PICK UP: The quest is picked up from Marishta in The Lost Circle at /setwaypoint 3107 2406
TO COMPLETE: Activate the Surveillance Devices x5

Around the path through the lost circle you will find Deactivated Surveillance Devices, like this one at /setwaypoint 2982 2495
Right click them to activate them.
There are more at /setwaypoint 2983 2553 and /setwaypoint 3054 2487

This quest will autocomplete when you are finished.

Rune Wrecking

QUEST 31
PICK UP: The quest is picked up from Tuath’de Rune (A green rune painted on the rock) in The Lost Circle at /setwaypoint 3082 2440
TO COMPLETE: Destroy Tuath’de Runes x7

In the ritual circles around The Lost Circle area are green runes painted on the stones, right click them to destroy them.
This one is at /setwaypoint 2992 2644 you can get up on the rock and switch shard here without anything agroing you!

This quest will autocomplete when you are finished.

Brown Out

QUEST 32
PICK UP: The quest is picked up from Lightning Collector in The Forgotten Forest at /setwaypoint 3076 2348
TO COMPLETE: Destroy Lightning Batteries x7

Find 7 of the lightning batteries and right click to destroy them. these can all be found next to pillars in the forgotten forest.
This one is at /setwaypoint 2771 2452
They respawn INCREDIBLY slowly… switching shard is a good plan!

This quest will autocomplete when you are finished.

Ancient Fragments

QUEST 33
PICK UP: The quest is picked up from Torelith in The Forgotten Forest at /setwaypoint 3056 2840
TO COMPLETE: Find Ancient Tablets x5

Find the Tablets to collect all around The Forgotten Forest area. You can kill some of the mobs and hope they drop, or just pick up the Tablets from the ground in the cave at
/setwaypoint 2828 2702 and up against the rock at /setwaypoint 2890 2565

Hand in the quest to Torelith in The Forgotten Forest at /setwaypoint 3056 2840

Pawn's Promotion

QUEST 34

PICK UP
The quest is picked up from Balin in Kilcual
/setwaypoint 3024 2204

TO COMPLETE
Infiltrate Rabado Base

There are a few entrances leading inside Rabado Base, the one you need to take is marked on the map by the doorway symbol. Enter the base at the doorway at /setwaypoint 3282 2562 
Be sure to grab the quest to the right of the doorway first!!

Go all the way down to the room below ground.

Your quest objective will now change to ‘Steal the Weapon Plans x3’
In the underground room you will find blue rectangular ‘computer screens’ up against the walls or on desks, loot 3 of these.
This one is at /setwaypoint 3182 2563

Scavenge Mimetic Alloy
This one is at
/setwaypoint 3164 2529
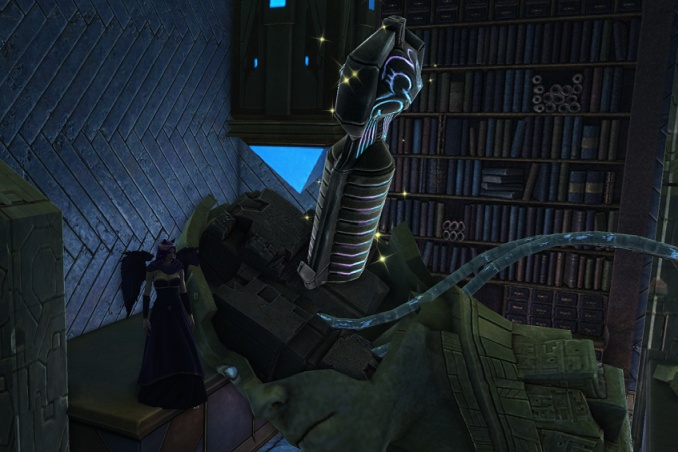
Your quest objective will now change to
‘Scavenge Mimetic Alloy x2’
‘Copy a Simulacrum Brain Scan’
‘Study an Automata Brain Case’
‘Steal a Mimetic Sensor’
These items are all around the room, just look for the sparkly objects.

Copy a Simulacrum Brain Scan
This is at
/setwaypoint 3194 2594
Study an Automata Brain Case
This is at
/setwaypoint 3159 2530
Steal a Mimetic Sensor
This is at
/setwaypoint 3166 2545

Warning: This next part of the quest is difficult. Be sure to read the tips below.

Your quest objective will now change to ‘Kill the Rabado Base Think Tank’

Leave the underground area and go to /setwaypoint 3297 2488 in the upper Rabado Base – up the central stairs.

Here you will find 3 mobs called Penuel, you need to kill them!

Killing the Penuel mobs is difficult! All 3 of them have 1.6million health. They have a huge agro range, respawn quickly, and they hit pretty hard. They are also in a busy room with other mobs, and although these mobs are gentler, they can add up to death pretty quick!

  • If you are not level 70 yet, ask in the public chats for a level 70 to group with for the duration of the quest so you can sidekick up and make this much easier!
  • Carefully clear the additional mobs first without pulling the Penuel. Run down the stairs if you need to lose agro.
  • Find a stun or other crowd control ability that you can use on the Penuel.
  • All 3 Penuel need to be dead at the same time for you to credit the quest. If you have enough DPS then you can kill them one at a time. If your DPS is lower then the first may respawn before the third is dead. In this case, you will want to DPS 2 or even all 3 of the Penuel together, this way you can have them die at roughly the same time so there is no chance of respawn.
  • The 3 Penuel mobs need to die in the room next to the Storm Foci, you will also need to be stood in the room yourself for the quest to credit.
  • The 3 mobs only spawn when you are close to the room. Sometimes only 2 of them will spawn, or one can disappear mid fight. If this happens then the easiest way to reset is to just switch shard.
  • If all this fails you, then you should just ask for help. Most players who have completed this quest remember how awful it was and will gladly give up 2 mins to come help you kill them! Remember to pay it forward when you see someone else asking for help with it in the future.

Your quest objective will now change to ‘Talk to Balin’

Go back to Balin in Kilcual at
/setwaypoint 3024 2204
Right click to talk with him.

Your quest objective will now change to ‘Witness Minas Transformation’

Go to the marked spot in Kilcual  at /setwaypoint 3023 2180
Stand here for the NPCs to all have a good chat.

Hand in the quest to The Queen of Suns in Kilcual at /setwaypoint 3021 2177

Data Scramble

QUEST 35
PICK UP: The quest is picked up from Legion Comlink in Rabado Base at /setwaypoint 3281 2544
TO COMPLETE: Tamper with Simulacrum Data Consoles x10

Go down insinde the Rabado Base (entrance at /setwaypoint 3286 2562)
In the room there are large consoles to tamper with, right click them.
This one is at /setwaypoint 3204 2570

This quest will autocomplete when you are finished.

The Queen of Suns

QUEST 36

PICK UP
The quest is picked up from The Queen of Suns in Kilcual
/setwaypoint 3021 2177

TO COMPLETE
Form the Battle Lines against the Storm Legion

Go to just outside of Kilcual at
/setwaypoint 3156 2124

Your quest objective will now change to ‘Repel the first wave’

Go slightly further down the path to
/setwaypoint 3165 2101

Your quest objective will now change to ‘Kill Lightning Cohorts Experimental Mechs and Tanks x3, and Kill Augurs to disrupt Thunder Cohort Summoning x100’

Go slightly further down the path to
/setwaypoint 3176 2030
The Mechs and Tanks are large mobs to the left and right of the path.
For the augurs, you don’t actually have to kill 100 of them, the smaller ones count as 5 or 20 each, the large one counts as 50.

Your quest objective will now change to ‘Report to The Queen of Suns’

Go to The Queen of Suns at
/setwaypoint 3199 2109

Your quest objective will now change to ‘Defeat Tempest Strike Team’

A load of mobs will appear behind you for you to kill, let your helpful NPCs take agro and pull them off one at a time to kill them.
You only need to kill the 2 Harpys and the Primus Caeli with 3.9mil health.

Hand in the quest to The Queen of Suns in Kilcual at /setwaypoint 3021 2177

Chase The Sun

QUEST 37

PICK UP
The quest is picked up from The Queen of Suns in Kilcual
/setwaypoint 3021 2177

TO COMPLETE
Breakout of Kilcual

Hint: If you find when you kill the big guys that your quest does not update, try to ensure you are killing them exactly on the quest waypoint.

Head to the south of Kilcual to
/setwaypoint 3156 2321

Your quest objective will now change to ‘Kill the Wind Cohorts Primus’

Go to /setwaypoint 3474 2422 in The Front.
When you stand on the spot Primus Thrakkus will run from the tents and attack you, make him dead.

Your quest objective will now change to ‘Kill the Steel Cohorts Primus’

Go to /setwaypoint 3563 2357 in The Front
When you stand on the spot Primus Arazel will run from between the tents and attack you, make him dead.

Your quest objective will now change to ‘Kill the Rain Cohorts Primus’

Go to /setwaypoint 3718 2289 in The Front.
Primus Veridan spawns inside the large tent, make him dead. Killing him inside the tent will still give credit, he is a ranged mob so can be hard to move.

Your quest objective will now change to ‘Kill the Iron Cohorts Signifier’

Go to /setwaypoint 3976 2245 in The Front.
The mob ‘Signifier’ will run down the small hill to attack you, make him dead.

Your quest objective will now change to ‘Enter The Magicians Tower’

Go into The Magicians Tower to the spot marked at /setwaypoint 3998 2058

Your quest objective will now change to ‘Meet Asha and Orphiel at the Porticulum’

Go to the Porticulum at
/setwaypoint 4021 2064

Hand in the quest to Arlan Merkur in the Magicians Tower at
/setwaypoint 3987 2052

The Maze of Steel

QUEST 38

PICK UP
The quest is picked up from Arlan Merkur in the Magicians Tower
/setwaypoint 3987 2052

TO COMPLETE
Discuss the attack plan with The Queen of Suns

Go to The Queen of Suns in The Magicians Tower at /setwaypoint 4035 2046 in the magicians tower.
There is a lot of talking here before the quest progresses.

Your quest objective will now change to ‘Send word to Zimra’

Go to the marked spot in the magicians tower at /setwaypoint 4017 2034
Again there is lots of talking.

Your quest objective will now change to ‘Enter The Maze of Steel’
Go to The Maze of Steel area of the map and enter the portal at
/setwaypoint 4023 1706

Be sure to take the portal away from the wall, not the one up against the wall!

Your quest objective will now change to ‘Confront Crucia’

Follow the path to the middle of the Maze of Steel area.
/setwaypoint 673 821

Your quest objective will now change to ‘Defeat Crucia and Ahnket’

Please see below for the full guide to The Maze of Steel fight

The Maze of Steel

The quest takes place inside a solo instance. You cannot bring another player inside to help. Inside the instance, Crucia and Ahnket are waiting! You will need to fight both bosses in the arena and get them both down to 25%, then there is some talking and the quest is done!
This fight is very difficult, especially for newer players. Both of the bosses have nasty abilities, a few of which will kill you if you don’t react correctly.

If you are under level 70 then you will be able to group up with a level 70 outside of the instance and then sidekick up to gain extra power and make the quest much easier!
If you are already level 70 then give it a go. If it’s awful then try to run some dungeons or LFR raids for better gear. You will not be able to do VP dailies until Maze of Steel is done!

Points to Note

You will only be fighting one boss at a time. Starting with Crucia, you will need to get her down to 50% before Ahnket becomes active. When Ahnket becomes active, Crucia will become immune and stop attacking. When Ahnket is down to 50%, Crucia will then become active again and Ahnket will then become immune and stop attacking. You then need to get Crucia down to 25%. Once Crucia is at 25%, Ahnket will become active again while Crucia becomes immune and you can DPS Ahnket down to 25%. When both bosses are down to 25% they will both become immune, there will be some talking and the quest is done.

When you are fighting Ahnket you MUST be out of line of sight of Crucia. This is to avoid the ability ‘Thunder Blast’. If you are not out of line of sight of Crucia you will die. There are pillars around the room that you can use to LoS, try to be near one when Crucia is about to go immune so you can quickly hide from her while you fight Ahnket.

The mechanics and abilities of this fight are far more important than your DPS. You need to be concentrating on each ability cast by the bosses and reacting properly. High DPS will make the fight quicker, but it will not save you from the one shot abilities.

When you enter the arena you will be given 3 temporary abilities; an interrupt, a shield, and a heal. Pop the interrupt on your bar where you can access it easily. You can also pop the other two abilities on your bar if you want to.

Crucias Abilities

Concussion – This is the only blue cast in the whole fight, it MUST be interrupted. You can use the interrupt ability given to you or one from your own spec. The cast time for Concussion is about 5 seconds long.

Lightning Breath – This is a frontal cone that Crucia casts regularly. You must move out of it. You do have time to move out, the cast time is a few seconds long and the bulk of the damage happens at the end of the cast, ensure you are out of the red before the cast is finished!

Source Decay – During the 50%-25% stage of the fight Crucia will also cast an ability on you that will make you drop 4 very painful circles on the ground. Get out of these circles as quickly as possible, don’t worry about your DPS while you are moving, try to place the circles close to each other so you have room to move out of the way of the next lightning breath. Once all 4 have dropped you can then concentrate on DPS again.

Thunder Blast – Crucia will only cast this ability while you are fighting Ahnket. It will kill you in one shot if you do not hide from it. Use the pillars to line of sight Crucia as soon as Ahnket becomes active and for the duration of the time you are fighting Ahnket. – Again: You need to be out of line of sight from Crucia not Ahnket!

Ahnkets Abilities

Crush – This ability is cast most often, its not very painful and a few self heals in your spec will heal you back up to full.

Ray Of Obliteration – This ability will one shot you if you don’t shield yourself. You need to use the shield ability given to you. I like to pop the heal ability at the same time. Using only the heal ability will not protect you, you need to use the shield as well. Try to pop the shield when the cast is just over halfway through to ensure it lasts long enough to protect you.

The Fight

When you enter the portal you will need to walk down the path towards the middle of The Maze of Steel. Make sure you buff up completely before you walk too far. When you walk into the middle arena a wall will appear around the arena and you will be in combat automatically, so you wont be able to apply weaponstones etc once you pass that point.

You will start the fight when you start DPS on Crucia.

Crucia – 100% to 50% – Interrupt Concussion. Move out of the red cone breath asap. Be aware of where the pillars are, when she is getting close to 50% slowly make your way closer to one of the pillars.

Phase change – When crucia hits 50% she will become immune, stop attacking, and stay stood still in the spot she is in. Switch your DPS to Ahnket and line of sight Crucia using the pillar.

Ahnket – 100% to 50% – Watch for Ray of Obliteration cast/emote and use the shield and heal abilities before the cast finishes. Stay out of line of sight of Crucia for the duration.

Phase change – When Ahnket reaches 50%, Crucia will become active again and Ahnket will stay still and go immune.

Crucia 50% to 25% – This is when Crucia will start casting Source Decay on your character, it is pretty much always 4 circles in a row. Move out of them asap while also interrupting Concussion and moving out of the red cone breath. DPS will be slow, your priority is to stay alive!

Phase change – When Crucia hits 25% she will become immune and stay still. Switch your DPS to Ahnket and line of sight Crucia using the pillar.

Ahnket 50% to 25% – Watch for Ray of Obliteration cast/emote and use the shield and heal abilities before the cast finishes. Stay out of line of sight of Crucia for the duration.

Both at 25% – Congratulations!

Video Time!

Using a fresh level 70, I made a video of the fight. The spec is a very low DPS solo spec with a few self heals. The DPS is low mostly because of the gear my char is wearing, which is quest gear and a few crafted bits, along with very basic non upgraded fragments.
YOUR DPS DOES NOT MATTER! It is all about reacting correctly to each ability.
You will notice I have moved my chat box with the boss emotes right next to the boss cast bar so I can see in a small area all the information I need. I also pop Crucia on focus so I can watch for the thunder blast cast, although as long are you are out of line of sight you don’t really need to watch for this this anyway.

This fight was MUCH quicker on my main because I had raid gear by the time VP came out and with a decent DPS spec I only had to react to each ability once before the bosses would switch.

Once you are finished, a portal will spawn in the middle of the arena to exit the maze of steel.

Hand in the quest to Arlan Merkur in the Magicians Tower at /setwaypoint 3987 2052

Prophecy of Peace

QUEST 39

PICK UP
The quest is picked up from Arlan Merkur in the Magicians Tower at /setwaypoint 3987 2052

TO COMPLETE
Lay Orphiel to Rest

Take the portal down to Uttila East
In Uttila East at /setwaypoint 3986 3380 is Orphiels grave, right click it to lay him to rest.

Hand in the quest to Fayne Doran in Uttila East at /setwaypoint 3998 3456

If you are level 70, you can now pick up all the daily and weekly quests available in Vostigar Peaks!

7 Jetpack Quests

For the ‘The Jet Set’ cheevo in Vostigar Peaks – You need to be level 70 to pick up the first quest.
This questline will reward you with the Jetpack Prototype Mount on the last quest. You will need to farm 16k intel in order to buy ‘parts’ for the mount. When using the mount you will gain special jump abilities that can be used to complete the VP puzzle.

A Mounting Problem

QUEST 1

PICK UP
The quest is picked up from Winachuk Maguk in Uttila East
/setwaypoint 4004 3420

TO COMPLETE
Speak to Anton Anatec in Uttila East

Hand in the quest to Anton Anatec in Uttila East at /setwaypoint 4027 3364

Freed by the Light

QUEST 2

PICK UP
The quest is picked up from Anton Anatec in Uttila East
/setwaypoint 4027 3364

TO COMPLETE
Capture Console Keys from OFS Cultists x3

Go into Uttila West /setwaypoint 3688 3403 and kill OFS Cultists, they will randomly drop keys.

Your quest objective will now change to ‘Activate Wavelength Consoles x3’

Go to the marked spot in Uttila West at /setwaypoint 3732 3449
Here you will find Willa Anatec, with 3 sparkling consoles around her , click all 3 of them.

Your quest objective will now change to ‘Transmit the correct wavelength into Willa Anatec x12’

When you were clicking the consoles you should have gained 3 temporary Wavelength abilities; Red, Gold, and Purple.
Select Willa Anatec and watch her buff bar. As the colours on her buff bar change, click the ability you have that matches that colour.
They will switch too quickly to catch every change, so aim for every other change.
You will need to match the colour 12 times.

Your quest objective will now change to ‘Use the Teleport Rod on Willa Anatec’

You will have a quest item attached to your sticky called ‘Teleport Rod’

Target Willa Anatec and use the Teleport Rod on him.

Your quest objective will now change to ‘Return to Anton Anatec in Uttila East’

Go to Anton Anatec in Uttila East
/setwaypoint 4027 3364
Right click to talk with him

Hand in the quest to Winachuk Maguk in Uttila East at /setwaypoint 4004 3420

Beep Machine for Know-How Thing

QUEST 3

PICK UP
The quest is picked up from Qwip in Uttila East
/setwaypoint 4005 3422

TO COMPLETE
Use the Location Tracker in Path of Destruction to find the Jetpack Schematics

You will have a quest item attached to your sticky called ‘Location Tracker’

Head into the Path of Destruction area.
Use the Location Tracker to help you find the schematics.
When you click the Location Tracker there will be pulsing circles around your character, count the amount of pulses then move a bit and click it again, if the pulses increase then you are going in the right direction, if they decrease, change direction and try again.
You should end up near the Jetpack Schematics at
/setwaypoint 3925 3041

Your quest objective will now change to ‘Gather Frost Components to build the Frost Ray x8 and Freeze Unkillable Biters with the Frost Ray to collect the Jetpack Schematics’

Gather up the Frost Components from the area nearby, they are little rocks or test tubes on the ground, like these at /setwaypoint 3905 3100

When you have all 8 Frost Components, go back to the Jetpack Schematics at /setwaypoint 3925 3041
You will gain a temporary ability called ‘Frost Ray’.

Use the Frost Ray ability on the Unkillable Biters to freeze them. You can then pick up  the Jetpack Schematics. I find it easiest to stand on the Jetpack Schematics and then do a full circle of freezing before quickly grabbing the Jetpack Schematics.

Hand in the quest to Winachuk Maguk in Uttila East at /setwaypoint 4004 3420

More Ore

QUEST 4

PICK UP
The quest is picked up from Winachuk Maguk in Uttila East
/setwaypoint 4004 3420

TO COMPLETE
Bring Unstable Vostigean Ore into the Source Infuser x4

Go to the Path of Destruction area around /setwaypoint 3820 3142
Here you will find a Source Infuser (A large machine with a column of light ascending to the sky).
Scattered around the quest circle are Unstable Vostigean Ore to pick up, this one is at /setwaypoint 3766 3187

You need to pick up the Unstable Vostigean Ore and take them into the machine one by one.. however, on approach to the machine, you will notice lots of red on the ground!

The red areas will alternate very quickly over segments of the ground in a simple pattern.
You need to run to the source infuser while moving left and right to avoid the red areas. You will get knocked back a little bit (even if you miss the red) but will eventually make it as long as you don’t get hit by the red too much.
You have 2 minutes from picking up the Ore to handing it in to the infuser.
Just jump into the light beam to ‘hand in’ the Ore, there is no need to click anything.

Hand in the quest to Winachuk Maguk in Uttila East at /setwaypoint 4004 3420

Celesterium Delirium

QUEST 5

PICK UP
The quest is picked up from Winachuk Maguk in Uttila East
/setwaypoint 4004 3420

TO COMPLETE
Extract Energy from Power Cysts x12

Head over to the Drained Forest area at around /setwaypoint 4251 3046

You will have a quest item attached to your sticky called ‘Extractor’

Around some of the tree roots you will find small purple crystals called Power Cysts, this one is at /setwaypoint 4222 3036

Select the Power Cysts and use the Extractor item on them.
If you are finding it difficult to see them, use /target power

Your quest objective will now change to ‘Activate an Ascender Launcher’

Go to one of the 5 marked spots in The Front. There are 5 Ascender Launchers to choose from, the one I like is at
/setwaypoint 3922 2410 as there are no nearby mobs to distract you.
The Ascended Launcher will…. launch you!!
up up in the air you go!

Your quest objective will now change to ‘Target Celesterium and use the Extraction ability x30’

While up in the air you will gain a temporary ability called ‘Extraction’
The first time you go up, drag that ability to your cast bar asap.
Then jump up again and spam your [tab] key (target next enemy mob) to target the Celesterium, while also spamming the Extraction ability.
You should get between 5 and 10 each time you jump.
Repeat the process until you hit 30.

Hand in the quest to Winachuk Maguk in Uttila East at /setwaypoint 4004 3420

Jetpack It Up (I'll Take It)

QUEST 6

PICK UP
The quest is picked up from Winachuk Maguk in Uttila East
/setwaypoint 4004 3420

TO COMPLETE
Activate the Tool Calibrator

This is a blue hexagonal platform just behind Winachuk Maguk at
/setwaypoint 4000 3423
Click the platform to enter the quest instance.

Your quest objective will now change to ‘After activating the Tool Calibrator, tell Winachuk Maguk that you are ready’

Winachuk will be stood right next to you, talk to him.
You have two options; ‘I don’t want to do this now’ will port you back out of the instance, ‘I am ready’ will start the puzzle.

The puzzle is 21 clicks of various items in the correct order.. you need to be quick!
Placing your character in the middle of the platform, will allow you to reach all the items without having to move.
When you speak to Winachuk Maguk again he will start telling you what you need to click.

You have between 1 and 2 seconds to click the correct object before it fails and you have to start over again.
HOWEVER the pattern is ALWAYS the same, so if you keep trying you will soon learn the pattern.
You DO NOT NEED to wait for Winachuk to tell you the next item, just click them all in the correct order as quickly as you can and you will complete the task (you do however need to wait for him to tell you the first item to start it all off).
The pattern is as follows..

You can right click the image and select ‘view image’ for a bigger version.

1. Material Conversion Unit
2. Regulation Terminal
3. Source Capacitor
4. KRAM LOCKS
5. KRAM LOCKS
6. KRAM LOCKS
7. Celesterium Tank
8. Regulation Terminal
9. Material Conversion Unit
10. Celesterium Tank
11. Particle Welder
12. KRAM LOCKS
13. KRAM LOCKS
14. KRAM LOCKS
15. Source Capacitor
16. Material Conversion Unit
17. Regulation Terminal
18. KRAM LOCKS
19. KRAM LOCKS
20. KRAM LOCKS
21. Particle Welder

Note: Some peeps have reported that the 12/13/14 kram locks need to be clicked in a certain order.. the order on the image above has worked for me a few times already, but if it doesn’t work for you then just try them in a different order.

Your quest objective will now change to ‘Reactivate the Tool Calibrator’

Behind Winachuk is another blue hexagonal platform, click on it to be teleported back out of the instance.

Hand in the quest to Winachuk Maguk in Uttila East at /setwaypoint 4004 3420

Handing in the quest rewards you with the wardrobe skin ‘Finely Tooled Jetpack Shell’. This is the ‘Cape’ appearance of the Jetpack Mount. It is not the actual mount! This comes from the next quest.

We Can Build It

QUEST 7

PICK UP
The quest is picked up from Winachuk Maguk in Uttila East
/setwaypoint 4004 3420

TO COMPLETE
Buy the items listed

‘Aquire a Sky Forged Vvertical Thruster’
‘Acquire a Verbidium Dampener’
‘Acquire a Lateral Thrust Controller’
‘Acquire a Acceleron Timing Module’

All these items can be bought from the vendor ‘Norher’ at /setwaypoint 3949 3377 in Utttila East.
Each item costs 4000 intel, bringing total cost to 16000 intel.
For tips on farming intel, please see the level 70 gear page.

The Jetpack Mount has a speed of 160%, this is the fastest speed available in Rift.

When you buy the items they will go into your questlog bag, don’t panic if you cant see them in your main bags!
The vendor is only visable to you while you are on this quest.
The items are soulbound, you cannot trade them, even between alts.
The mount that you will be awarded is also souldbound.

Once you have bought all 4 items simply hand the quest back in to Winachuk Maguk to be rewarded with the jetpack mount.

35 Carnage Quests

For the cheevo ‘Comet Carnage’ in Vostigar Peaks.
I have ordered the carnage quests in the order of amount of mobs to kill starting with the smallest, as you are most likely to be missing the ones with fewer amount of mobs.

Note: Most of the carnages that require a small amount of kills are for very strong elite mobs. You may want to wait til you are high level/gear before you try them!

CARNAGE: Carnage: Primus Titan
PICK UP: There are a few of these dotted around The Front, I found one at /setwaypoint 3819 2237
TO COMPLETE: Kill a Primus Titan

CARNAGE: Carnage: Source Construct
PICK UP: There are a few of these dotted around The Front, I found one at /setwaypoint 3712 2463
TO COMPLETE: Kill a Source Fueled Construct

CARNAGE: Carnage: Auxilia Harpy
PICK UP: Many of these mobs can be found in The Landing at /setwaypoint 3738 2118
TO COMPLETE: Kill Auxilia Harpies x3

CARNAGE: Carnage: Primus Veles
PICK UP: These mobs can be found in The Landing, just north of The Magicians Tower /setwaypoint 4032 1913
TO COMPLETE: Kill Primus Velites x3

CARNAGE: Carnage: Auxilia Shalistiri
PICK UP: Many of these mobs can be found in The Landing at /setwaypoint 3797 1872
TO COMPLETE: Kill Auxilia Shalistiri x3

CARNAGE: Carnage: Primus Seraphim
PICK UP: These mobs can be found in The Front /setwaypoint 4008 2344
TO COMPLETE: Kill Primus Seraphim x3

CARNAGE: Carnage: Artillery Commanders
PICK UP: These mobs can be found north of Uttila West in the Path of Destruction area /setwaypoint 3706 2982
TO COMPLETE: Kill Artillery Commanders x3

CARNAGE: Carnage: Primus Vilicus
PICK UP: Many of these mobs can be found in The Landing at /setwaypoint 3824 1902
TO COMPLETE: Kill Primus Vilici x5

CARNAGE: Carnage: Ahnket Command Sentinel
PICK UP: Many of these mobs can be found in The Landing at /setwaypoint 3739 2101
TO COMPLETE:  Kill Ahnket Command Sentinels x5

CARNAGE: Carnage: Source Guardian
PICK UP: Many of these mobs can be found in The Source Collectors at /setwaypoint 3362 3048
TO COMPLETE: Kill Source Guardians x5

CARNAGE: Carnage: Utukku Drudge
PICK UP: Many of these mobs can be found in Ahnkets Tail at /setwaypoint 3634 1640
TO COMPLETE: Kill Utukku Drudges x5

CARNAGE: Carnage: Wandering Utukku
PICK UP: Many of these mobs can be found between Uttila and Uttila West on the Path of Destruction /setwaypoint 3830 3603
TO COMPLETE: Kill Wandering Utukku x6

CARNAGE: Carnage: Rabisu Hunter
PICK UP: Many of these mobs can be found north of Uttila East on the Path of Destruction. /setwaypoint 3980 3282
TO COMPLETE: Kill Rabisu Hunter x6

CARNAGE: Carnage: Primus Invocata
PICK UP: Many of these mobs can be found in The Landing at /setwaypoint 3744 1941
TO COMPLETE: Kill Primus Invocata x6

CARNAGE: Carnage: Sky Hunter
PICK UP: Many of these mobs can be found in The Landing at /setwaypoint 3738 2118
TO COMPLETE: Kill Sky Hunters x8

CARNAGE: Carnage: Evocatus Stormbringer
PICK UP: Many of these mobs can be found in the Rabado Base /setwaypoint 3366 2486
TO COMPLETE: Kill Evocatus Stormbringer x8

CARNAGE: Carnage: Hinterland Worg
PICK UP: Many of these mobs can be found in the Forgotten Forest at /setwaypoint 3129 2159
TO COMPLETE: Kill Hinterland Worg x10

CARNAGE: Carnage: Alu Infantry
PICK UP: Many of these mobs can be found between Uttila and Uttila West on the Path of Destruction /setwaypoint 3832 3570
TO COMPLETE: Kill Alu Infantry x12

CARNAGE: Carnage: Ahnket Forces
PICK UP: Many of these mobs can be found in Ahnkets Glen /setwaypoint 4248 2437
TO COMPLETE: Kill Ahnket Forces x12

CARNAGE: Carnage: OFS Cultists
PICK UP: Many of these mobs can be found in Uttila West /setwaypoint 3773 3416
TO COMPLETE: Kill OFS Cultists x12

CARNAGE: Carnage: Source Zombies
PICK UP: Many of these mobs can be found in The Source Collectors /setwaypoint 3348 3078
TO COMPLETE: Kill Source Zombies x12

CARNAGE: Carnage: Rabisu Eradicator
PICK UP: Many of these mobs can be found in The Front /setwaypoint 3657 2428
TO COMPLETE: Kill Rabisu Eradicators x12

CARNAGE: Carnage: Source Guardian
PICK UP: Many of these mobs can be found in the drained forest /setwaypoint 4118 3178
TO COMPLETE: Kill Source Guardian x12

CARNAGE: Carnage: Utukku Worker
PICK UP: Many of these mobs can be found in the drained forest /setwaypoint 4126 3137
TO COMPLETE: Kill Utukku Workers x12

CARNAGE: Carnage: Drained Wretches
PICK UP: Many of these mobs can be found in the drained forest /setwaypoint 4329 3015
TO COMPLETE: Kill Drained Wretches x12

CARNAGE: Carnage: Hinterland Rocs
PICK UP: Many of these mobs can be found in Ahnket’s Glen /setwaypoint 4414 2581
TO COMPLETE: Kill Hinterland Rocs x12

CARNAGE: Carnage: Auxilia Swordsmen
PICK UP: Many of these mobs can be found in the Rabado Base /setwaypoint 3366 2486
TO COMPLETE: Kill Auxilia Swordsmen x12

CARNAGE: Carnage: Corrupted Grizzlies
PICK UP: Many of these mobs can be found in The Forgotten Forest /setwaypoint 2795 2220
TO COMPLETE: Kill Corrupted Grizzlies x12

CARNAGE: Carnage: Frozen Tempest
PICK UP: Many of these mobs can be found in The Forgotten Forest /setwaypoint 2781 2259
TO COMPLETE: Kill Frozen Tempest x12

CARNAGE: Carnage: Hinterland Gargazelle
PICK UP: Many of these mobs can be found in The Forgotten Forest /setwaypoint 2828 2555
TO COMPLETE: Kill Gargazelles x12

CARNAGE: Carnage: Hinterland Spider
PICK UP: Many of these mobs can be found in Ahnkets Glen /setwaypoint 4212 2589
TO COMPLETE: Kill Hinterland Spiders x12

CARNAGE: Carnage: Auxilia Storm Raptor
PICK UP: Many of these mobs can be found in The Front /setwaypoint 4074 2123
TO COMPLETE: Kill Auxilia Storm Raptors x12

CARNAGE: Carnage: Lost Circle Tuath’de
PICK UP: Many of these mobs can be found in The Lost Circle /setwaypoint 3032 2526
TO COMPLETE: Kill Lost Circle Tuath’de x15

CARNAGE: Carnage: Evocatus Soldiers
PICK UP: Many of these mobs can be found north of Uttila West in the Path of Destruction. /setwaypoint 3706 2982
TO COMPLETE: Kill Evocatus Soldiers x15

CARNAGE: Carnage: Legion Infantry
PICK UP: Many of these mobs can be found in the Tenon Fortress /setwaypoint 3433 2061
TO COMPLETE: Kill Legion Infantry x15

Notes for Completionist..

  • No notes required as all quests should be ticked off nicely once you finish the zone!
LIVE on Twitch OFFLINE
on Twitch