The Bastion of Steel

Cheevos found in H > Raids > Prophecy of Ahnket > The Bastion of Steel

General

Gear Drops

Boss 1 – Azranel – Gloves + Shoulders

Boss 2 – Isiel – Legs + Feet

Boss 3 – Titan X – Chest + Belt

All gear from BoS is
T2 quality with 325 HIT

Location: Maze of Steel in Vostigar Peaks
Waypoint: /setwaypoint 4024 1685

Difficulty Tier: Tier 2
Hit Requirement: 2400 HIT
Level of bosses: 72
Number of bosses: 3
Max Group Size: 10
Recommended Minimum Group Size for Level 70 cheevo run: 10

Solo at 70?: No
All cheevos while solo?: No

You can enter this raid solo, you do not need other players in the group.

All 3 bosses are found in the centre of an arena style area.
Azranel is up when you enter the area. Once Azranel is dead there will be a glowing orb to click that will summon the next boss.
Vindicator MK 1, a large tank, will appear towards the back of the room, Vindicator needs to be taken to 60% for Commander-Isiel to then spawn and be killed.
When Isiel is dead a new orb will spawn to start the Titan X encounter. On clicking the orb for Titan, the trash will spawn after a few seconds and then start attacking straight away, so make sure you only click for boss 3 when you are ready!

The Trash

There is a lot of trash between the entrance and the boss arena.
Most groups will skip the majority of the trash, sending someone with stealth and cast a group summon towards the arena entrance to summon the group. Or, your whole group can run through the trash and die near the last pack, casting a group rez to get everyone up to kill the trash pack.
Once you have the group in the correct area you will only need to kill the very last pack of adds near the opening into the arena. This pack can be line of sighted by the tank using the tent. This will group them all up nicely so the raid can AOE them down.
Once this pack is dead, all the other trash will disappear, giving you a clear run back to the arena after you die!

Boss 1 - Azranel

Quick Guide (Detailed Ability Guide Below)

— There are lots of different positioning strategies that will work for this fight.
— The raid will start by pulling the boss to position 1, the tank will hold the boss still while the raid stacks up behind the boss.
— Every 24 seconds the boss will cast missile storm on up to 2 people. These players will drop painful red aoe for around 10 seconds, they need to move away from the raid and keep running, circling around the raid, until they finish dropping red.

— You will need 2 tanks, they will need to tank swap before reaching 5 stacks of Laser Cutter, preferably at 3 stacks (6 stacks is death).
— There are two debuffs cast on raid members, Sticky bomb and Magnetised, that need to be cleansed straight away. Magnetised starts after the boss hits 50% health, it is best to have 2 cleansers at this point to keep up.
— The boss will cast Comet Shot on a random player every 70 seconds(ish). This player should stay stacked with the group (minimum 3) to share the damage.
— At 75% health, pillars will begin to spawn around the room, eventually there will be a pillar at position 1. The tank should adjust slightly to ensure the tank is closest to the pillar than any of the other raid members. Also ensure the tank and raid are not stood in one of the lightning beams.
— The first time the boss reaches 45% health, and then every 44 seconds after, the boss will do a Defensive Spin. The boss will cast a red aoe around himself (10 meter radius) and spin around, killing everyone inside the aoe. There are a few different movement strategies to deal with the spin, most groups prefer to have the whole raid move out and then position on the next pillar waiting for the boss to finish and the tank to bring the boss over to resume the fight. The boss takes reduced damage while the spin is active.
— At 40% health a large red aoe will appear around the edge of the room, giving less space for running missiles.
— If a raid member dies then Azranel will regain 4% health.

Azranel

Support Players using raid wide cooldowns (such as lava field/flaring power) should pop these at the beginning of the fight and then again 5 minutes after, being careful to pop them straight after a spin for max effect.

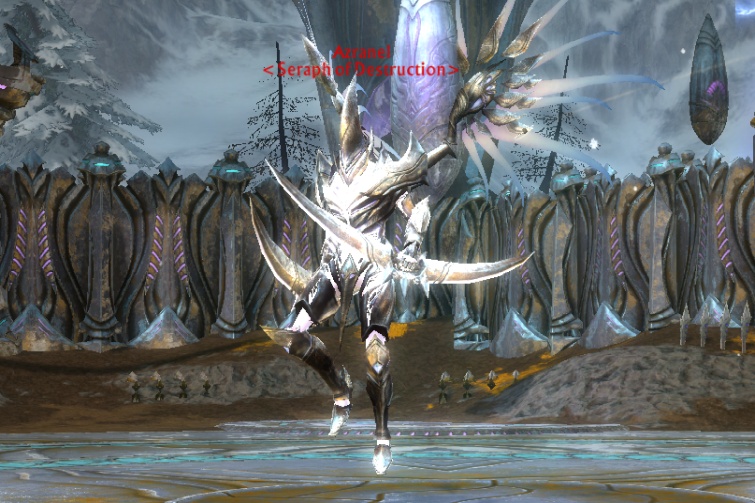
General Mechanics that apply to all roles
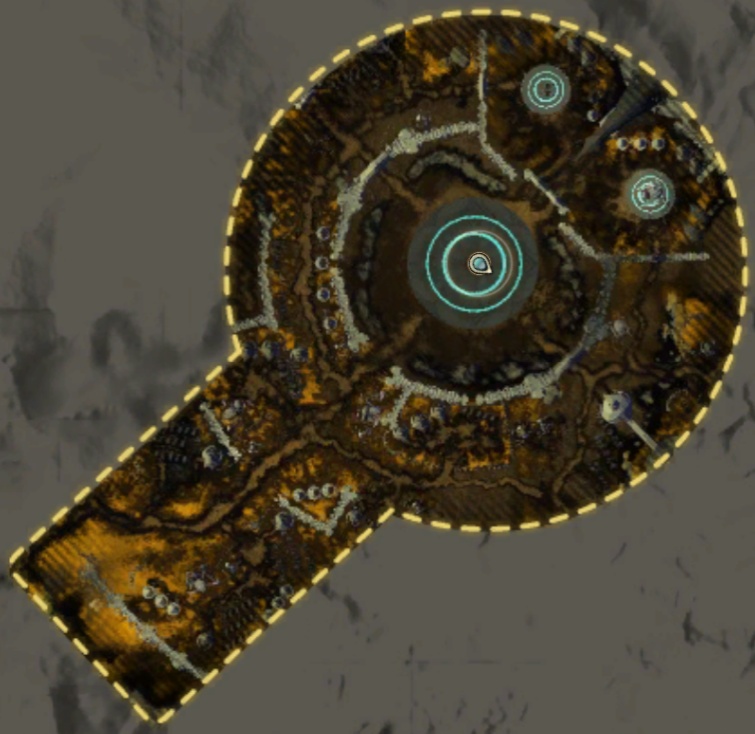
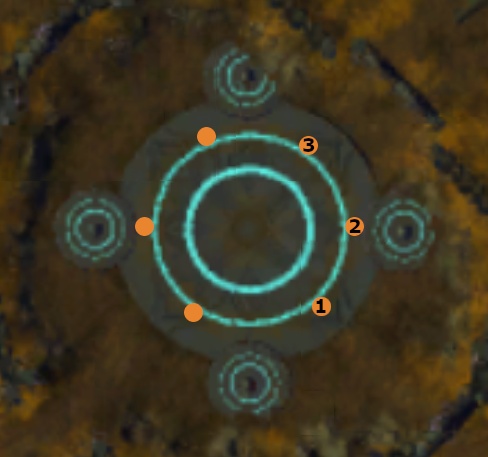
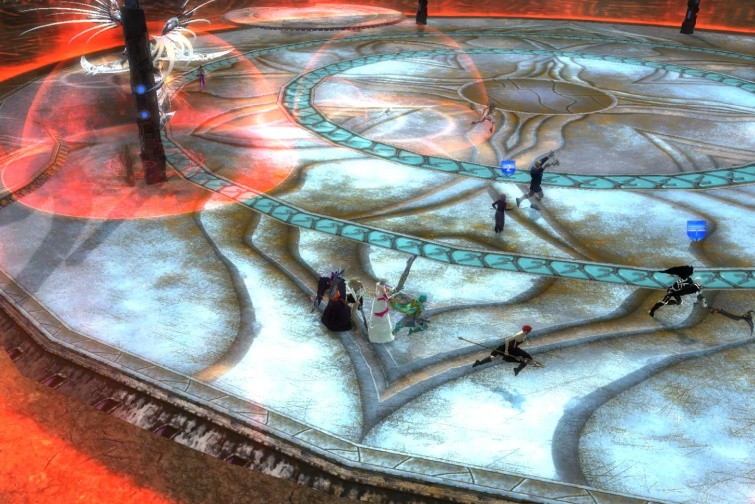
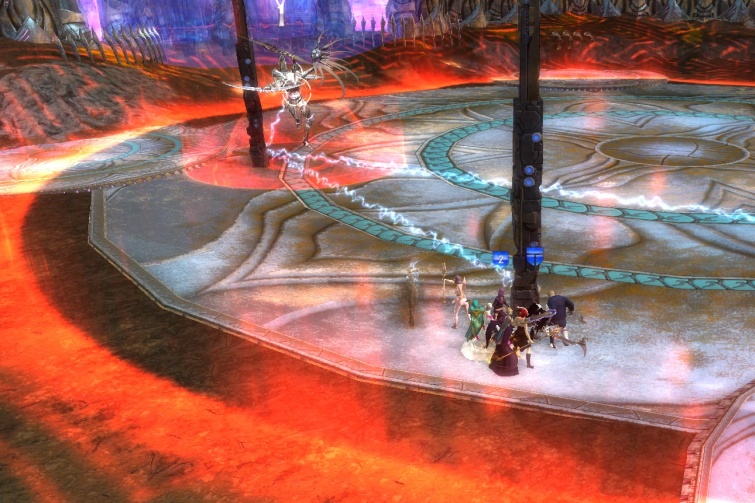
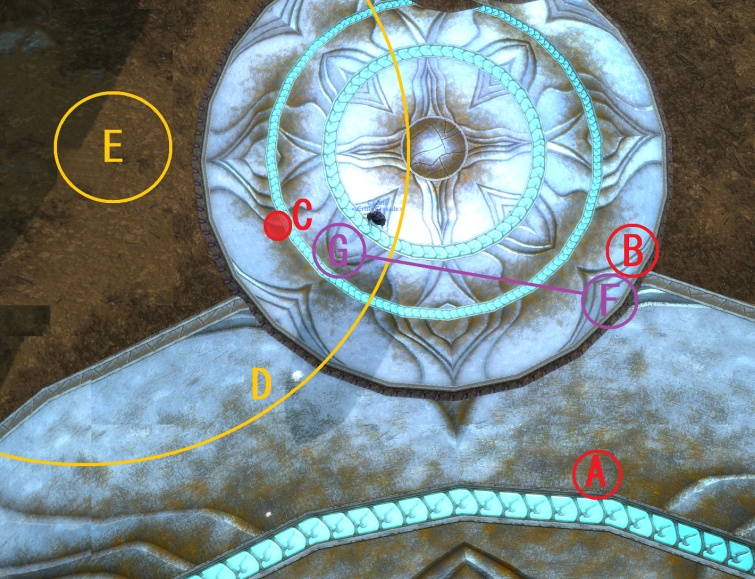
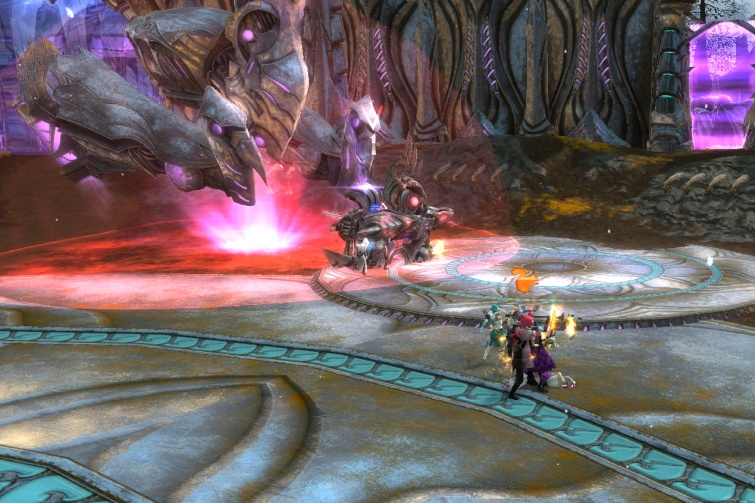
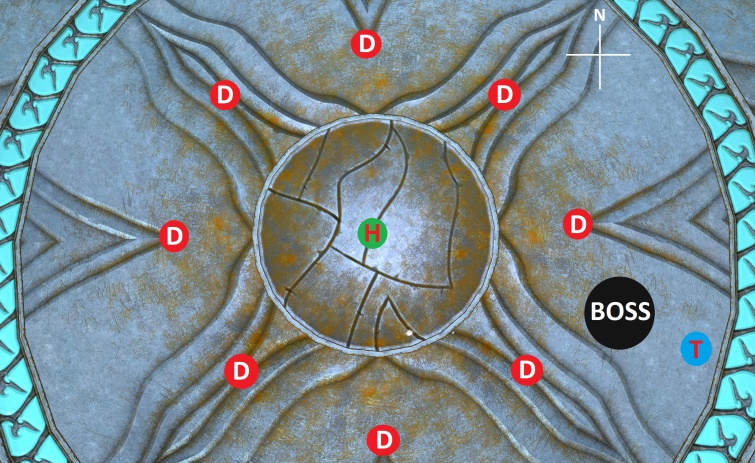
Stacking: Make sure the raid stacks near the tank in order to receive the tanks guard bonus, make sure you are close to the pillars that spawn, but not closer than the tank because of Lightning Arc (explained below, in the tank section). Stay away from the edge of the large circle so that you don’t spawn extra pillars behind the group.
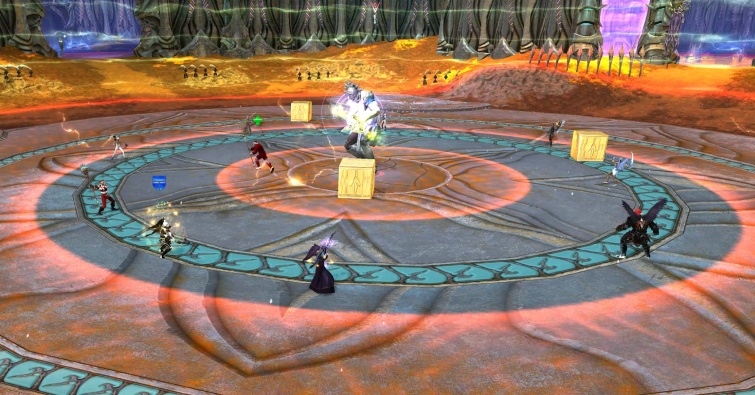
Plasma Chain: Pillars will spawn at 75% boss health. They have beams of lightning, called Plasma Chain, that go from one pillar to another & from the pillars to the boss. Standing in the beams will damage you. If you need to run through the beams do so quickly and get out again asap. Do not attempt to jump over them!
Fallen Analysis: Every time someone dies the boss will heal for 4% of its maximum hp, so, avoid dying.
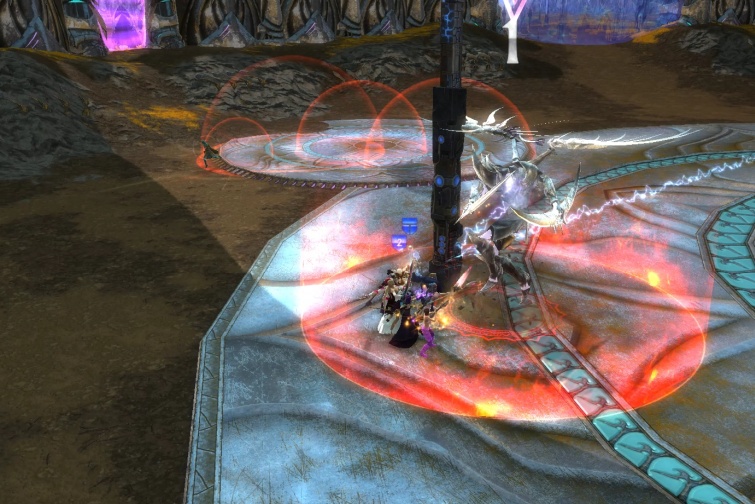
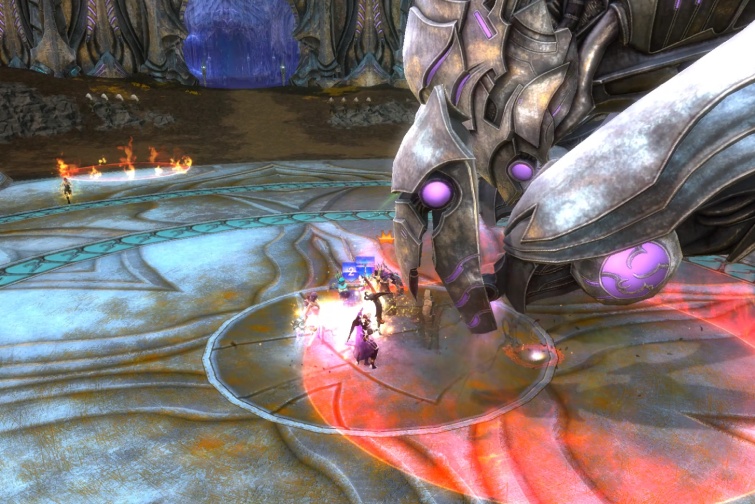
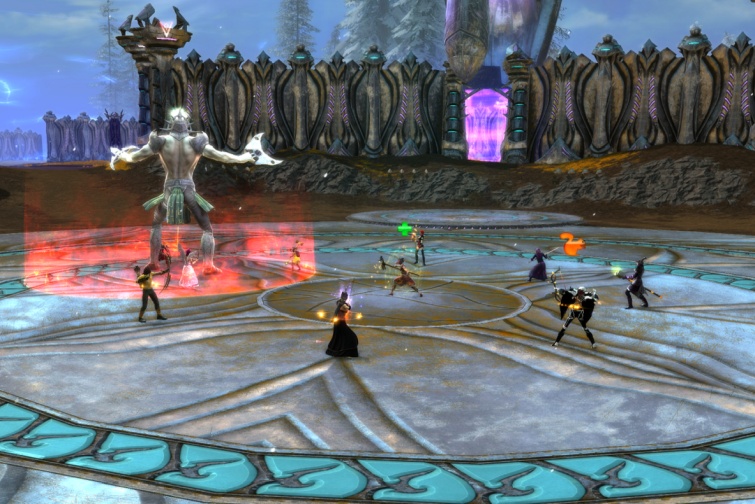
Defensive Spin: The boss will spin around in a fast circle doing damage in a 10 metre radius around himself, make sure to stay out of this area whilst he is doing this (and for 2 seconds after) or you will die.
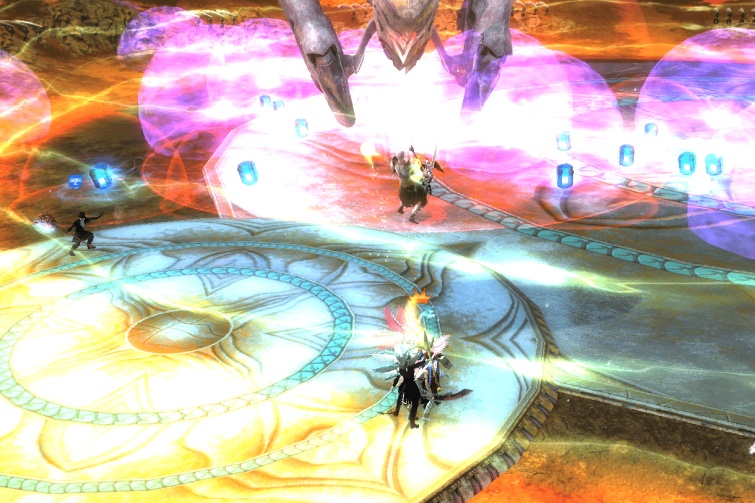
Comet Shot/Charging: Every 7 seconds the boss will gain stacks of Charging, upon reaching 10 stacks he will select a random person & cast an ability called Comet Shot at that person, this is a group stack mechanic, you need to have a minimum of 3 people inside the Comet Shot area in order to survive.
Electric Charge: As the boss gains more stacks of Charging the regular area of effect (aoe) damage, called Electric Charge, that he does will increase up to a maximum output at 10 stacks. The only way to decrease this aoe damage is to kill the pillars, but this is largely considered to not be worth it.
Missile Storm: Starting at 20 seconds in and then every 24 seconds after, the boss will select up to 2 random people (anyone except active tank) and place a de-buff called Missile Storm on them, the affected players need to run away from the group and drop the bubbles of Missile Storm away from the group, the players will need to keep running else they will stand in their own Missile Storm bubbles and kill themselves, the player can not run near another player that has Missile Storm or they will get hit by the other Missile Storm and die from that.
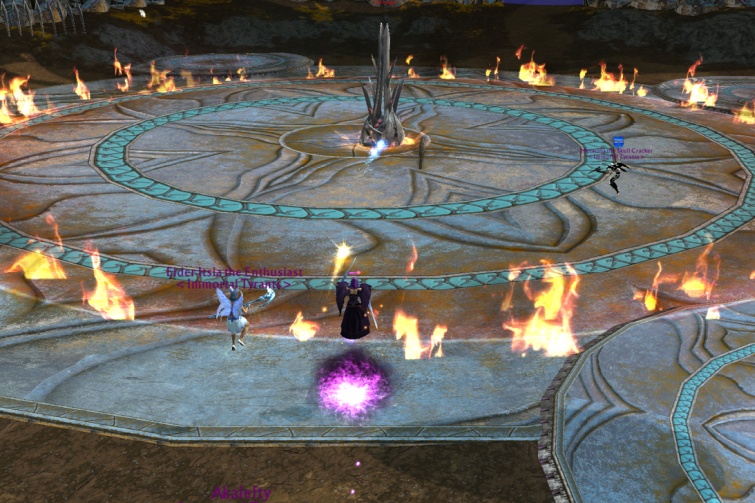
Overcharging Generators: At 40% the boss will use an ability called Overcharging Generators, this will turn the outer area of the room red & running through this red area will hurt & it might kill you, you want to avoid running through the red area unless absolutely necessary & if it is necessary to run back out as soon as possible.
Tractor Beam: At 30% the boss will use an ability called Tractor Beam, this ability will pull 2-3 people to a nearby pillar, stacking near to a pillar will normally (but not always) negate this ability. This ability will normally be accompanied by Comet Shot, so make sure to run back to the rest of the group.
 
Tank Mechanics – 2 Tanks Required
Laser Cutter: The active tank will get stacks of Laser Cutter every 10 seconds, reducing their armor and increasing damage taken. Upon reaching 5 stacks the 6th stack will one shot the tank that has 6 stacks with an ability called Can Opener (Can Opener hits for 100 Million hp), tanks should to do a tank swap at 2-3 stacks, after a missile strom has been cast (be sure to swap no later than reaching 5 stacks) in order to avoid this mechanic. If your tank dies from the Can Opener debuff then you will need to wait til the debuff drops off before you rez them or they will instantly die again.
Defensive Spin: At 45% health and every 44 seconds after the first cast the boss will do an ability called Defensive Spin that lasts for 11 seconds. The raid group must move away from the boss during the spin, or the boss can be moved away from the group just before the spin starts. When the boss is spinning he will stay in that location, once he stops spinning he can be tanked again, but beware the aoe effect lasts another 2 seconds after the cast has finished, so don’t bring the boss back or move in too quickly! 
Lightning Arc: Make sure you do not stand between the boss and the pillar as the boss will do a beam between himself and a pillar (sometimes multiple) (the pillars will also do beams between the other pillars), this beam will do considerable damage to anyone who stands in its path.
 
Healer and/or Support Mechanics
Sticky Bomb: At 75% and every 15 seconds after the first cast the boss will put a debuff on the entire raid called Sticky Bomb. This debuff will slow the players and needs to be cleansed (via a group cleanse) asap. If a player gets to 3 stacks of Sticky Bomb it will stun this person.
Magnetized: At 50% health and every 40 seconds after the first cast the boss will put a debuff on 2 people, there are two ways to deal with this, the easiest way is to cleanse this off the affected people,with either a single target cleanse or a group cleanse (make sure your cleanse is off CD again for the next Sticky Bomb), if this is not an option then the affected people need to spread out so that the bubbles are not overlapping to avoid killing the group/themselves.
 
DPS (Damage Dealer) Mechanics
Defensive Spin Shield continued: While the boss is in Defensive Spin he will gain a shield for 9 seconds out of the 11 seconds that he is casting Defensive Spin, whilst he has this shield up Dd people do not want to throw any big hitting abilities at the boss for two reasons; firstly his shield will make him take reduced damage, secondly the shield will reflect some damage back at the caster of the ability; so using a hard hitting ability is not only a waste of dps, but is also a risk of killing yourself.
 
Thank you to Specs for help with the ability list.
The raid stacks close together.
Run Missile Storms away from the raid.
Spin and Missiles will often happen at the same time, be sure to watch your feet!
The raid can wait at the next
pillar while Azranel is spinning.

Boss 2 - Commander Isiel

First Phase: Vindicator MK 1
— There are lots of different positioning strategies that will work for this fight. The tank will likely just pull Vindicator to the middle of the room and the raid will stack up next to the tank underneath Vindicator.
— Every 10% of its health (90, 80 and 70%) Vindicator will summon a group of adds, these will need to be pulled to the boss and cleaved down.
— Players are randomly chosen to receive a debuff called Timed Charge, This is a red pulsing AoE on the player that will drop on the ground after 5 seconds. The circle will expand twice after it has been dropped. Standing in a red circle from Timed Charge is instant death. The player with Timed Charge needs to move well out of the raid before it drops. (If you are in the middle of the circles then past the second blue floor ring is a good distance).
— Every 25-30 seconds will be 4 AOE Damage Pulses called ‘Lightning Burst‘. The active tank will want to use a damage reduction cooldown as this, stacked with other damage, becomes significant.
— The active tank will receive stacks of ‘Driller Round’ every 8 seconds which reduces Guard and increases damage taken. Tank Swap at 2 Stacks with 16s on the timer, the active tank tanks the boss and the adds.
— You need to DPS the Vindicator down to 60% health to advance to the next phase.
— It is best to hold Vindicator in the middle of the room to make the next phase easier. If you need to move due to badly dropped red circles then try to move roughly towards the (E) spot in the next phase (be sure not to be too close to the A spot).

Second Phase: Commander Isiel
Most raids will choose the Southern smaller platform to move to and position around. There are a few different ways to position around the circle, making use of various ‘safe spots’ and strategies. The way I explain below is a ‘melee friendly’ approach. Melee players will be able to move out of stack (A) and go behind the boss to DPS whenever the boss in in position (F) being careful not to be cleaved when the boss is moving from position (G) to (F).
If your Raid is fully ranged then there will be no need to bounce Isiel between the two tanks. Isiel would then just stay in position (G).

A – The main raid stack – DPS and Heals.
B – The off-tank – Off Tanking Isiel if required. Or just throwing heals and cleanses if not.
C – The main tank – Tanking Vindicator and Isiel – Throw heals here.
D – The edge of Vindicators AoE (ish)
E – Vindicator – 5 meters away from main tank.
F – Isiels primary position for DPSing down
G – Main tank pulls Isiel to this spot within the Vindicators AoE to remove the shield.

— DPS and Heals should stay out of the path from the middle of the room to position (B) as Isiel has a nasty cleave (Arc Slash) that will kill anyone in the way.
— The off tank should move to his spot (B), be sure to have aggro on all the adds and grab Isiel as soon as she spawns (from the middle of the room).
— Once the off-tank has Isiel in position (F) the DPS/Heals can now move to the allocated safe spot (A). This position should have been explained before the fight starts, if you are unsure, follow everyone else!
— Isiel will be casting Heart Strike on the active tank every 14 seconds, this will apply a stack of Crippling Shock which reduces max HP by 10%, once this reaches 3 stacks, Isiel will then cast Voltaic Thrust, this will hit the tank super hard so throw your healing(damage reduction/mitigation) cooldowns during the cast!
— All DPS should now be focused on Isiel, the adds will be cleaved down.
— Once Isiel reaches 85% Vindicator will become active again, the main tank will need to be ready to grab Vindicator and position him.  Above in the map we see the spot (E), the tank will need to take Vindicator further away than spot (E) and then slowly bring him back until the tank is stood exactly in spot (C) with Vindicator 2.9 meters away from the tank and the furthest angle away from the raid stack area (A).
— Vindicator will have a red AOE in a large area around him (D), this will instantly kill any non-tank that stands in it.
— Vindicator will throw ‘Explosive Round‘ at a random player which applies a debuff of ‘Burning Purpose‘, this will need cleansing ASAP or will tick dealing a lot of aoe damage to the raid, likely killing a few people.
— Isiel will use ‘Lightning Whirl’ which deals AOE damage to the raid.
— Starting at 75% and then every 23 seconds after, Isiel casts ‘Aegis of Storm‘ on herself which creates a shield granting 90% damage reduction for 30 seconds. As soon as the shield is applied the main tank (tanking Vinidicator) needs to taunt Isiel to them (from position (F) to (G)) Vindicator will then cast ‘Demolishing Blast‘ on the main tank thich will remove the shield from Isiel, you need to be very quick with this (less than 5 seconds) or you will miss the cast and end up with the full length shield. While the shield is up your DPS needs to save all cooldowns/hard hitting abilities and then use them once the shield is down. 
— At 50% a bunch of drones will surround the arena and shoot purple bubbles across the area, these will instantly kill any player that touches them, it is very important to stay in those safe spots now!
— From 50% mines will be spawning in groups around Vindicator, these will hurt the tank quite a lot if they have 3 or 4 on top of them at the same time.
— During the final 50% you will need a lot of heals on the main tank, all your healers should direct their heals to the main tank, mostly leaving the off-tank to fend for themselves at this point. Hard hitting spells can be managed by rotating a few big heals from multiple healers, big heals like Phalanx from a Warchanter or Life Insurance from a Rogue.

Drop Timed Charge well away from the raid!

Explosive round shows as an orb shot from Vindicator towards a player and then a red pulsing circle which needs to be cleansed as soon as possible.

Your group may decide to have your main tank hold Vindicator and Isiel during the final phase. This can also mean that the off-tank only needs to tank during the first phase and can be a lot more 'hybrid'.
Some groups will use the same safe spots but with different configurations,

Boss 3 - Titan X

This fight is split into two main phases.
During phase 1 there will be waves of adds to kill. Each wave has a different selection of adds.
During phase 2 is when you will be killing Titan X.
Most groups will head for the middle of the circle and work out their positions for the second phase before clicking the orb to start the fight. You can put a waypoint on your own position so it is easier to come back to it later! After positions the group should move back to stand near the orb for the first wave of trash.

Phase 1 - Trash mobs

Before you start this phase you will want to designate 3 players to do interrupts. One each for the Right, Middle, and Left R.D.U mobs.
The tank should attempt to bring all mobs towards the middle of the large circle.
The Healer should stay slightly away from the group, so if they get ghost agro then they wont hurt the rest of the raid.
The rest of the raid should be on the outer edge of the circle, DPSing all the trash waves from range.
Note: Hitting an RDU once will grant the player a ranged damage buff. DPSers should hit an RDU and then switch to the other mobs of the wave. This is especially useful during the Pulser phase.

Waves

  • Wave 1 – Two RDUs, one on left, one on right, and one E. Class Soldier.
  • Wave 2 – Two RDUs, one on left, one on right, and two E. Class Soldiers.
  • Wave 3 – Two E. Class Soldiers, and Ghosts.
  • Wave 4 – Pulser, and three RDUs, one on left, one in middle, and one on right.
  • Wave 5 – A single Fire Spigot, and Ghosts.
  • Wave 6 – Two Infectors, and Ghosts.
  • Wave 7 – Two Infectors, one E. Class Soldier, and three E.C.Bs.
  • Wave 8 – Three E.C.Bs, one RDU, and 3 Fire Spigots.

Any trash that is alive for too long will enrage. Each enrage will give Titan X a stack of ‘Roar of the Crowd’, this will buff Titan so he hits harder.

Titan X
Run forward and jump over the wave of fire

Mob Descriptions

  • RDU – These mobs will cast ‘Rocket Volley’. Assign players to interrupt this. If the cast is allowed to finish then the Rocket Volley will shower the raid with pain circles and likely lead to a few deaths. The raid can attempt to avoid them by running around like headless chickens.
  • E. Class Soldier – These mobs hit very hard with a painful cleave. The tank will need to hold agro as they can kill raid members easily.
  • Pulser – Casts a circle of red around himself and then a ring of red further out. Raid members in the red will likely be one shot, so you need to stay very far out! (40 metres). Hit one of the RDUs for the range buff before the first cast so you can keep DPSing.
  • Fire Spigot – Casts a wave of ‘Fire’ that emanates out from the Spigot – Players will need to jump over the wave.
  • Infector – The tank will need to turn the Infectors away from the raid quickly. Anyone who is ‘in front’ of the Infector (That isn’t the tank) will be hit with ‘Infection’, this player will drop red circles of pain on the floor, they will need to keep moving to stay out of them and avoid the area where the raid is stood! When the Infector is dead the Infection will go.
  • E.C.B – Small flying mobs – These guys will cast heals on the other mobs, but the heals are not that great so there is no need to focus them down.
  • Sacrificial Prisoner (Ghosts) – These mobs spawn at a specific spot that changes each Wave. The ghosts will target a random player and run towards where the player is stood. Being hit by a ghost is painful! The player targeted should wait until the ghost is near and then sidestep out of it’s path at the last second. Ghosts can also be intercepted at their spawn point using pets, or you can have it be a specific players job to ‘catch’ them (Usually a healer).
Phase 2 - Titan X

100% – 70%

Assume your positions!
The raid needs to spread out in the inner circle so they are all 5 metres away from each other.

Assign a single player to purge the Roar of the Crowd buff from the boss. Each time the boss is purged he will deal a lot damage to the raid, be sure to heal the raid back to full between each purge.

You will also need to interrupt ‘Legion’s Pull’, if allowed to cast this will pull every player to the boss, this will mean a raid wipe after the 70% mark.

70% – 35%

The boss will place a debuff called ‘Static Pulse’ on every player. This debuff will emanate a circle of pain around the player that is 4.8m wide(ish), overlapping these circles will mean much pain and eventual death. So you all need to stay 5m away from each other for the rest of the fight!

Continue to interrupt Legion’s Pull. It is a good plan to add a back up rupter at this point as it is super important to keep this rupted!

35% – 0%

The boss will port to the middle of the circle. The tank should stay where he was stood and continue to keep agro on the boss.

Safety Dance!
The boss will now create concentric rings of red, with one safe white ring for the raid to stand in.
The safe ring starts in the middle and then moves slowly outward. The raid will need to move with the white ring, walking in a straight line from the center towards the outer edge and then back in again when the rings go back in.
Players still need to be at least 5m away from each other, stay away from your friends!

Yellow cubes called ‘Range Modules’ will appear. Hit a Range Module to get a buff that will allow you to hit the boss from a very long distance! The buff lasts 45 seconds, you will likely need to refresh it during the fight.
When hitting a range module, use a low DPS ability once. You only need to tap it lightly to get the buff and then can switch straight back to the boss to continue DPS.

Continue to interrupt Legion’s Pull.

Notes for Healer: You are expendable. Better to die in the red than kill a DPS.
Notes for Tank: You will be caught in the first red, after that you can move out with the rest of the raid, but be careful! Choose DPS players you trust not to kill you to move out with. 

Note: It may seem like the tank should be in the middle! The player in the middle spot is more likely to die during the first two rings of Safety Dance. You will need your tank alive more than your healer at this stage.

Static Pulse circle of pain around players - The animation often bugs so it can't be seen, but the effect is still there!
The Inny Outty phase!

Achievements Available

Commendations of Steel

Complete all the cheevos listed below.

Breaker of Steel

Defeat all 3 bosses.

Azranel
Fallen Angel

Defeat Azranel.

Clipped Wings

Defeat Azranel in under 5 minutes after the battle begins.

Call Tech Support

Most of the damage to the towers can be done with splash damage, or you can allocate specific DPS to kill the towers while the rest gets the boss down. You can use Rift Meter to help you keep track of how many towers you have killed (in damage taken under enemies). Be careful when counting not to include the boss too.. or you will end up with only 9 towers killed (We call this ‘Counting like Yarr’).

Here is a video of a group completing this cheevo, filmed by Zueda.

Just a Little Prick

Everyone will get this achievement every kill as the Imbedded Shrapnel ability isn’t in the game.

Commander-Isiel
Commander-in-Chief

Kill Commander-Isiel

Unscathed

No die during the Isiel fight peeps!

Fire, Fire, Everywhere

There are the red circles that are dropped by raid members during the first phase of the fight.
You will need to slow DPS waaaay down. Get your DPS to single target the adds instead so the tank doesn’t get squished.
Start by tanking Vindicator towards the back of the room. Players should drop the red up against the outer wall at the back. Then Vindicator can be slowly kited along the outer wall away from the already dropped red, this way more space opens up for fresh red circles.
Dropping 10 red circles will take a lot of time (Roughly 4min 30sec). This will give you much less time for phase 2.. so you will need super DPS to still be able to kill Isiel before enrage.

Firing Squad

Dont get hit by the purple bubbles during the second phase of the fight.
Be sure to stack tightly on the safe spot!

Titan X
Trial of the Legion

Kill Titan X

In a Timely Fashion

Titan X will gain a stack of Roar of the Crowd for every add that hit enrage during the first phase.
To get this cheevo you will need to kill the adds very quickly and be sure none of them reach enrage.
This will be most difficult of the final add phase with the 3 Fire Spigots, because they are so spread out you cannot AoE them down. Be sure to split your DPS between the Fire Spigots during this phase. With more DPS on the Fire Spigot where the adds will be gathered to.

Calamity

Titan X will gain a stack of Roar of the Crowd for every add that hit enrage during the first phase.
You will want 10 adds to hit enrage. It is up to you which add waves you want to go slow on.

Resource Management

The Range Modules are the yellow cubes that pop up during the final phase.
Your DPS will need to be super careful not to kill any.
Remove all AoE and Splash damage abilities from your bars. This should prevent the cube closest to Titan from being destroyed.
When DPS player hit a cube for the buff, they should use their lowest hitting ability ONCE and then switch straight back to the boss.
If your raid is still killing boxes, check a DPS meter to see who didn’t get the memo!

Can The Ascended Dance? I Don't Know, Can They? Let's Find Out.

Ah yes the inny outy phase!
You gotta stay out of the red peeps!
This is gonna be super easy for your DPS, but not easy for your tank/heals as they don’t have a proper spot on the circle.
The easiest way to mitigate this is to have your healer and a DPS (Preferably the lowest DPS) die before the safety dance starts. As you cannot last resort in BoS, the easiest way for them to die will be to run towards the outer wall and then stack on top of each other. This way their corpses will be out of the way for the players still doing the safety dance.

LIVE on Twitch OFFLINE
on Twitch