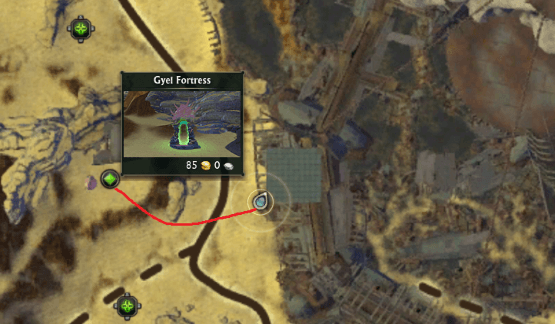
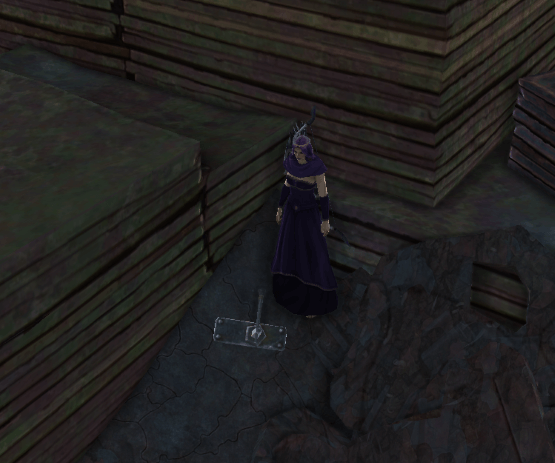
The entrance is a lever hidden in a pile of rubble at /setwaypoint 3014 5981 It’s very easy to get to! The lever doesn’t sparkle but it does light up slightly when you mouseover it. Simply click the lever to be ported up to the puzzle.
Introduction to The Puzzle
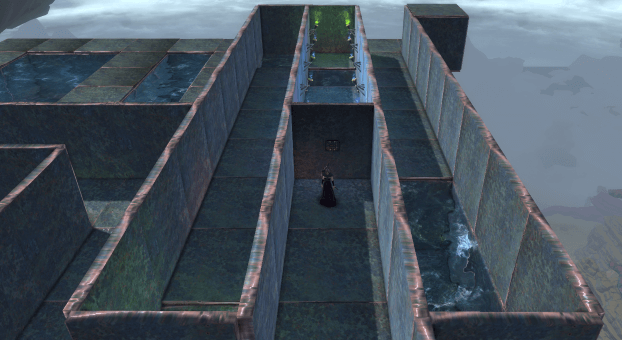
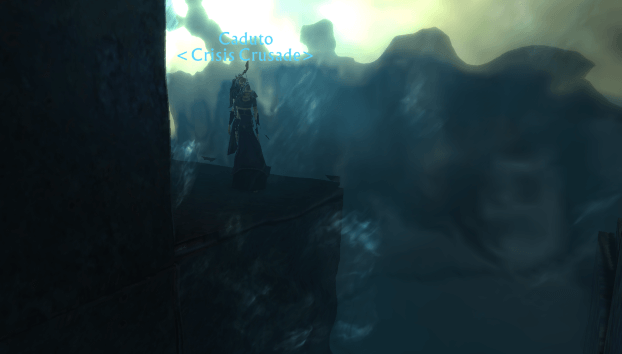
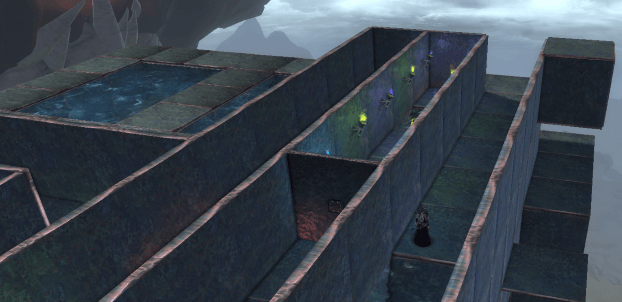
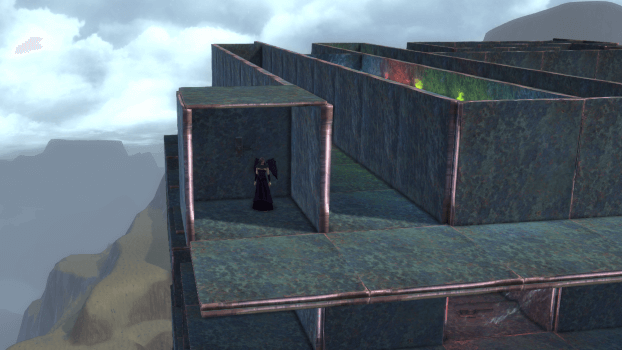
The Goboro Reef Puzzle is a large cuboid maze structure floating above Gyel Fortress in Goboro Reef
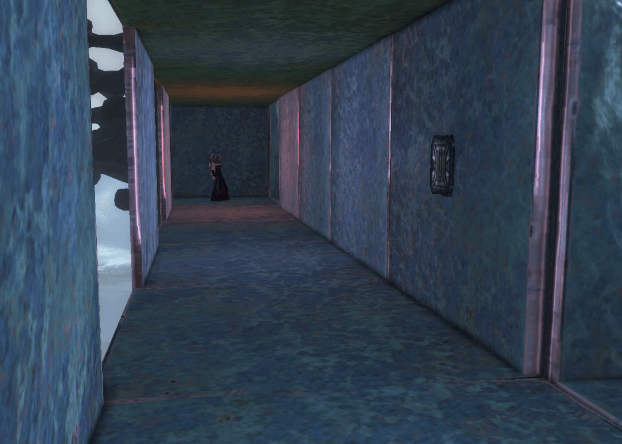
The puzzle is a maze where you have to find the route through in order to get to the chest at the end. When you first enter the puzzle you will see the final chest behind the wall to your left.. no, you cannot get over that wall! There are 9 mini puzzles that need to be completed as you go through the maze. Each mini puzzle has a chest at the end to loot a key from, with an extra key to loot right at the end, once you have all 10 keys you can then loot the final chest. The maze will take a while on your first few attempts. You can log off and then log back in and carry on from the same position/puzzle. You can also banner/summon another player or an alt from another account to create a ‘save point’ so you can come back to the puzzle later to complete it.
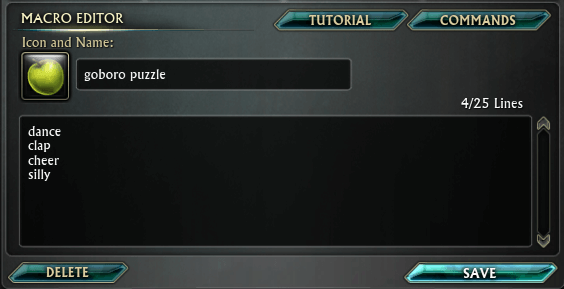
You will want to create a simple macro for puzzle 6. Set it up as in the picture with..
dance clap cheer silly
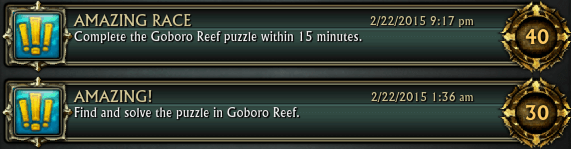
Less than 15 minutes - Amazing Race Cheevo
The puzzle is easy enough to do, the challenge is doing the puzzle in less than 15 mins, which is why there is a separate cheevo for this. I suggest you use a speed spec and then just practice til you get quicker and quicker and eventually run in under 15 mins. You can see videos of me doing the 15min cheevo with each class on the speed spec page. The 15 minute timer starts as soon as you hit the clock! You can cheat a little on the first puzzle, the torches. Before you click the clock, go around to the torches, remember the pattern, then swim down to the puzzle and click 4 of the torches to the correct colour, then pull the lever, go back up to the clock to start the timer, swim back down to the torches and you only have to change one torch to the right colour to make the chest appear, thus saving you a small amount of time at the start. You cannot click the clock if you have keys still in your bags, destroy all your keys to reset the puzzle and be able to start the clock timer. If you fall off or lose time some other way and want to restart then you will need to wait for the 15min timer to count down to zero before you can click the clock to start again. I have found no way to ‘abandon’ the quest to restart sooner, so its best to continue the puzzle to practice.
Bring your friends along!
You can bring your friends with you! Every player will need to loot each of the treasure chests to get their own keys to be able to loot the final chest. Treasure chests will only be available to loot for a short amount of time, 3 people is a good limit, otherwise you will have to repeat puzzles or switch shard to do the puzzle again to make the chest spawn again. Your friends can make it easier to complete the puzzle for speed runs, a few of the puzzles can go quicker with more than one pair of hands, such as puzzle 4, each player can hold a different torch to bring back to the braziers.
Note: Only one player at a time can get the speed run cheevo ‘Amazing Race’. The player that clicks the clock at the start of the puzzle will have the timer, other players will not be able to click the clock, but can run the puzzle with their friend to help them achieve the speed run. You will have to take it in turns with your friends, running the maze repeatedly til you all have the cheevo!
Falling off!
You will fall off. When you fall off, you will drop a short distance and then be ported back to the start of the puzzle cube. During the first few puzzles this isnt much of an issue, you can easily catch up to where you were and continue. If you fall off while doing the last few puzzles then you may be able to use the Opie mount to help you get across to where you need to be, or you can get partway there and then run through the puzzles til you catch up to where you were. As long as you do not delete the keys from your bags then you can just skip each puzzle and click the exit levers/run through straight to the next puzzle.
Goboro Puzzle Walkthrough Guide
I have created 3 tiers of guides for the puzzle.
SUPER QUICK GUIDE – for those players who like a few hints, but want to figure out the bulk of the puzzle by themselves.
QUICK GUIDE – for players who have gone through the puzzle before and are trying for speed runs.. It may be a good idea to print this out and have it on your desk, or have it on your second screen
DETAILED GUIDE – a full breakdown of every tunnel, every puzzle, every lever and every chest. For people attempting the puzzle for the first time (or even the second and third time!)
NOTE: If you have tried and failed at this puzzle before and you are now finding that you cant interact with certain areas of the puzzle then it could be because you still have a few of the keys stashed away in your bags or even in your bank, you will need to find and delete those keys to be able to start the puzzle fresh. NOTE: If you find a puzzle chest will not pop, switching shard and doing that section of the puzzle again will usually fix this.
Super Quick Guide - For peeps who want a challenge!
Note that Mini-Puzzle #1, #5, #8 and #9 will change solution each attempt, while others stay the same. 1 – Torches – Match the colours. 2 – Four levers to pull in order. 3 – Swim round in circles x8. 4 – Grab the 4 torches to light the braziers. 5 – Four levers to pull in order (square room). 6 – 4 emotes (macro). 7 – Chest that spawns in order to chase. 8 – Find the odd shield. 9 – Match the coloured levers to hint. 10 – Easy chest with hard jump.
Quick Guide - To jog your memory during speed run practice.
Entrance is a lever at /setwaypoint 3014 5981 When you are ready to try your speed run you will be able to click the clock and it will give you a timer so you can keep track of how much time you have left..
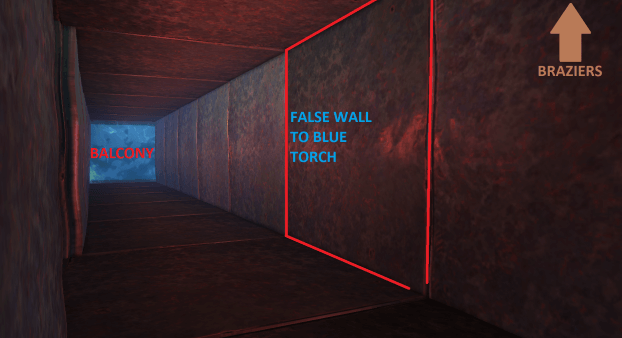
PUZZLE 1 – Walk through the wall, take note of colour of torches – Swim down to torch room, recreate colour sequence – Loot the chest, pull lever, jump up into water – Swim back up, jump across to lever, swim down hole, jump out very near bottom, take second door on the left
PUZZLE 2 – pull levers 1,2,3,4 – loot the chest, pull lever – Back to start position, jump up into water – Back onto balcony, take tunnel where you jumped from earlier, swim up to exit near top – Pull lever, walk along new platforms, jump down into hole – Go along tunnel, pull lever, through false wall, jump up into water – Swim up, take tunnel east with hole in floor, go down hole, take left before wall of water
PUZZLE 3 – Swim round and round in direction of lights til chest appears, loot chest – Go out wall of water, drop down in the corner, pull lever furthest away, take jump pad up into water
PUZZLE 4 – find all the torches and light the braziers – loot chest, pull lever, go out through new exit, wait for drop
PUZZLE 5 – Figure out pattern of levers, loot chest, pull lever, go out through new exit – Drop down, pull lever, race around to leap pad, go up into water, swim all the way to the top, exit at balcony
PUZZLE 6 – Use macro for emotes, loot chest – Back out to balcony, take far left exit, swim up, take first left, click lever – take new platforms around the corner, walk into water asap, continue along tunnel
PUZZLE 7 – Follow chest around 16 times – loot chest, pull lever, go through new exit – Follow tunnel to balcony, go in middle entrance
PUZZLE 8 – Find shield that doesn’t have a pair – loot chest, pull lever – go up through new exit in middle of shield room
PUZZLE 9 – go to hint room, pull levers in each colour room to match hint room, loot chest – pull lever, go out new exit
PUZZLE 10 – Walk around, grab chest, pull lever, VERY QUICKLY walk back around, go through new exit – CAREFULLY jump out of water onto platform, loot chest.
Detailed Guide - For your first few attempts
Each puzzle is split into two sections, the first being the route to the puzzle, the second is the actual puzzle. The section starts with a picture guide of the process and then a video of the whole process at the end of each section.
Starting Area
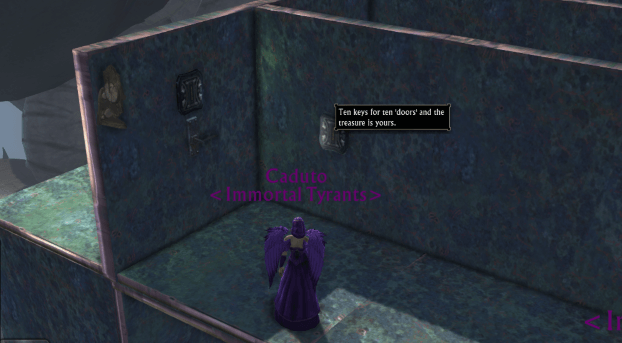
When you pull the lever and teleport up to the puzzle you will arrive on the first platform. There is a lever to take you back down again, a clock that will time your attempt and a plaque to tell you that you need to collect ten keys for the ten doors within the puzzle.
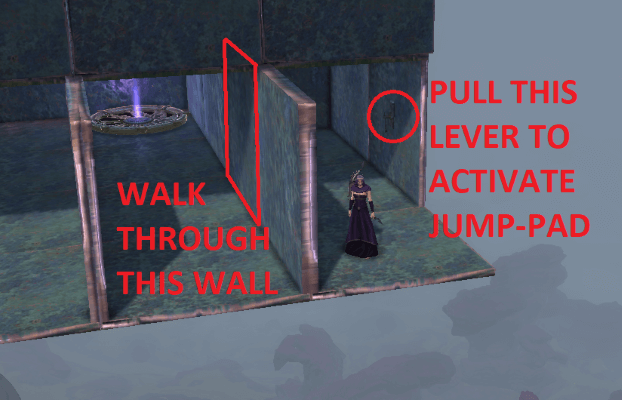
Route to Puzzle 1
The first puzzle is a simple matching game.
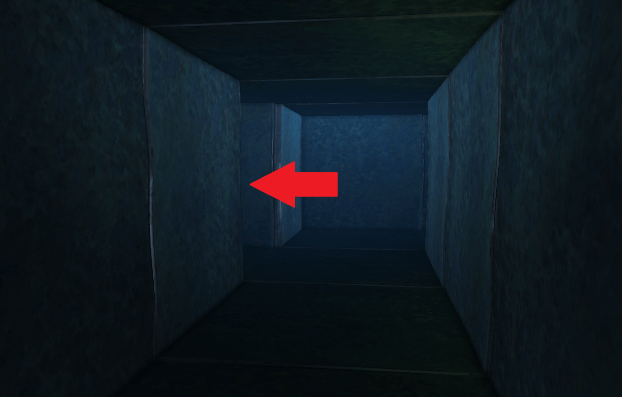
Taking the second left turn on the top floor will bring you to a ‘wall’ with torches behind it.
WALK THROUGH THE WALL!!!
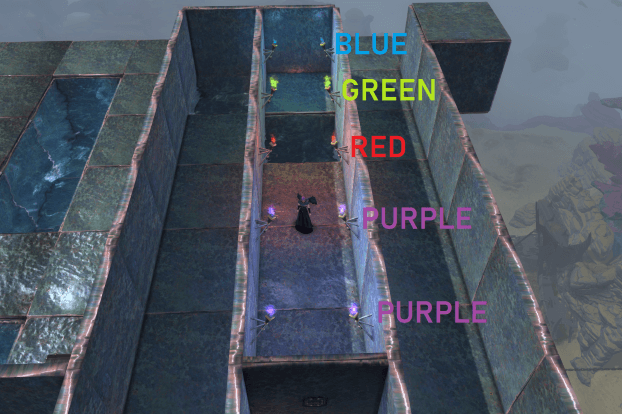
Look at the colours of the torches and remember the order.
The order of the torches will change every attempt.
for this attempt, the order is
BLUE
GREEN
RED
PURPLE
PURPLE
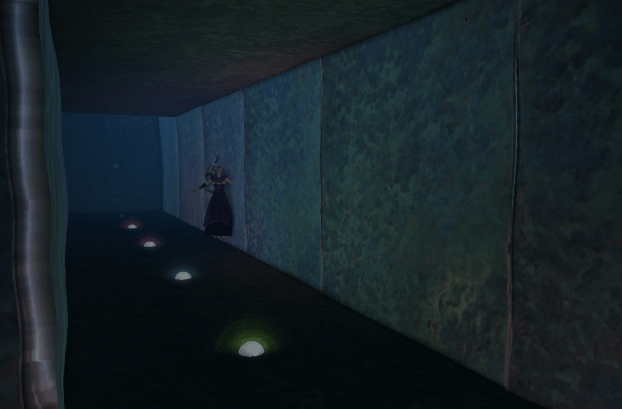
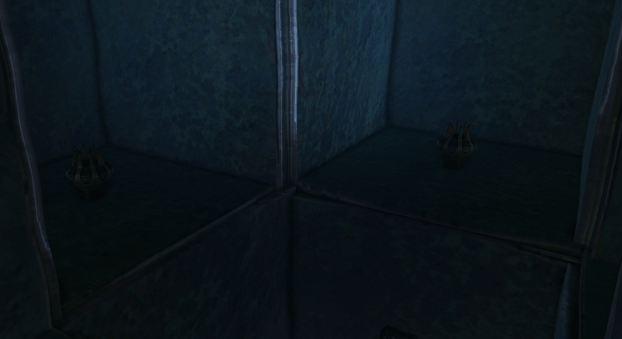
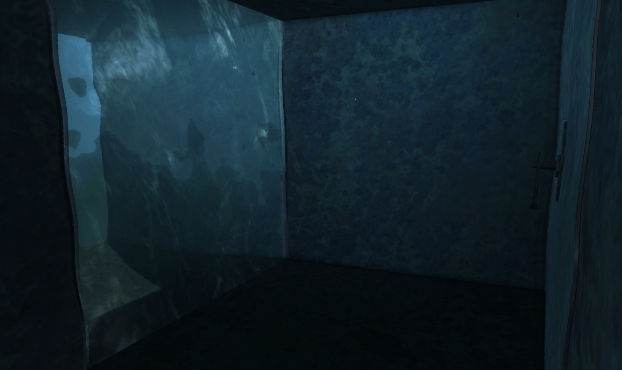
Then swim down the hole in the floor between the torches and find the room with the next set of torches
Video of the Route to Puzzle 1
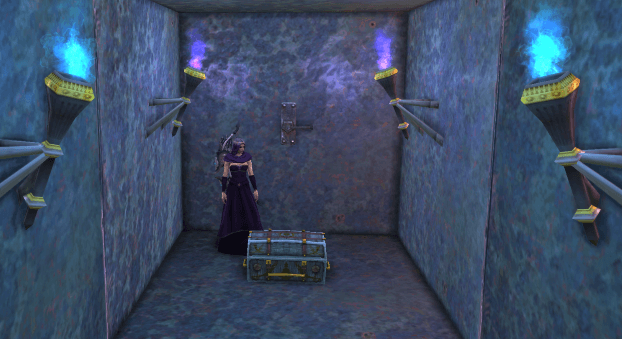
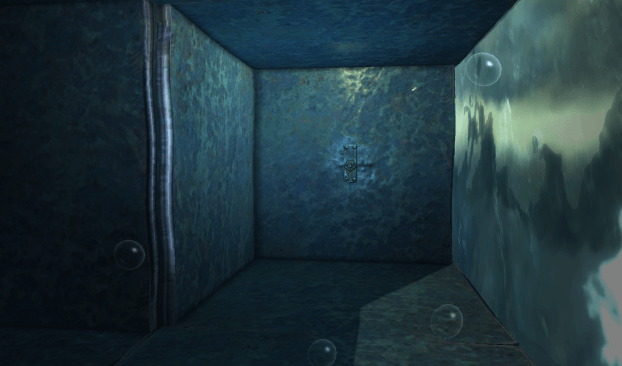
Puzzle 1 - Torches
This room also has 5 sets of torches on the walls. You need to right click the torches to cycle through the colours to make them match the colours of the first set of torches.
The order the colours cycle through is.. none >> red >> purple >> green >> blue — (repeats)
There is a lever at one end of the puzzle, the torch closest to it needs to match with the torch closest to the ‘fake wall’ up top. So for this try, the torch closest to the fake wall was purple, so the torch closest to the lever needs to be purple.
If you walk in the torches room and the torches are already in the correct order, simply cycle through one torch til its back at the right colour again to make the chest appear.
If you have forgotten the order the torches were in, you can click the lever at the end of the room to make a jump pad appear, take the jump pad back into the water and swim back to the torches to look again.
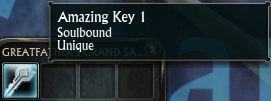
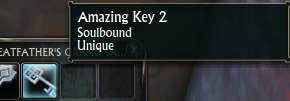
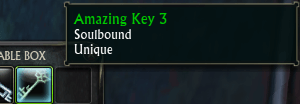
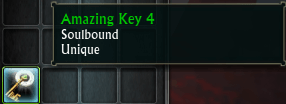
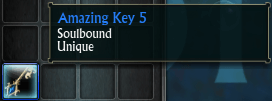
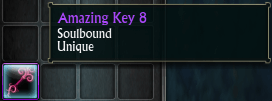
When you loot the chest, you will receive your first amazing key!
Keep this key safe!
Video of Puzzle 1
Route to Puzzle 2
Once you have looted your key, click the lever to make the jump pad appear.
You can now use this to jump back into the water and make your way to the next puzzle.
Swim back up to the first set of torches, then back through the fake wall.
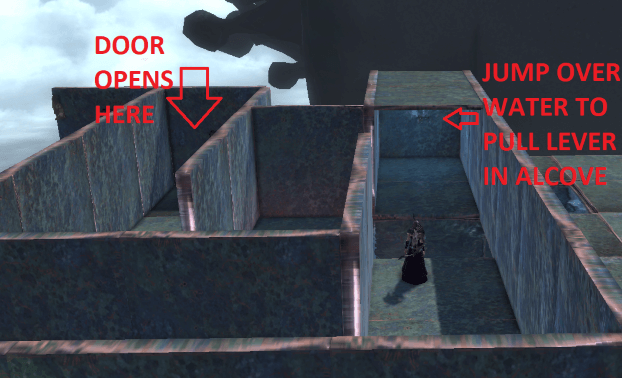
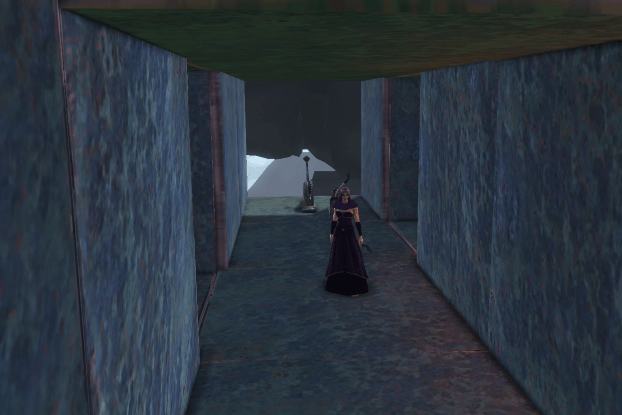
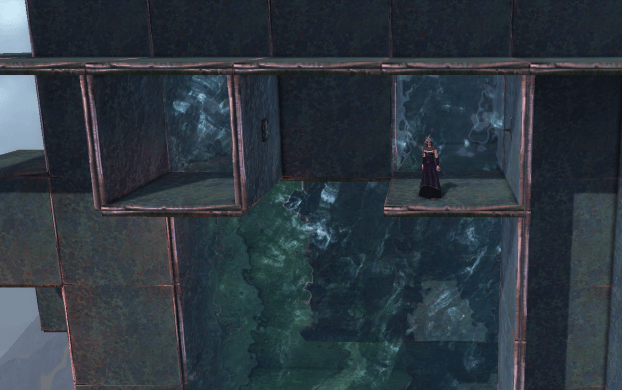
Turn right and right again, then jump over the square of water into the alcove and pull the lever to open the next door.
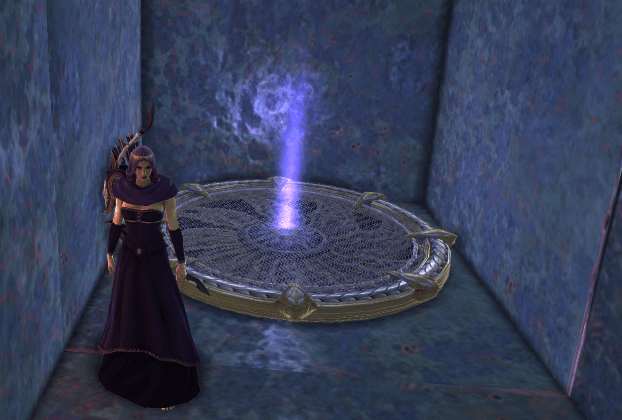
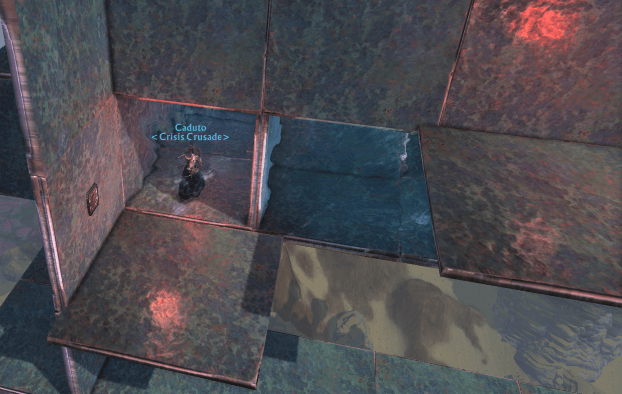
The door opens as a square of water to swim down right in front of the plaque. (shown here on the floor just behind me)
The door is only open for a short time, so you have to be really quick from pulling the lever to making your way to the door and swimming down.
Stop swimming one square before the bottom.
Looking towards the west you will see the water stops and there is a ledge you need to jump onto.
Swim right up to the ‘edge’ of the water up close to the right side wall, angle your char so you are facing the ledge to the left then jump out of the water onto the ledge.
This will likely take a few tries! if you fall, you will be ported back to the puzzle beginning and you can pull the lever to open the door to try again, the puzzle does not reset! (you don’t need to do torches again)
Take the second door on the left! Follow the corridor all the way around.
Video of the Route to Puzzle 2
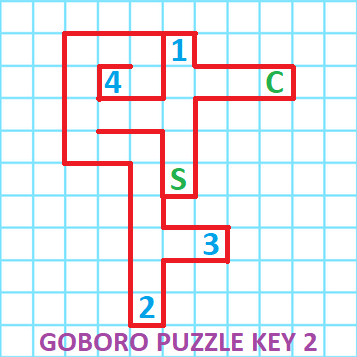
Puzzle 2 - Levers
You will find yourself in a series of tunnels with levers.
Through the various tunnels there are 4 different levers.
You need to pull the levers in the right order in order to switch them all to the ‘on’ position.
I have labelled the levers in the correct order for you..
S = start position 1-2-3-4 = pull the levers in this order C = loot the chest
When you have pulled all 4 levers the chest will appear in the C position. If someone else has messed with the levers before you get there then this may not work.. switch shard and hope to get a fresh set of levers!
Loot the chest for your second amazing key!
Keep this key safe!
Video of Puzzle 2
Route to Puzzle 3
Pull the lever next to the chest and a jump pad will appear back at the start position ‘S‘ for you to get back up to the water.
Go back through the tunnel to the ledge you were on earlier.
Take the water tunnel where you jumped out from earlier.
Swim up the tunnel til you hit an exit halfway up (facing west)
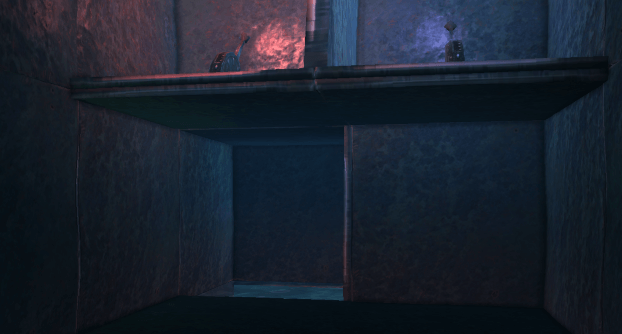
At this exit there will be a lever to pull.
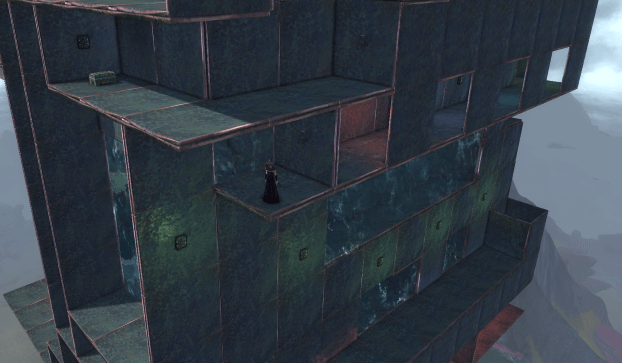
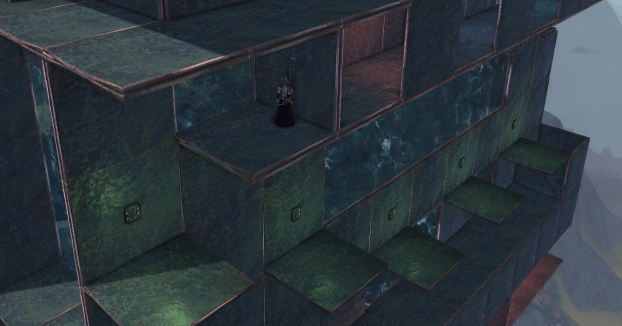
Pulling the lever will make a series of platforms appear. You need to drop down and then walk and jump across the platforms and drop down the hole at the end!
You have to do this very quickly as you are on a timer
Pull the lever, walk backwards to first platform, walk normally to ‘fall’ to next 2 platforms, then gently jump to the next 2 and walk to drop down the hole.
Once you are down the tunnel, follow it to the end and drop down to a ledge with a lever to pull. When you pull the lever a jump pad will appear in the tunnel next to you WALK THROUGH THE WALL The middle section of wall is not really there.. simply walk through it to get to the jump pad.
Swim up and take the tunnel facing east.
You will notice a hole in the tunnel floor, swim down that.
Follow the tunnel down and take a left before you hit the wall of water
Video of the Route to Puzzle 3
Puzzle 3 - Swim
Puzzle 3 is a circular tunnel. Going around the tunnel are a series of lights that go around and around in a circle. You need to follow the lights! You need to swim around the ‘circle’ about 8-10 times. The third chest will then spawn.
The chest will spawn halfway along the top tunnel section.
This chest will give you key 3.
If the chest doesn’t spawn for you. A few players are having trouble getting the chest to spawn. Some tips to help include.. — Leave the puzzle area for 15 mins to allow it to properly reset. — Swim just behind the lights as they go round, this will be slower but may give you better results. — Ensure the player that clicked the clock (timed run) is the one swimming.
Keep this key safe!
Video of Puzzle 3
Route to Puzzle 4
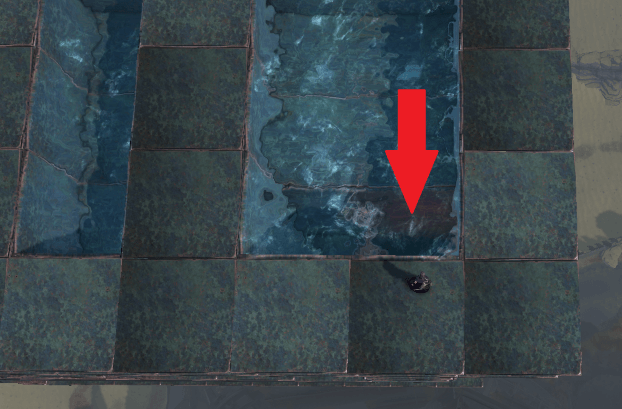
Once you have looted the key step out of the water onto the ledge on the outside of the puzzle.
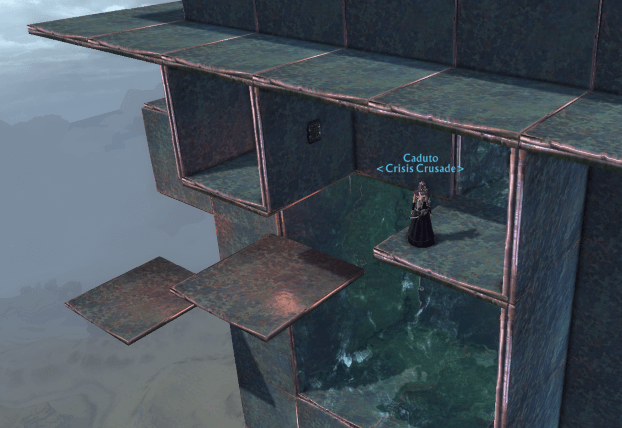
Then drop down at the very corner of the puzzle to the bottom platform.
When you first drop down there will be a lever right next to you, ignore it and go around the platform to the lever towards the back.
Pulling that lever will spawn a jump pad right next to you. Use it to get into the water above.
Video of the Route to Puzzle 4
Puzzle 4 -Braziers
This puzzle is a lot of swimming through tight corridors.
The aim of the puzzle is to light 4 braziers, they are all located in one of the tunnels.
Your job is to find 4 differently coloured torches and bring them to the braziers to light them up. When all 4 braziers are lit up you will receive the fourth key.
Finding and learning the correct routes will take a lot of practice!
There is a video at the bottom of this section!
Each torch will give you a differently coloured buff. The buff lasts for 2 minutes, you need to carry the buff to the brazier and light it.
You can only carry one torch buff at a time.
When you light the first brazier you are then on a timer to get the other 3 lit up, it seems to be around 5 mins timer.
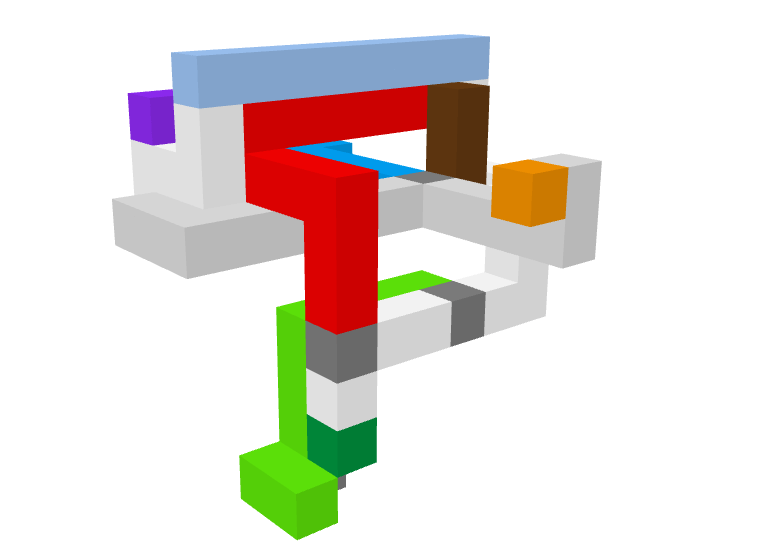
dark green = tunnel entrance / start position red = red torch dark blue = blue torch purple = purple torch green = green torch pale blue = ‘bridge’ over the top brown = braziers orange = lever white+pale grey = main tunnels dark grey = junctions be aware that a lot of the routes go through fake walls
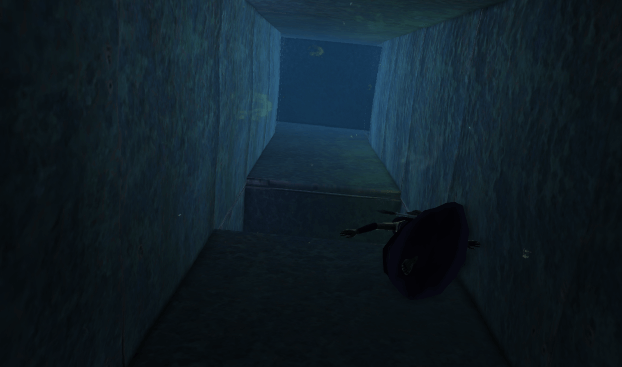
When you first enter puzzle 4 you will be in a vertical tunnel with a junction halfway up.
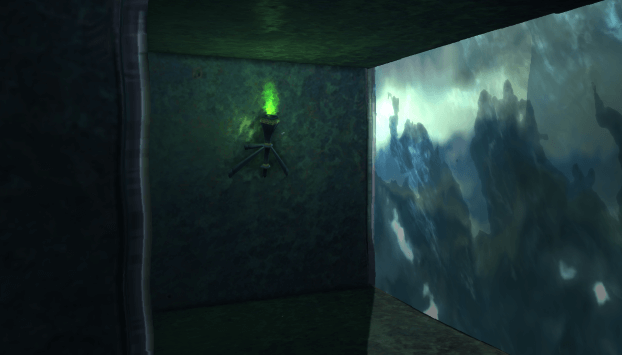
At the top of this tunnel is a T junction, one side leads to a wall of water, the other seems to be a dead end.. its not a dead end! Go through the wall and follow the tunnel to the red torch. Then navigate to the braziers (brown on the map) and click the brazier (only one will be clickable) to deposit the red flame.
Then go all the way back to the first tunnels to grab the green torch. The tunnel to the green torch contains a false wall, once past the false wall you will be on top of the false floor! Swim down!
If you are doing the puzzle as two players, you can have one player go for the red torch while the other player goes for the green torch.
Take the green torch all the way to the braziers and light it up!
Next is the purple torch come out of the brazier tunnel and back over the ‘balcony’ area there is a false ceiling that you swim through to grab the purple torch.
Take the flame back to the braziers. If you are playing with 2 people, the other player should be grabbing the blue torch.
The blue torch is just below the braziers behind a false wall.
Grab the blue flame and take it up to the braziers.
Once you have lit all 4 braziers the chest will appear in the tunnel below the braziers. Loot it for key 4
Keep this key safe!
Video of Puzzle 4
Route to Puzzle 5
From the chest containing key 4, go to the tunnel on your right (facing north as you go through the tunnel) and find the lever at the end (up in its own little alcove)
When you pull the lever the wall opposite the lever will disappear to allow you to go through.
You have now reached the end of the puzzle as there is clearly nowhere else to go!
Wait..
Wait..
Oh! and we all fall down!
(Standing on the platform for roughly 7 seconds will make it disappear and you will drop down!)
Go straight into the tunnel to find lever room.
Video of the Route to Puzzle 5
Puzzle 5 - Levers in Square Room
You will find yourself in a room with 4 levers. Your job is to find out the order to click the levers in to make them stay in the ‘on’ position.
I am unable to tell you the order as it changes every puzzle attempt!
Start by clicking each lever in turn til you find the one that stays on, this will be your first lever. Then click the other levers to see if you can find the second lever, you need to be quick or the first lever will reset.
There is a sweet spot in the middle of the room where you can reach all the levers without moving.
If you get the wrong second lever then the first lever will go back to the off position too and you will need to reclick it.
With trial and error you will quickly find the correct pattern.
Once you have all 4 levers in the on position the chest will appear at the end (round the corner) of the tunnel that is under the green lever.
There will be no message to tell you the chest has appeared and the levers will reset very quickly once you have them all in the on position, so you may think you have failed the puzzle, go check if the chest is there anyway, it will disappear after about 15 seconds if you don’t loot it! If you are playing with 2 players, have one player stand at the chest location to tell the other player when it appears.
Keep this key safe!
Video of Puzzle 5
Route to Puzzle 6
On the wall opposite where the chest was is a lever. Pull this lever to open up the route to puzzle 6.
When you pull the lever the floor beneath the red lever area will open up to allow you to drop down. When you drop down there will be another lever to pull straight away. Pulling this lever will activate a leap pad.
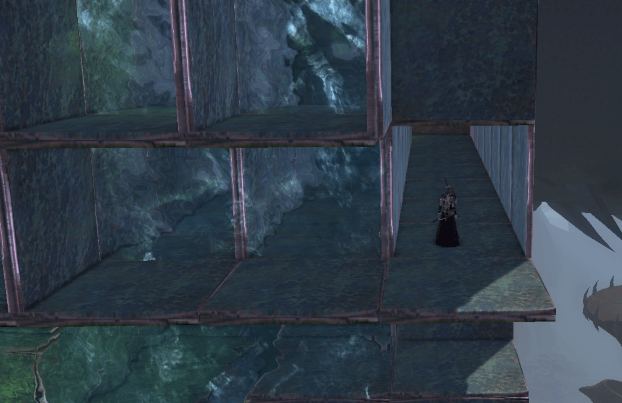
The leap pad is all along the winding platform… be VERY careful here not to fall! DO NOT try to jump over the gap.. the ceiling height here does not allow for such jumps and you will fall!
Once you reach the leap pad, use it to jump up.
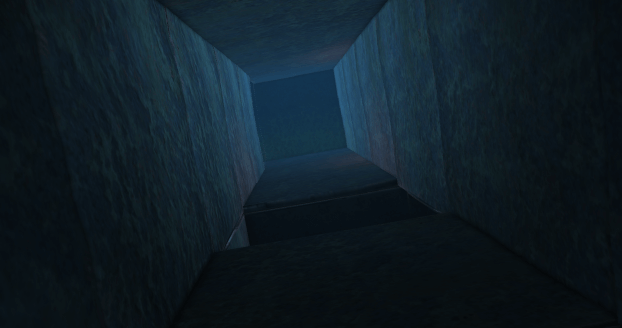
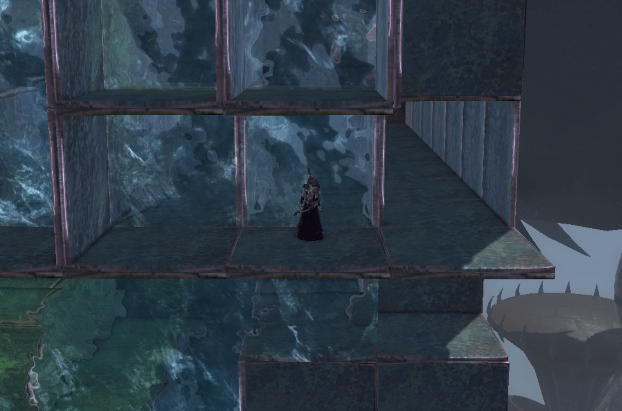
You will find yourself in a vertical tunnel with a junction halfway up and a corner at the top.
Swim all the way to the top.
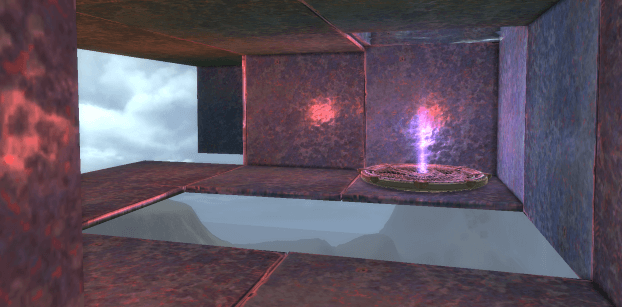
Follow the tunnel all the way until you reach the next balcony.
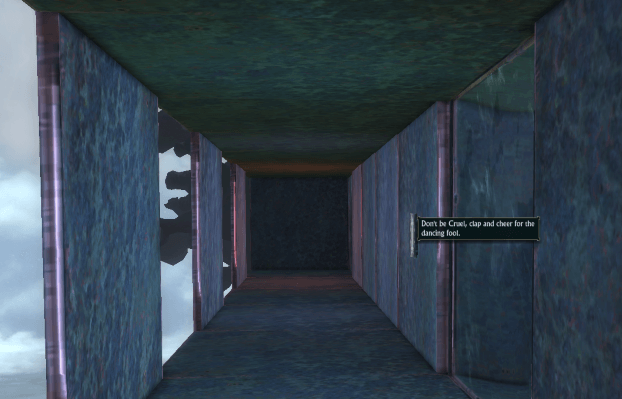
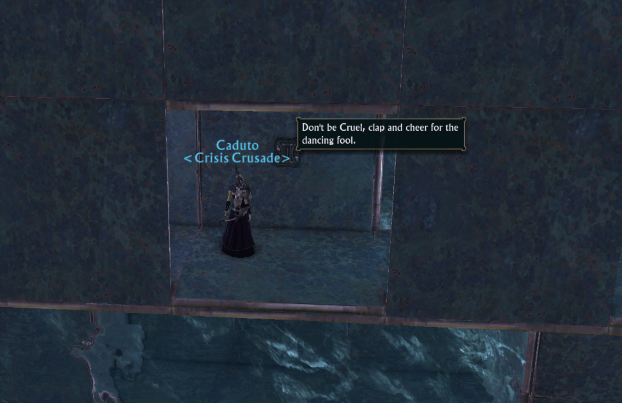
On the balcony is a plaque on the wall, this is puzzle 6.
Video of the Route to Puzzle 6
Puzzle 6 - 4 Emotes
Stand in front of the plaque and use your macro!
You only need to click it once.
The macro will make your character dance, clap, cheer and be silly all at once, which will complete the puzzle!
dance clap cheer silly
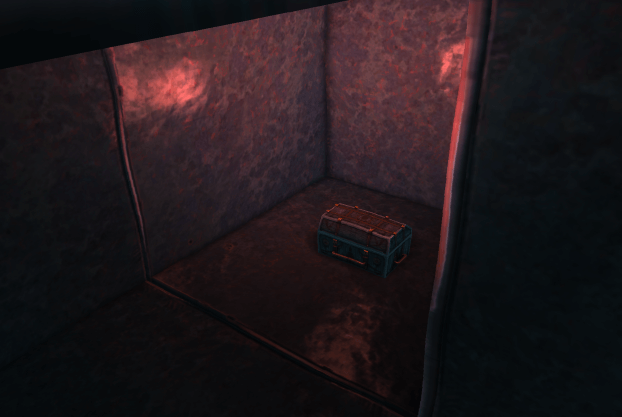
The chest will appear at the end of the water tunnel that is just to the right of the plaque.
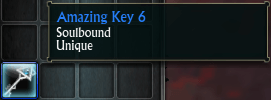
Looting the chest will give you key 6.
Keep this key safe!
Video of Puzzle 6
Route to Puzzle 7
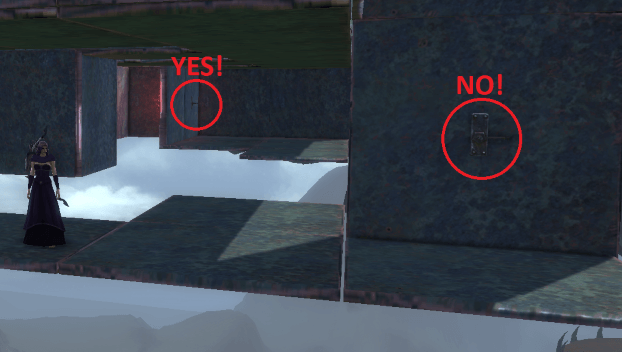
Once you have looted the chest, go back out to the balcony with the plaque and go to the very end into the tunnel of water.
Swim up and then along and take the first left.
You will find yourself on a small platform with nowhere to go!
Pull the lever on the wall and a series of small platform will appear.
Walk along this new path as quickly as you can, you are on a timer!
You don’t need to jump at all, just walk and turn at the corner and keep walking til you reach the end.
When you get to the last platform, DONT STOP!
Go straight inside the water tunnel next to you, or you will fall down!
Travel all the way to the end of this tunnel and then swim up, all the way to the top and out of the water
You have now arrived at puzzle 7.
Video of the Route to Puzzle 7
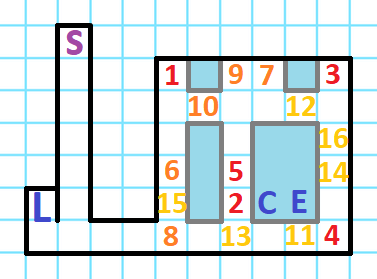
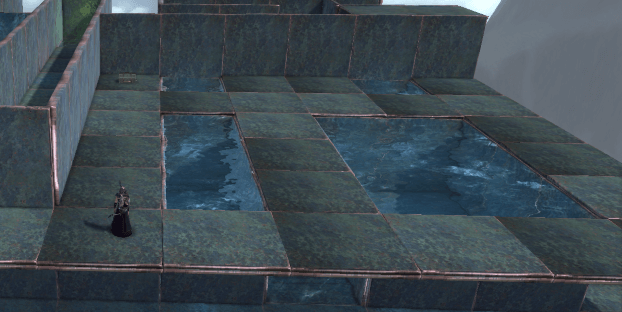
Puzzle 7 - Chase the Chest
When you first arrive at puzzle 7 the chest will be in the top left corner.
When you approach the chest it will disappear and move to another location on the platform.
You need to move to that location and then the chest will move again.
The chest will keep moving in a set pattern until it has moved 16 times and then you will have to swim down the tunnel to loot the real chest.
This is the pattern the chest appears in.
If you are playing with 2 people, one of you can do one half of the platform while the other player does the other half, this will cut your running times in half!
S = start area where you swim up from L = lever to pull after you collect the chest C = swim down here to access the chest E = after pulling lever, swim down here for route to puzzle 8 1–16 = chest locations
After the 16th chest has disappeared you will need to swim down the water tunnel at point C and loot the chest.
Looting the chest gives you key 7.
Keep this key safe!
Video of Puzzle 7
Route to Puzzle 8
Swim back up to the puzzle platform and click the lever (shown on the map as L)
When you click the lever a new tunnel will appear in the larger pool of water (shown on the map as E), be quick to move to it, as it will only be open a very short time!
Follow the tunnel all the way to the end and you will find yourself on a balcony.
Puzzle 8 is down the middle tunnel.
Video of the Route to Puzzle 8
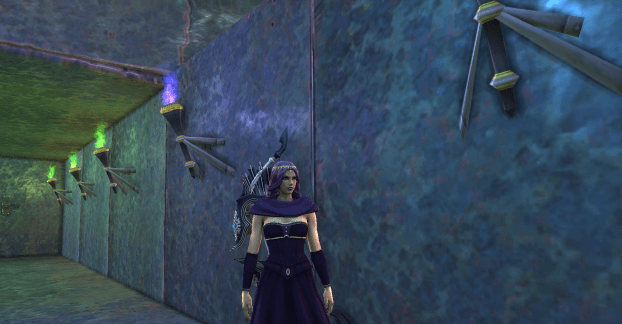
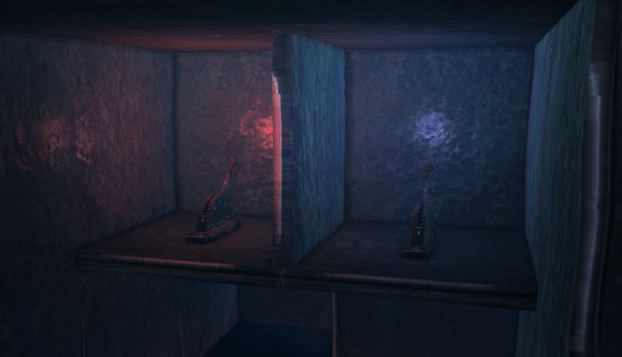
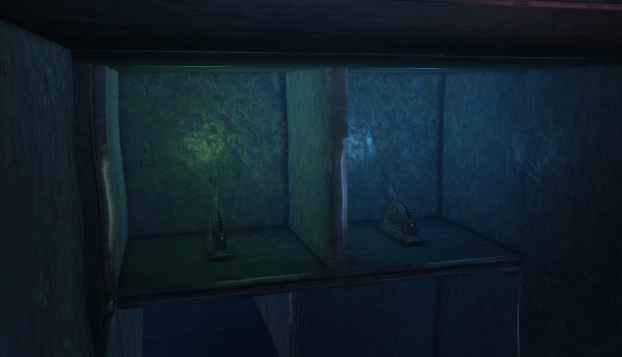
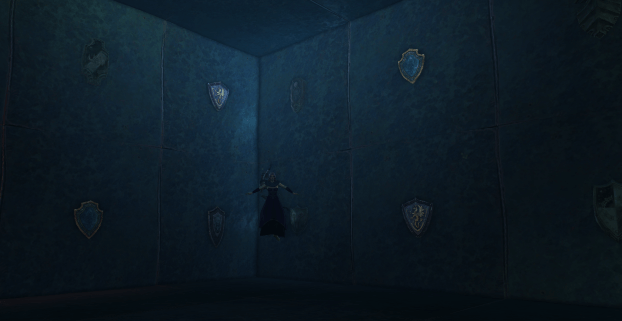
Puzzle 8 - Odd Shield
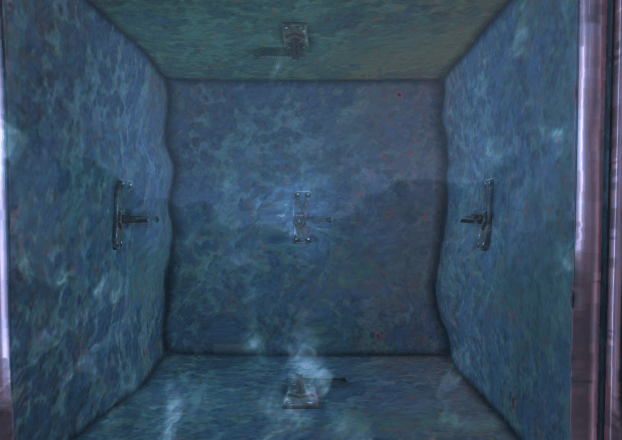
You will find yourself in a cuboid room with shields on all the walls.
Your job is to find the shield that doesn’t have a matching pair! There are 12 different shields, only 11 of them will be paired.
When you find the shield without a pair, right click it to ‘polish’ it.
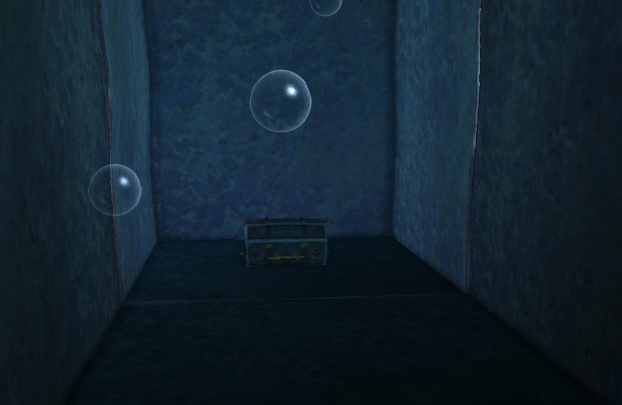
If you are correct, the chest will appear down by the puzzle entrance.
If you clicked the wrong shield, the shields on the wall will rearrange and you will need to try again.
Looting the chest with give you key 8.
Keep this key safe!
Video of Puzzle 8
Solution will be different each reset.
Route to Puzzle 9
Go back to the balcony outside the puzzle and take the third tunnel. At the end of the tunnel is a lever to click.
Clicking the lever opens up a new exit from the shield room, swim up the tunnel. Swimming up will put you in the start position for the next puzzle (don’t turn left or right at the top!)
Video of the Route to Puzzle 9
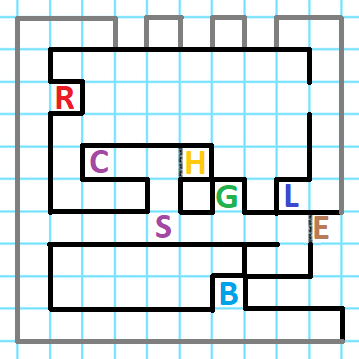
Puzzle 9 - Coloured Levers
I have made a map of the area for this puzzle.
S = start position H = hint room (behind false wall) R = red room G = green room B = blue room C = chest location L = lever to pull to open route to puzzle 10 E = exit to puzzle 10 once lever is pulled
If you fall while trying to jump to the lever at L, just swim back through the puzzle to come out at the gap just before the lever
From the start position, head straight to the HINT room. (Behind a false wall!)
This is a single cube room.
You will find plaques on the walls/ceiling/floor.
Hover your mouse pointer over the plaques to get your clue
The clue will be different for each run of the puzzle, so you will need to check each time.
You need to take note of the position of each plaque and the colour ‘written’ on them.
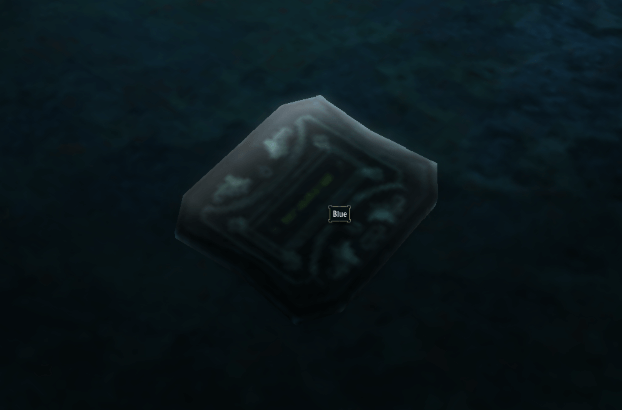
During this attempt I have a plaque on the floor which says ‘blue’
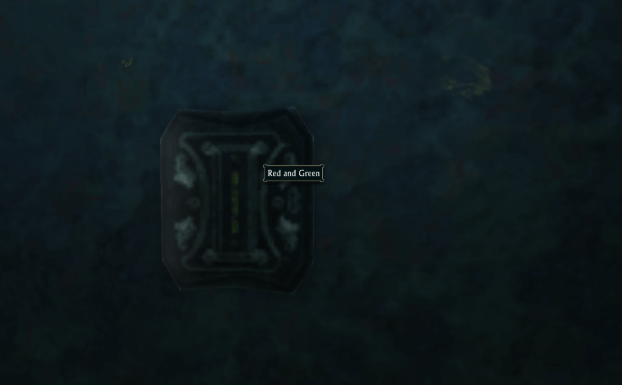
And a plaque on the right side wall which says ‘red and green‘
When you have your hints, move to each of the coloured rooms and use the hint to pull the correct lever.
This is the blue room, I will pull the lever on the floor to match the hint.
Then I travel to the red room and pull the lever on the right side wall, and then the green room to pull the lever on the right side wall.
When you have pulled all 3 levers head to the chest location to loot your key.
The chest is in the other end of the tunnel from the hint room.
Looting the chest gives you key 9.
Keep this key safe!
Video of Puzzle 9
Solution will be different each reset.
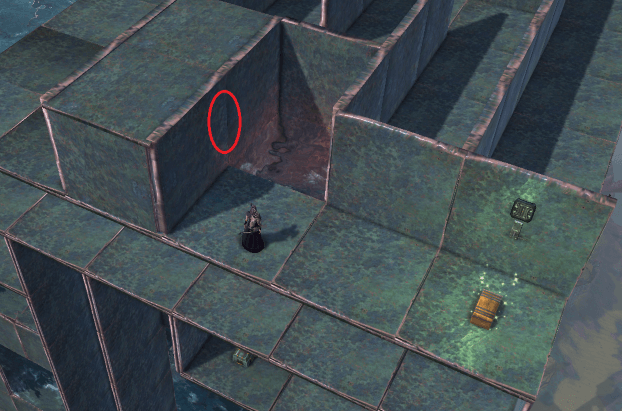
Route to Final Chest
Travel to the lever at position L on the map, when you pull it a doorway will open up at position E.
Travel all the way back around and go through the doorway.
Video of the Route to the Final Chest
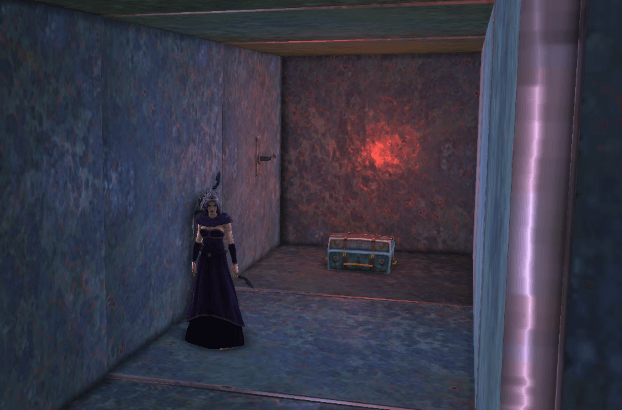
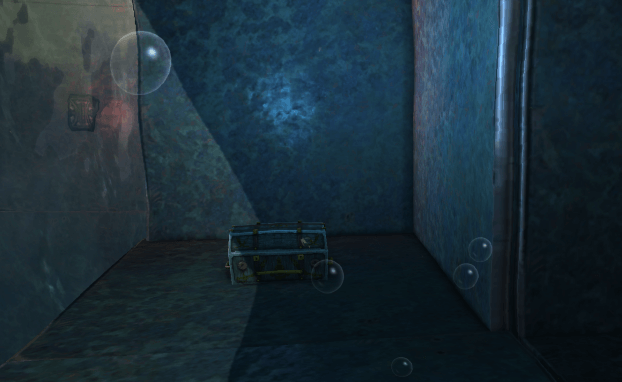
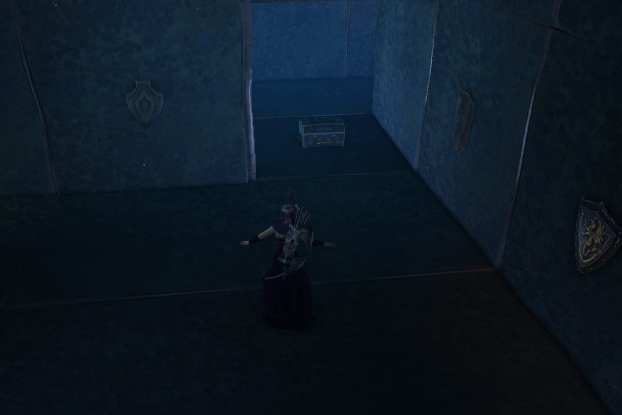
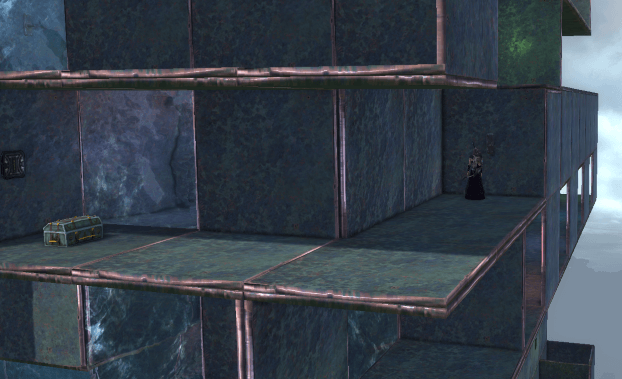
Final Chest
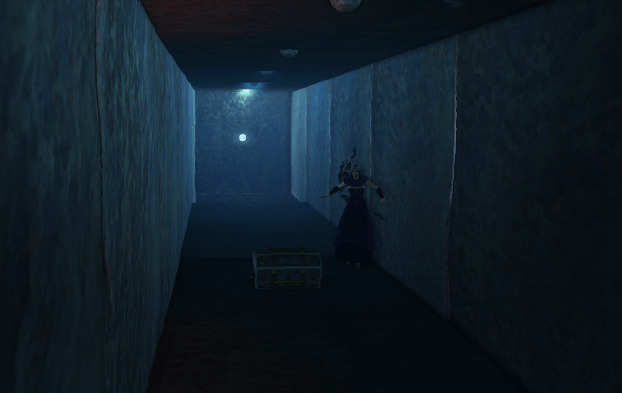
The final chest is right there! go grab it!
NO TRICKS NO TRAPS
Looting this chest gives you key 10.
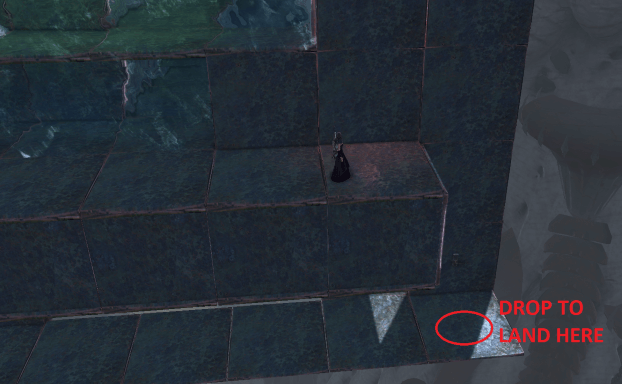
When you have looted the key, go back around the corner and pull the lever. This will open up a tunnel right next to the chest. You need to be VERY quick to get inside the tunnel.
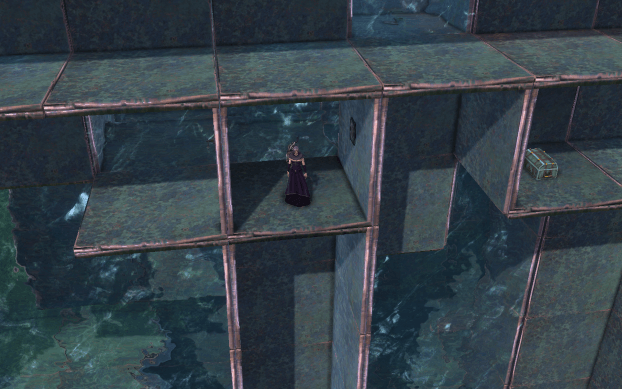
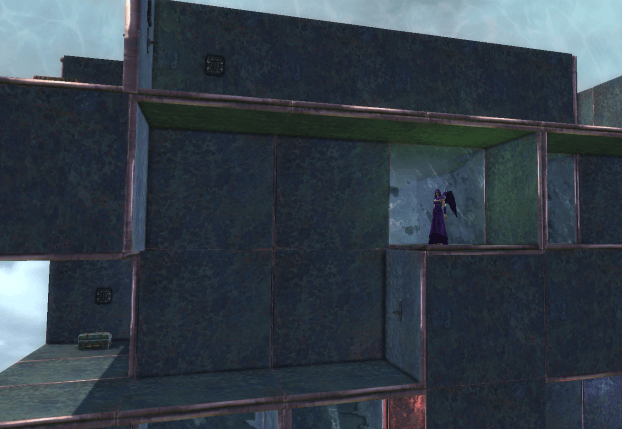
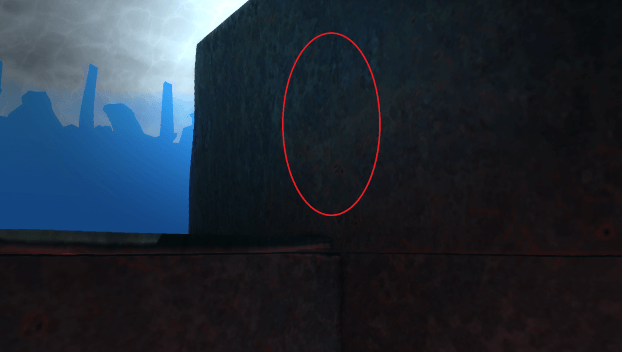
Now you have one of the most PITA jumps in the whole puzzle…
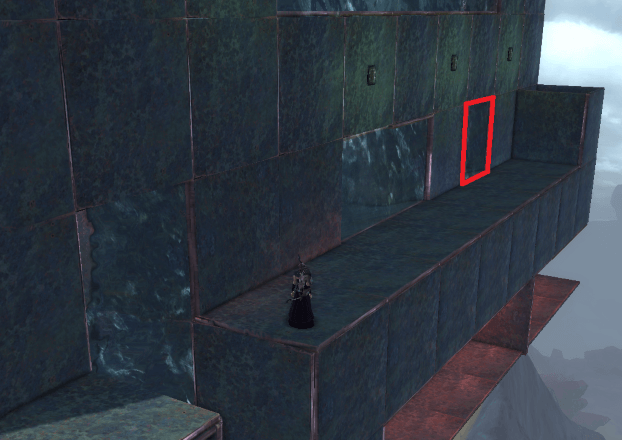
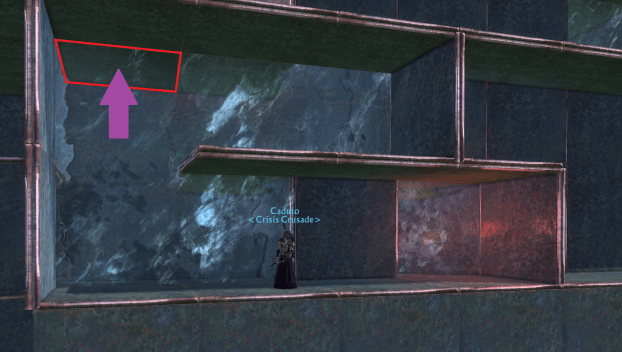
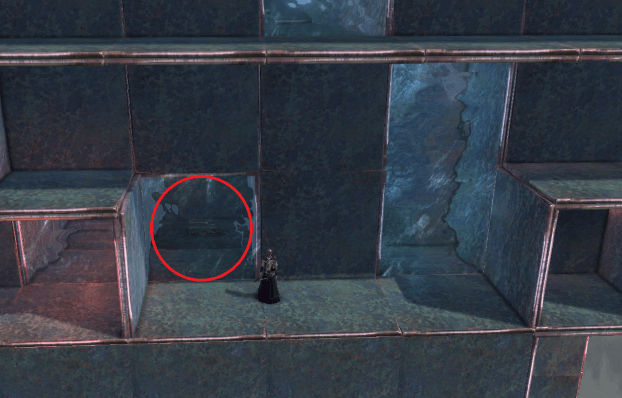
You need to jump out of the water onto the platform beside you without jumping over the edge!
Because in NMT areas you get the ‘frogs legs’ jump buff when exiting water, this can be very tricky to do.
I find the best way to ‘slow’ the jump down and keep control is to jump towards the wall.
Place your character in the far corner and then jump towards the area i have circled in red.
When you have made the jump, simply loot the final chest and you are done!
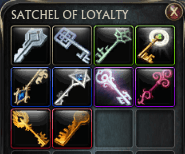
When you loot the final chest, all the keys you have collected will disappear and you will receive your reward.
Video of the Final Chest.
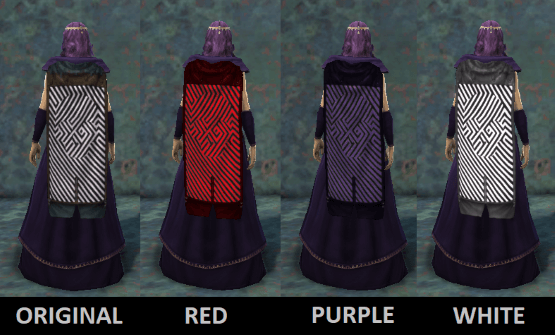
The first time you complete the puzzle you will also receive the costume for the ‘amazing cape’.
Repeating the Nightmare Tide puzzles will give you a chance for various minion cards and artifacts. You can see these rewards on the main Nightmare Tide Puzzle page.