Endless Eclipse

Cheevos found in H > Raids > Rift: Storm Legion > Endless Eclipse

General

Location: Morban – In the Shapers Citadel in the north-east.
Waypoint: /setwaypoint 15236 5480

Difficulty Tier: Tier 1
Hit Requirement: N/A
Level of bosses: 62
Number of bosses: 5
Max Group Size: 20
Recommended Minimum Group Size for Level 70 cheevo run: 10

Solo at 70?: No
All cheevos while solo?: No

You can enter this raid solo, you do not need other players in the group.

A group of 5 level 70s can easily kill the first 4 bosses. You will want at least 10 people for a decent Regulos kill, especially if you are going for the harder cheevos.
Regulos is still a complex fight to explain and he cannot be burned quickly like the other bosses can, you will have to do platforms and watch for other mechanics.
The absolute minimum number of players you can complete the raid with is 3. They would need to know the tactics and be rather skilled!

A group of level 70 players can easily kill everything in this raid.
This guide is mainly designed to show you how to get the cheevos.
If the content becomes ‘relevant’ again then I will expand the boss guides as needed and add more detail.

The Eggs

When you first enter the raid you will be greeted with a room full of trash.

It is the 3 large eggs that are important here.
You need to break these eggs to release 3 large trash mobs that you kill. All the other trash in the area is either immune, or constantly respawning.
The easiest way to break the eggs is to send stealthed players. The players need to walk carefully up to the egg, into the dip where the eggs stand. Here they will gain a temporary ability which will damage the egg.

This ability has a 30 second cooldown and will break your stealth when you use it. You will likely be instantly in combat from the surrounding trash mobs, if you have an ability to put you back in stealth use it! If you die, respawn and go in again. – You can move of of the dip around the egg and back in again to regain the Scrambled Eggs ability with the cooldown reset!
The Scrambled Eggs ability will take 20% health off the egg each time it is used, so each egg will need to be hit 5 times. The more people you have hitting the eggs the better.
If you dont have stealth, you can help by standing in the blue circle to the right of the entrance and getting a disguise. You will notice rows of ‘captives’ walking in a circle around the room, stay with these guys to move around and get to the eggs to use the ability. Be aware if you are seen by the other adds in the room then you will be killed.

A group of level 70s can run through and grab everything and blitz it all down or just hold it away from the rest of the group while they are doing the eggs.
Anyone who dies should just respawn and rejoin the fight!
As a level 70 you can also go heals and heal yourself as you spam the ability on an egg (move in and out to reset the cooldown)

When the eggs are destroyed Embryonic Progeny will spawn from them. All three of these will need to be killed, then the room will reset and the first boss will spawn.

These guys are like guard dogs,
they will see through your stealth.
Stand in the blue to get your disguise.
Embryonic Progeny
will spawn from the eggs.

Boss 1 - Progenitor

A group of level 70s can pretty much tank and spank the whole encounter. Everything will die before the first cast is even finished!

The Progenitor fight is technically 4 mini bosses plus Progenitor, all with their own abilities and tactics.
The fight starts with only the 4 mini bosses active, you need to kill 3 of them and then Progenitor will become active and you fight the final mini-boss plus Progenitor together.
Killing the mini-bosses in a certain order will activate a hard mode kill (This order is Arebus, Ebassi, Juntun).

Each of the mini-bosses has a special ability, when the mini boss dies the ability is randomly transferred onto another of the mini bosses, until you end up with just the final mini-boss with ALL of the abilities.
Because of this, you will want to kill the bosses in a certain order, mostly so you can keep a good eye on Arebus to ensure his shield ability is removed asap.
The usual (easy mode) kill order is..

1 – Juntun – Places a red rectangle on the ground which will have a wave damage move through it – Anyone caught in the wave receives a debuff which reduces their healing and damage for a short time.
2 – Ebassi – Places a purple expanding AoE on a random player – This will place a DoT on any player that stands in it.
3 – Arebus – Casts a shield (Ebon Barrier) on himself every 20 or 30 seconds – DPS needs to switch to this boss straight away to get the shield down before his cast finishes or the whole raid will wipe. It helps to put this boss on focus before you start the encounter so you can see the shield easily and know when to switch.
4 – Rhu’Megar – Places a red pulsing AoE circle on a random player – Everyone should stack within the circle to share the damage until it goes away.

The mini-bosses will heal each other when stood close to each other. To be able to kill them you will need a tank to gather them all up and then another tank to pull each boss in order away from the gathered group so the DPS can kill it before the tank then grabs the next one.
Each of the mini-bosses will also randomly be given a buff that increases their damage, this buff can be purged off, assign a couple of purgers (one for each mini if you can!) to keep an eye on each boss and purge when needed.
The group should stack up behind the ‘active’ mini boss (the one you are currently killing) and move slowly across the room to avoid the purple AoEs.

When you are left with just the final mini-boss and Progenitor, pull these two together (they dont heal each other) and DPS them both down evenly, they need to stay within 10% of each other, otherwise they will heal.
The last mini-boss will now have all the abilities, so you will still need to stay stacked and move slowly to avoid the purple AoE.
Progenitor will occasionally cast a purple inward pulsing circle around himself, the raid will need to move into this circle until it disappears. Progenitor will stand still for the duration of this cast, so make sure he is far enough away from the purple circles that the raid can stand in the safe spot near the boss without getting hit by the expanding purple damage.

Progenitor Saetos
The bosses marked up for a hard mode kill.

Boss 2 - Kain the Reaper

The guide below is for a group of level 70s.
The first thing you will notice is that there is a large pack of adds in front of you.. and Kain is nowhere to be seen! You will need to work your way through these adds before kain pops.
Here you can see the adds numbered up…

Groups 6 and 7 on the left and right don’t need to die, have a tank take them off to the side and hold them there. If they do die then they will respawn, make sure your tank is ready to pick up the respawns. (for level 60s, the two reapers, numbered 6 and 7 should be split up and the two groups tanked separately or 6 and 7 will enrage, they will both need interrupting).

The mob marked number 8 is the important one, Zathral Ashtongue. 
Zathral will need to be tanked by himself by a separate tank. While he is up, he will summon bloodthieves on random players in groups of 3, the tank should gather these up and the DPS need to kill them before killing Zathral. (for level 60s, if Zathral is not killed fast enough (before Blood Glutton is cast) then then he will consume adds and enrage)

When Zathral dies, a new mini-boss will appear called Baziel. Baziel will cast a spell called ‘corpse explosion’ that will make adds explode, this will be painful for anyone near the adds at the time.
During this phase, random players may get turned into zombies. These players will not be able to use any abilities and cannot be healed, they will take damage over time while they are a zombie. They will receive a reactice ability to allow them to ‘bite’ other players to heal up. They should choose a player with high health to bite, or a pet/companion. They will need to bite 2 or 3 times during the duration of the zombie debuff so they dont die. The bite is a very short range ability with a long cast time, so make sure your players know to stand still while being bitten!

Once Baziel is dead, the whole raid should move to the middle of the room, be careful to keep the add packs separate until they disappear.
Kain will spawn and your tank should bring him to the middle of the room, the DPS should stack just behind Kain.

A red aoe circle will appear around random players, those players should move out the raid (level 70s can ignore this).
Bloodthieves will spawn and need to be priority killed (Level 70s can just cleave the boss).
A large purple cross centered on the boss will appear, anyone stood in the cross will be turned into a zombie – Stay out of it!
Around the edge of the room will be white ghosts (cannot be killed), they will slowly circle inwards and act as an enrage timer, if they move too close to your raid they will attack and deal a lot of damage (to a level 60, they just give cute tickles to level 70s) – Stay in the middle of the room and DPS Kain quickly enough before they get too close!

Kain

Boss 3 - Matriarch of Pestilence

The tanks will be stood near the Matriarchs head, while the rest of the raid will stack on her tail.

  • Matriarchs auto attack – This is cast on the tank only and will gradually stack up, reducing the tanks max health by 15% per stack. – Your tanks will need to swap regularly to wait for their stacks to fall off. – Swapping at 3-4 stacks is optimal.
  • Necrotic spores – A spell that is cast on a random player. – This player needs to move out of the raid to the very edge of the room and drop the spore. They will have 8 seconds to do this. – They need to avoid any other spores that have already been dropped. – They cannot be cleansed or it will drop early. – They may need some extra heals. – The spores will expand into a large damage circle. – A group of level 70s can ignore this mechanic and just allow them to drop in the raid, provided you have a couple of good healers.
  • Matriarch energy bar is slowly going up – When it reaches maximum she will heal a small amount and deal AoE damage to the raid.
  • Wave of Decay – Must be interrupted – Casts every 6-8 seconds so you will need 2 rupters and back ups! – If Wave of Decay is not rupted then she will deal a lot of damage and gain 20 energy.
  • Unholy Disease – Cast on a random player – That player will get a 5 second debuff – The player needs to stop casting and turn away from the boss or they will deal damage to the whole raid and Matriarch will gain energy.
  • Vile Birth – Spawns a Childe of the Matriarch -Cast around every 45 seconds – For every Childe alive, all players in the raid will receive a stacking debuff that increases their death damage taken. – The childes will also cast a frontal cone death breath that will hurt the raid if it’s not turned away. – When the childe dies, it will drop 5 or 6 purple crystals. Players need to run through these to get a buff that increases their damage.
  • Corpse Devourer adds – Spawns on a player every 20 seconds or so – Will heal the boss a very small amount on spawn – Tank just picks them up and brings them to boss so they can be cleaved down.
  • Below 50% – Every 20 seconds the Matriarch will get a stack of a buff that increases her damage done and reduces her damage taken, this will act as a soft enrage.

A group of Level 70s can ignore all of this and just stack on her and DPS her down very quickly. When going for the cheevos, your main concerns will be the tank swap (which will still kill a tank if not done correctly) and the rupts of wave of decay (part of the cheevos).

Matriarch of Pestillence
A level 70 raid can just
stand in the spores.

Boss 4 - Dread Lord Goloch

Goloch is a nice easy boss, as long as your raid is able to stay out the bad!
Even a small group (5) of level 70s will be able to burn this boss and skip all mechanics..

For lower level groups..
Your entire raid will stack right up behind Goloch, except the tank and your one raider dealing with the Glimpse of Mortality.

Tank debuff – You will want 3 tanks for this fight – 2 tanks will be in front of him, while the reserve tank stacks with the raid – The 2 tanks in front of him get a stacking debuff that increases damage taken, when they hit 2 stacks, one of them swaps with the tank in the raid, then that tank waits for his debuff to drop off and then swaps with the tank with 4 stacks, then repeat, switching out the 4 stack tank with the tank with no stacks each time.

Glimpse of Mortality – You will need to assign a group of 5 people to deal with this mechanic. 1 person will need to stay out of the raid, around 15 to 20 meters away. Goloch will cast the Glimpse of Mortality on that person, a yellow circle will appear on the ground beneath them and they will be stunned. The other 4 members of the group need to run out to the yellow circle and step inside it, then run back to their position on the boss. Once 4 people have ‘touched’ the yellow circle it will disappear til next time.

Baneful smash – The room will be cut into 4 pizza slices, two of them red, the other 2 safe. Move as a group to the safe areas. – There will also be a small red aoe around the boss that you need to avoid too.

Click the lamp on the ramp to the left when it is active (behind the boss as you enter the room) – From the doorway behind the lantern a ghost will appear and follow the person who clicked the lamp – The player needs to move back to the group so the ghost moves to the group too and covers the group with his white aura. – The player who clicked the lamp will receive 75% less healing for the duration of the ghost buff, so its best to let a support spec do this. – The white aura will double the DPS of anyone stood inside it.

There are also red exploding aoe circles, try not to stand in them.
And towards the end of the fight there will be a scythe that spins around the room and will deal quite a lot of AoE damage to your raid as it passes through them. Let the healers deal with this!

Dread Lord Goloch

Boss 5 - Regulos

You can find a proper progression guide to this fight here.
The explanation below is for a level 70 group – You cannot skip portal phases by burning the boss, so even a level 70 group will need to be organised and AWAKE to be able to kill this boss!

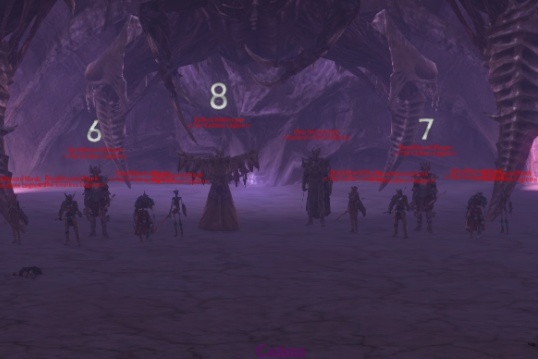
To start with, you will need to split your raid up into 4 groups of players. With a 20 man raid, 4 groups of 5 is perfect, try to keep the DPS of each group even and put a healer in each group if you can.
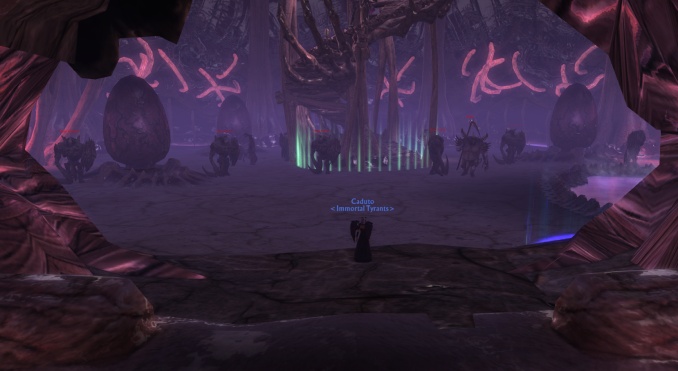
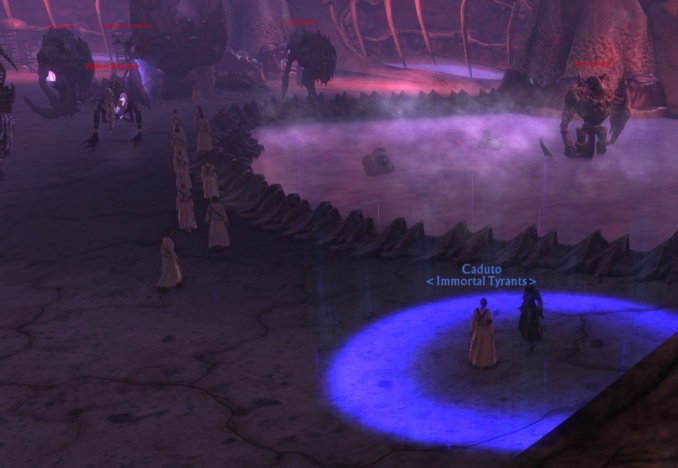
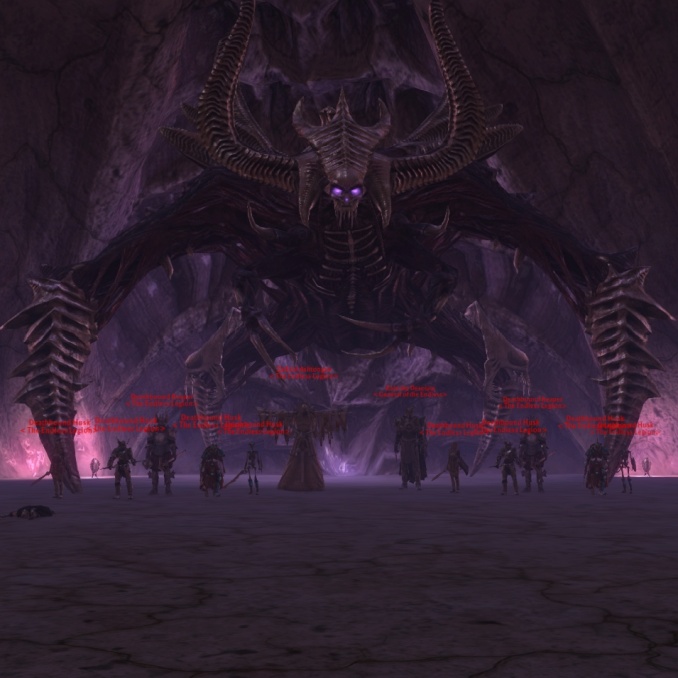
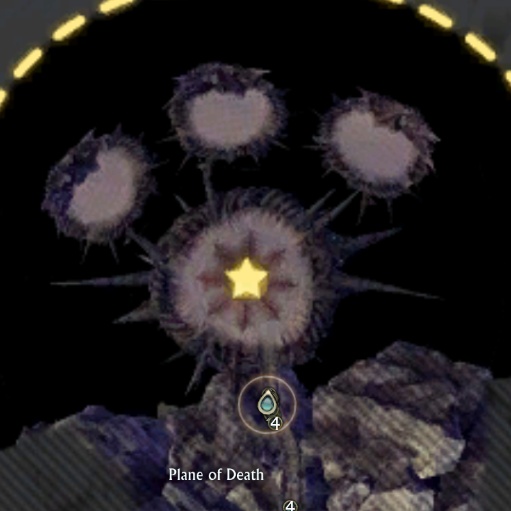
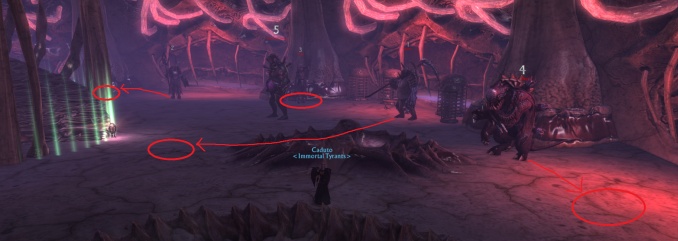
During the fight Regulos will go immune and 4 mini-bosses will spawn, 3 of those bosses will be on floating platforms. The floating platforms are accessed by the 3 portals which appear towards the back of the main platform, one left, one middle and one right, the 4th boss is on the bridge where you entered.

3 of your groups will need to enter the portals to go onto the floating platforms to kill the mini-bosses, the fourth group will stay on the bridge to kill the bridge boss.
This portal phase happens twice during the fight, on the second portal phase your groups will not be able to go into the same portal they went in during the first portal phase, so rotate the groups around.

You can copy+paste this script into a macro or just type it into the raid chat so everyone knows where to go..
PORTALS 1 > Group 1 left portal – Group 2 middle portal – Group 3 right portal – – – – PORTALS 2 > Group 1 middle portal – Group 2 right portal – Group 3 left portal – – – – Group 4 stays on bridge boss both times.

Assign your groups a number, if you have less than 20 people, spread them out in the raid frames, you will want at least 3 people in each portal, ensure you have rupters and cleansers in the groups where they are needed (Don’t forget to account for both portal visits). The bridge boss can be done with just one mage (with a short cooldown reflect – Dominator spec) and another player with a short cooldown interrupt.

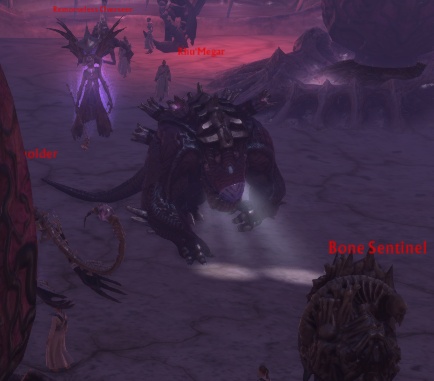
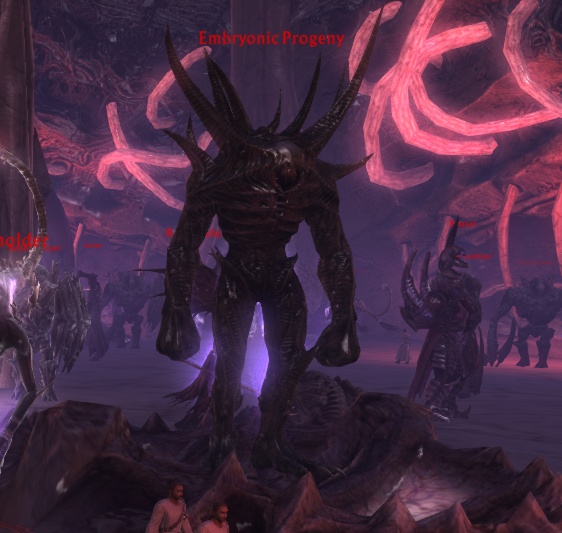
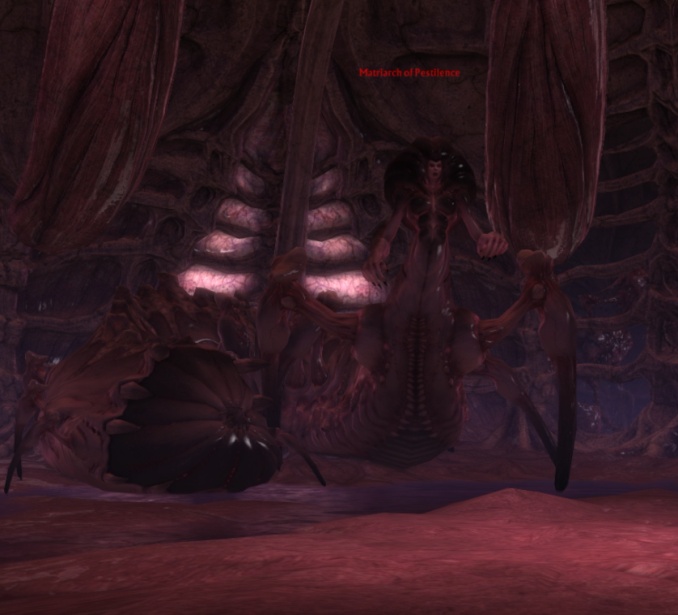
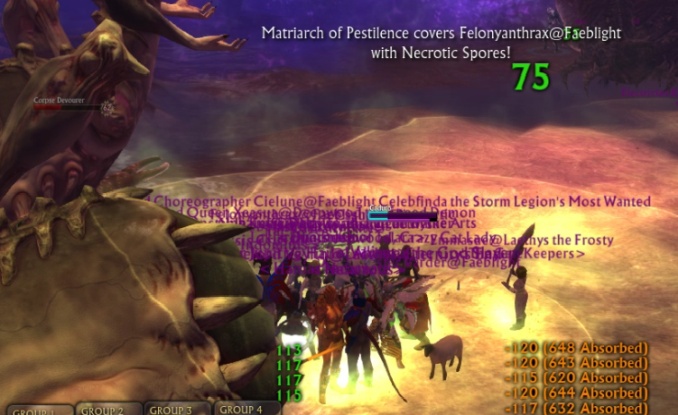
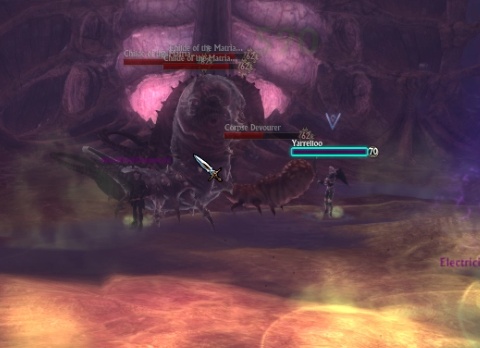
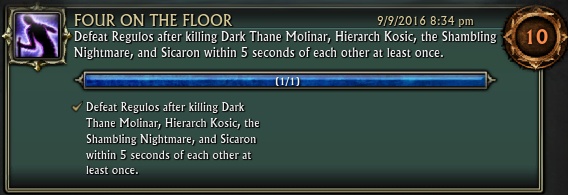
Left portal = Dark Thane Molinar – Does a look away mechanic (Runes of Pain) + You need to kill his two mates first as he takes 50% reduced damage for each one alive + Frightening shout will need rupting.

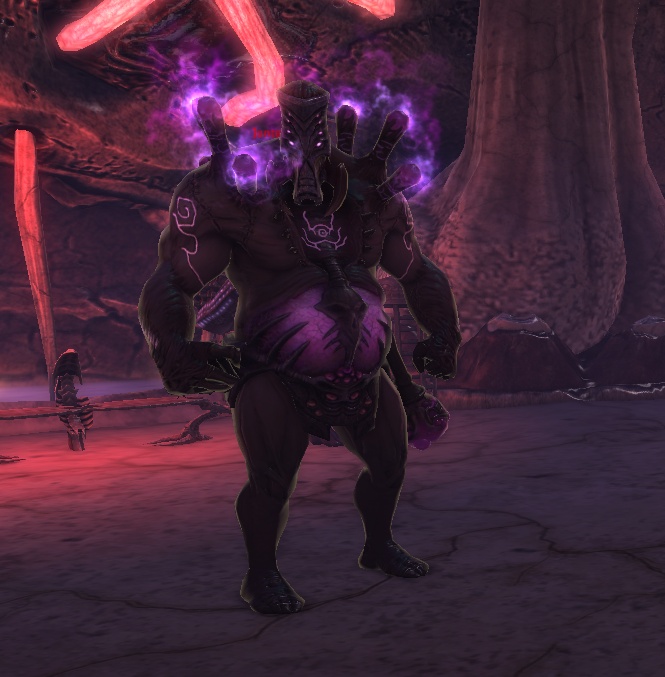
Middle Portal = Shambling Nightmare – You are supposed to drag him through the ‘plants’ to reduce his health and kill him, but with level 70 DPS you can just kill him normally + Be sure you are facing the boss at all times, turning your back to him will make him snare you and put a DoT on you.

Right Portal = Sicaron – Will cast Excruciating hex on players, ensure you cleanse it before it starts ticking damage – Will also place a Contract on a player, much like he does in HK – Player will need to move to edge of platform to drop the contract before going out of the portal (be sure not to drop it too close to where the portal spawns)

Bridge Boss = Hierarch Kosic – Casts a spell called Abhorrent Grudge that needs to be reflected (A mage with Reflective Command with the reduced cooldown can do this) (Level 70s can likely kill him before it is cast) – Also has a cast called ‘Accursed Volley’ that will need to be interrupted.

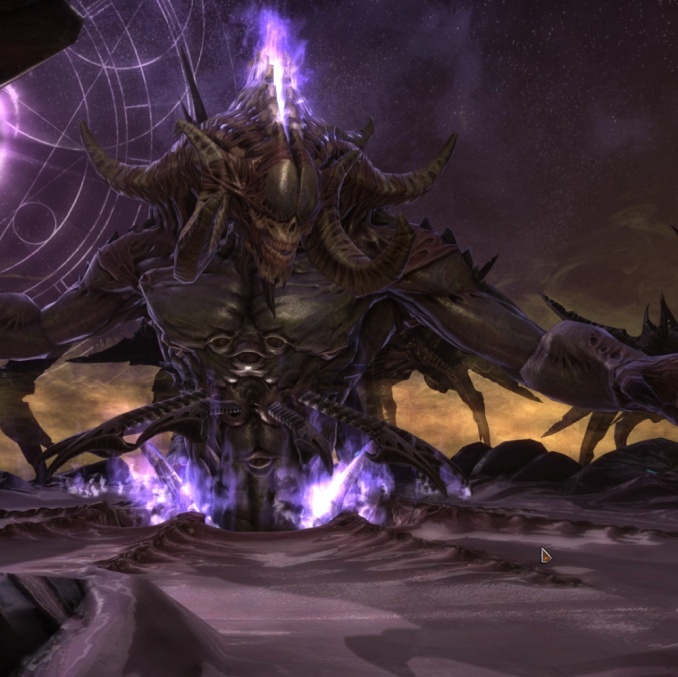
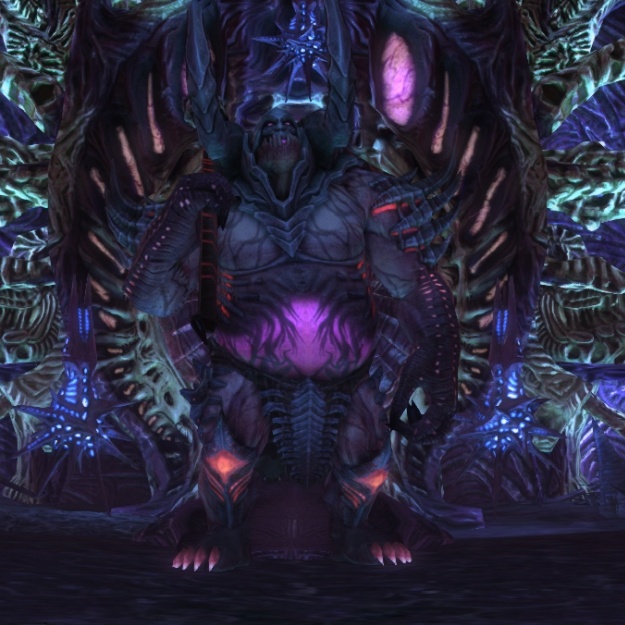
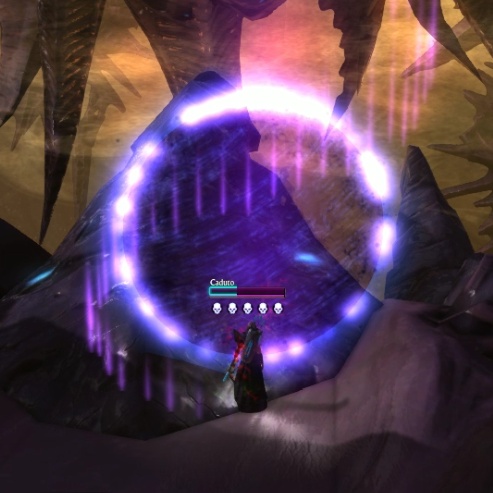
Regulos – A decently sized (at least 12) group of level 70s will blast through Regulos without seeing many mechanics at all, the main things to watch out for are;
Seething Darkness – cast randomly on your tanks, needs to be cleansed asap. 
Glimpse of the Abyss – The 180° ‘dead’ area behind Regulos that will put a debuff on any player that stands in it – This debuff will increase your ability costs and decrease your damage done and healing received, it will also slow you. It cannot be cleansed off, instead you should stop using any abilities until it wears off (takes about 5 seconds) – The debuff is unavoidable while running to the portals behind Regulos, so when you enter the portal wait 5 seconds for the debuff to fall off before engaging the mini-boss. Make sure your tank faces Regulos to the left side and waits til Regulos is properly immune before running to his portal, the goal here is to prevent the dead area from overlapping the bridge, so the players DPSing the bridge boss are not debuffed.

Regulos
You can clearly see the
portals on the map.
Pretty Purple Portals!

Note: The portal phase can be done with a minimum of 3 players/groups, The players should enter the portal and kill the mini-bosses and then head straight to the bridge boss to kill him too.

Achievements Available

Conqueror: Endless Eclipse

The meta-cheevo for most of the cheevos below.

Endless Eclipse

Kill all 5 bosses.

Rapid Assault: Endless Eclipse

Kill all the bosses within an hour.

Progenitor
Pentakill

Kill Progenitor – the first boss.

Ebon Corruption

Killing the mini-bosses in a certain order will activate a hard mode kill (This order is Arebus, Ebassi, Juntun)
Be aware that by killing Arebus first, his shield ability will be transferred to another mini-boss. You will need to figure out which one and ensure DPS switches as soon as the shield comes up.

Hands Free Spree

This is the purgeable buff that is placed randomly on the mini-bosses.
The best way to get this cheevo is to assign a purger to each of the mini-bosses, have them put that boss on focus and be ready to purge quickly!

Defile A Complaint

This is the red rectangle AoE with the wave that moves through it.
Ensure everyone moves out of the red rectangle as soon as it spawns so they dont get hit by the wave.

Disconnet Four

The four initial mini-bosses will heal each other if they are too close to each other.
You will need 4 tanks to pull them and keep them separate.
(Or just 4 groups of DPS at level 70)
They are most likely to accidently get too close and heal during the initial pull.
Be very careful when pulling them!
The minis in the picture above are marked up for an easy mode kill.
Pull number 2 off to the left hand side.
Keep number 3 where he is.
Bring number 4 over to the right.
Pull number 1 out towards the middle of the room.

Kain the Reaper
Kain Wasn't Able

Kill Kain, the second boss.

Raining Blood

To the left of the entrance a ‘death foothold’ (called Idol of the Fallen) will spawn when you start the fight. You need to kill this foothold before any of the trash dies to activate hard mode.

Cannibal Corpse

This is a personal cheevo, everyone who wants it will need to turn into a zombie and bite other people 8 times.
The easiest stage of the fight to do this cheevo is during the Kain phase.
Hold DPS and wait for the purple crosses on the ground.
Have everyone who needs the cheevo (but no more than half the raid) stand in the crosses to get the zombie debuff.
They will gain the temporary ability ‘Pestilent Bite’.
They need to target another player who is VERY close to them and click the bite, ensuring that the cast finishes before counting it towards the 8 needed for their cheevo.
They will have 20 seconds to do this, so will get 2 good bites from each zombie debuff.

Bone-A-Fide Champion

For this cheevo, you will want have your tank pull number 8 (Zathral) away from the trash packs and hold him. Another tank will take number 6 and 7 and all the little adds (Level 60 players will need 2 separate tanks on these 2 packs and keep them separate).
DPS will then kill 6 and 7 and then repeatedly kill their respawns, being careful not to hit Zathral at all.
Killing mobs 6 and 7 will spawn a Deathbound Bonegrinder. Kill it!
You will need to kill 5 respawns of 6 and 7 to get 5 Deathbound Bonegrinders, then kill Zathral, Baziel and Kain as normal

Matriarch of Pestilence
Hypochondriac

Defeat the third boss, Matriarch of Pestilence.

Used Tactics

Wave of Decay is an intrerruptable spell that Matriarch will cast every 6-8 seconds.
You will need at least 2 dedicated interrupters, but the more the merrier!

Wayward Sons
Hold the Childes towards the back of the room

This is easiest to do with a third tank.
Have two tanks on the bosses head, tank swapping as normal.
Your third tank will need to stand towards the back of the room and grab the Childes as they spawn. This tank will need a dedicated healer as the frontal breath will hurt a lot when there are 3 or 4 childes up.
When you have 4 childes up, kill the boss!

Dread Lord Goloch
Pop, Goloch, And Drop It

Kill Dread Lord Goloch, the fourth boss.

Three Is The Tragic Number

A level 70 group (5 or more) can simply burn the boss to avoid this mechanic and get the cheevo.

Glimpse of Mortality – You will need to assign a group of 5 people to deal with this mechanic. 1 person will need to stay out of the raid, around 15 to 20 meters away. Goloch will cast the Glimpse of Mortality on that person, a yellow circle will appear on the ground beneath them and they will be stunned. The other 4 members of the group need to run out to the yellow circle and step inside it, then run back to their position on the boss. Once 4 people have ‘touched’ the yellow circle it will disappear til next time.

Ungrateful Dead

A level 70 group (5 or more) can simply burn the boss to avoid this mechanic and get the cheevo.
These are the white ghosts that spawn when you click the lamp on the ramp.
Use 5 or less of them to pop this cheevo.

Regulos
It's About Time

Kill Regulos.

Never Say Die

Kill Regulos with no deaths!

Over Your Dead Body

For this cheevo, you will actually want people to die!
These adds all spawn when players die, they will spawn on the platform where the player died, so its best to pull Regulos, have 7 (or 8 to be safe) players jump off the edge (or they can /cast last resort so they can be battle rezzed) and then DPS down the adds that spawn before the first portal phase.

What Do We Say To The God Of Death?

This cheevo is all about doing all the tactics properly!
It will only be achieved by a competent group that is able to rupt/cleanse/reflect/turn away/not turn away!/stay alive.
It may be better to take a smaller group of players you trust to get this one!

Frightening Shout – Left Portal Boss – AoE Fear – Interrupt it!

Runes of Pain – Left Portal Boss – 4 Second Cast – Turn away from boss until its finished. (Only peeps on the left platform need to turn away).

Accursed Volley – Bridge boss – Needs to be interrupted.

Abhorrent Grudge – Bridge boss – Needs to be reflected –  Bring a mage with Reflective Command with a reduced cooldown. (It is cast every 22 seconds).

Spinal Wound – Middle Portal – Turning your back on the shambler will cause him to cast this on you – Make sure you are facing him at all times.

Excruciating Hex – Right Portal – Sicaron will cast Excruciating hex on players, ensure you cleanse it before it starts ticking damage.

Heart of Death – This is damage taken by falling off the edge of the platform or from walking into the hole in the middle where Regulos is.

Impending Doom – This is a debuff placed on the tanks while they tank Regulos – It can be cleansed off by healers, so make sure you are spam cleansing! It will say ‘name is engulfed by seething darkness’ in the chat, make sure that person is cleansed within 4 seconds to avoid taking damage/death.

For the WatchForDamage add on.. you will need to type in each damage type separately..
/wfd “Runes of Pain”
/wfd “Accursed Volley”
/wfd “abhorrent Grudge”
/wfd “Spinal Wound”
/wfd “Excruciating Hex”
/wfd “Heart of Death”
/wfd “Impending Doom”
Note: This add on will not track Frightening Shout as it doesn’t deal damage.

Four On The Floor

Level 70s: have your groups enter the portals/bridge and when everyone is in place, do a 3,2,1 countdown and burn the bosses down quickly. Have a teamleader from each portal/bridge announce when their target dies so you can ensure its within 5 seconds. You can do the same again during the second portal phase to give two chances.
You may want to give the middle portal DPS a head start as this boss has a lot more HP than the other 3. Have a try on the first portal phase and adjust your DPS accordingly. You can always wipe and try again if needed.

Level 60s: Distribute your DPS evenly between the left and right portals and the bridge boss, Carefully bring each mini-boss down to 50%, then 25%, then 10% then burn together. It is likely to be the shambler in the middle portal that gives you most trouble here, as the only proper way to damage him at this level is to drag him through the plants. So allow the middle portal a small headstart, practice and adjust accordingly.

LIVE on Twitch OFFLINE
on Twitch