Location: Ember Isle Waypoint: /setwaypoint 14094 3620
Number of Standard bosses: 4 Level of Standard bosses: 50 Number of Lower Expert bosses: 6 Number of Upper Expert bosses: 6 Level of Expert bosses: 52 Number of Master Mode bosses: 11 Level of Master Mode bosses: 52
Solo at 70?: Yes easily All cheevos while solo?: You will need 5 players for the Five Ascended, One Cup cheevo. You will need a mage for the Return to Cinder cheevo.
A level 70 player can easily one shot everything in this dungeon. This guide is mainly designed to show you how to get the cheevos and do the quests. If the content becomes ‘relevant’ again then I will expand the boss guides as needed and add more detail.
Difficulty Modes
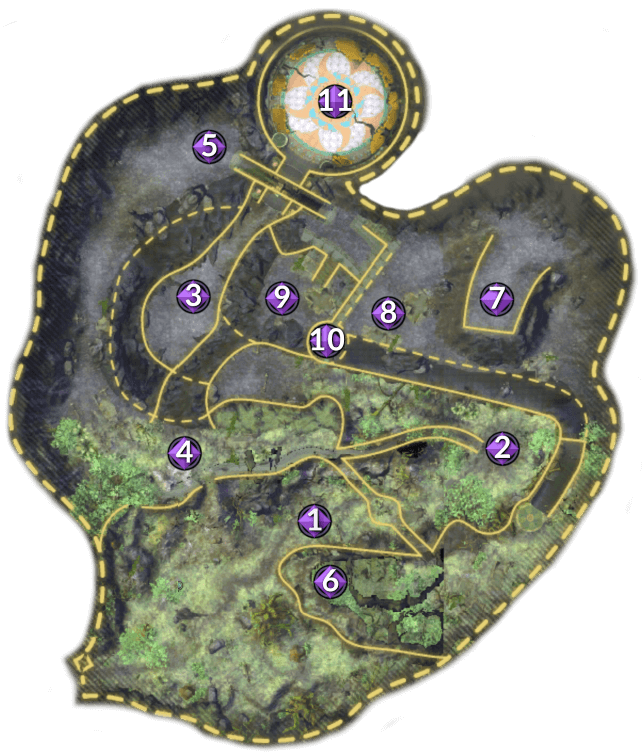
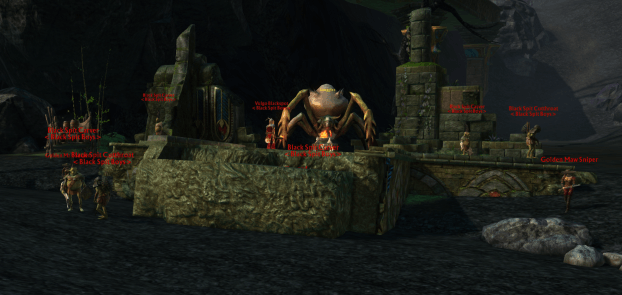
Caduceus rise is split into 2 separate expert dungeons, upper and lower, which then combine to create the master mode. The two expert dungeons are set in the same instance but with different areas open and different bosses to kill. When you reach the location where the entrances are you will see there are 2 entrances, one to your right and one up a ramp on your left.
Entering either entrance with dungeon difficulty set to standard will put you in standard mode Caduceus Rise.
Entering the right (lower) entrance with dungeon difficulty set to expert will put you in expert Caduceus Rise.
Entering the left (upper) entrance with dungeon difficulty set to expert will put you in expert Upper Caduceus Rise.
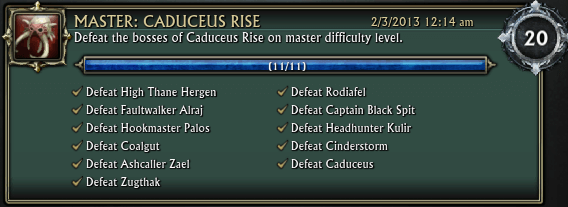
Entering either entrance with dungeon difficulty set to master will put you in master mode Caduceus Rise – Master mode has 11 bosses!
Caduceus Rise is a non-linear dungeon, you can choose which order to do the bosses in. I have ordered the bosses in the order they appear in the cheevo.
Throughout the dungeon you will find many treasure chests and mini-quests/encounters. These can reward health pots and small amounts of gold, they can also drop artifacts from the ‘Wanton Desires’ set.
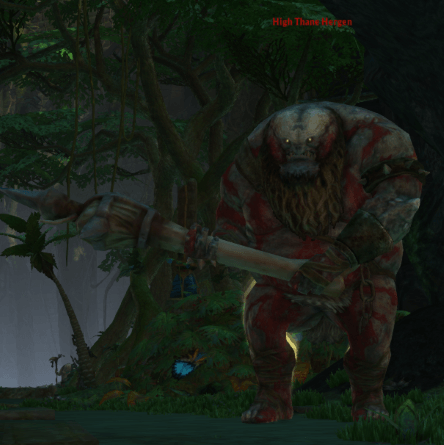
Boss 1 - High Thane Hergen - Standard Mode + Lower Expert Mode + Master Mode
Crystaline Earth – An AoE damage circle placed on the ground – Move out of it! Wild Cudgel – Interrupt this ability.
The boss cleaves and has a knockback ability, tank should tank him while backed into a corner, the rest of the raid can spread out to help with avoiding the AoE on the ground. The boss will bring up adds called ‘Erupted Core’, just cleave/AoE these down with the boss, low level groups will need to make sure not too many adds are up at the same time.
High Thane Hergen
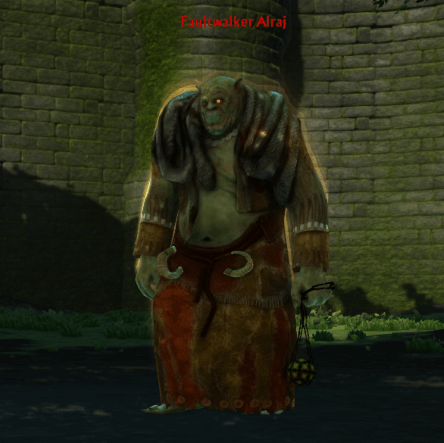
Boss 2 - Faultwalker Alraj - Standard Mode + Lower Expert Mode + Master Mode
Tainted Blood: During the fight you will constantly gain stacks of 3 different debuffs; red, green and blue. Around the boss area will be red, green and blue coloured circles on the ground. Standing in the circles will reduce the debuff of that colour. You need to stand in the circles, switching between the 3 colours when the stacks of that colour get too high.
The boss will also occasionally throw a purple AoE on the ground, move out of that asap.
Faultwalker Alraj
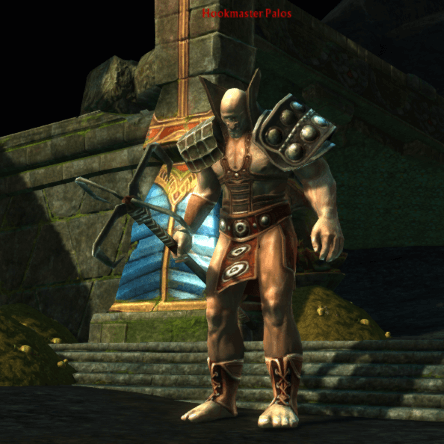
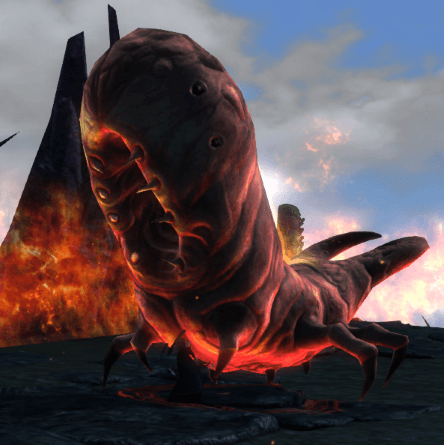
Boss 3 - Hookmaster Palos - Standard Mode + Lower Expert Mode + Master Mode
Blood Pact – Targets a random player. All damage dealt to Hookmaster Palos during blood pact is transferred to that player. Stop all DPS until the Blood Pact debuff is gone.
Hook – Pulls a random player to the boss. Move out quickly to avoid the cleave.
Thrashing Stomp – Deals AoE around the boss.
Sucker Punch – A stun on a random player, usually on a melee player.
Hypnotic Flames – There will be a red AoE Flame Circle on the ground – Move out of it.
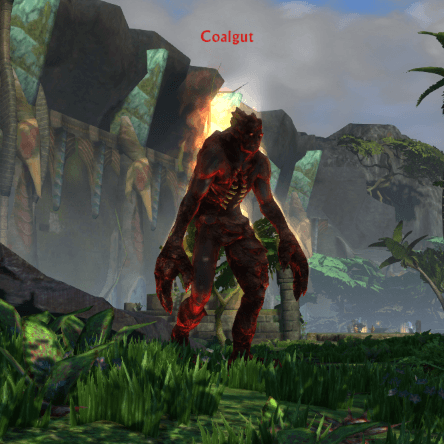
Unstable Furnace – Coalgut will create a large damaging AoE around him, move out of it quickly.
Rising Anger + Simmering Rage – When the Unstable Furnace is done, Coalgut will have Rising Anger for 30 seconds, this will add stacks of Simmering Rage every second. The tank will need to kite him, there are blue crystals scattered around, destroy the crystal when Coalgut is next to it to remove all the stacks of Simmering Rage and to stun/slow Coalgut, the slow will last around 15 seconds, you will want to destroy at least 2 crystals for each enrage.
Burning Lung (Master Mode) – A debuff placed on a random player, after a few seconds it will explode dealing a lot of damage (to a low level player). Players can stack up with the debuffed player to share the damage.
Ashcaller Zael will spit out small clones of himself, shrinking as he does so. DPS these adds down asap, when they reach 0% health they will change colour but not die. After a certain amount of time, Ashcaller Zael will reabsorb all the adds, any that still have health will heal Ashcaller Zael. The adds will attack the closest player to them. they cannot be taunted or pulled, so player positioning is quite important. One way to combat this is for only the tank to enter the combat area, all other players stay stack at the edge and attack the adds from there, thus the tank will always be closest to the adds and the only one taking damage.
Stomp – Tank and melee need to move out, this deals a lot of damageand will do a knock back, this can knock you off the platform!
Trog adds – 3 of them, they will respawn over time, Dps them down, don’t allow them to hurt the water spirits!
Water Spirit – These mobs are here to help! They have a blue circle around them, the player that steps into the circle will gain 3 temporary abilities.
Thick Hide – Buff that reduces the damage he will take from players. Buff can be removed by the player that gains the abilities from the Water Spirit.
Lash Wave – Removes Zugthak’s Thick Hide.
Trog Stomp – Kills the targeted Trog.
Water’s Grace – You become immune to Zugthak’s Stomp and your melee attacks do more damage.
The three abilities share a cooldown, most groups will just use Lash Wave to remove the Thick hide buff and not use the other two abilities at all.
DPS can kill the trogs and the stomp can be avoided by moving out.
Molten Spit – Places a red circle on the ground under a player, after a few seconds it will light up and hurt anyone standing in it. Move out of it quickly.
Molten Spray – A DoT placed on the tank – This can be cleansed off.
Lava Torrent – A DoT placed on two players in the party – Needs to be cleansed off quickly as it does a lot of damage.
Frantic Lash – A snare that slows you down – Cannot be cleansed.
Unstable Temperature – Rodiafel goes underground and puts a pulsing yellow circle on all party members. Do not stack on each other and avoid the fire red circles that are left in his path as he moves around underground.
The boss will be underground when you first enter the area, he will pop up and attack. During the fight he will switch between overground and underground phases. The fight is quite heal intensive with a lot of cleansing, low level groups may want to add a support healing to help with the cleanses.
Rodiafel
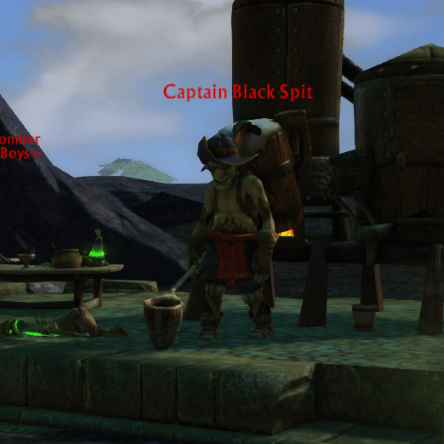
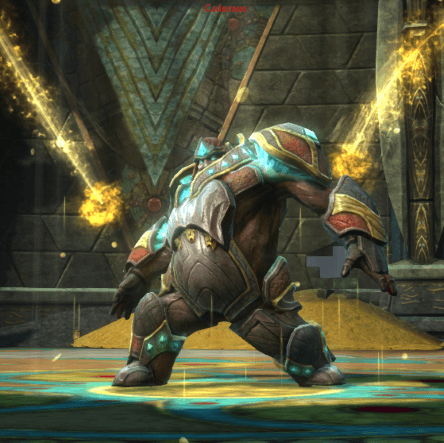
Boss 8 - Captain Black Spit - Upper Expert Mode + Master Mode
AoE on the ground – Move out of it quickly. – Gives stacks of Grog Stuper. After a player has 5 stacks they will throw up, removing all the stacks.
Bile Breath – A frontal attack that will really hurt low level players. Ensure the DPS/Heals stay behind him at all times.
Add Summon – An add will join the fight, just cleave it down with the boss. – Adds left alive for too long will eventually explode, dealing damage to anyone in range.
Sloshed – A stun, usually on the tank, not cleansable. – Reduced players max health to 50% for a few seconds.
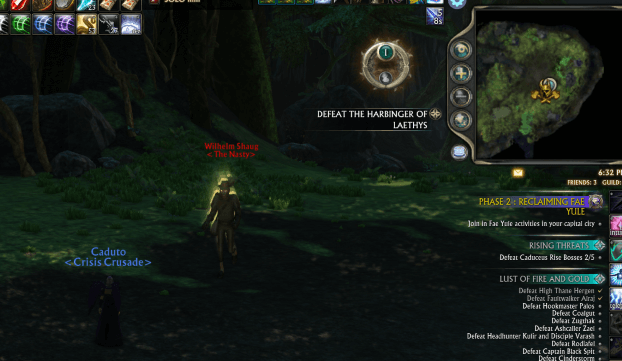
When you finish this boss, approach the cage at /setwaypoint 993 1162 and speak to Comda when he is released. Comda will make his way to boss 10, Cinderstorm, he will help you complete a small puzzle that will make the boss spawn.
You will fight Headhunter Kulir and Disciple Varash at the same time. Most groups will kill Disciple Varash first.
Magma Tempest – Cast by Headhunter – Interruptible – Headhunter will gain stacks of a buff that increases his damage for the duration of the cast. He will have an AoE damage around himself and will knockback the party.
Prey on the Weak + Dance of Ashes – Cast by Headhunter – A charge towards a random ranged player that deals damage.
Incendiary Artillery – Cast by Disciple – Red AoE circles placed all over the ground, move out of them!
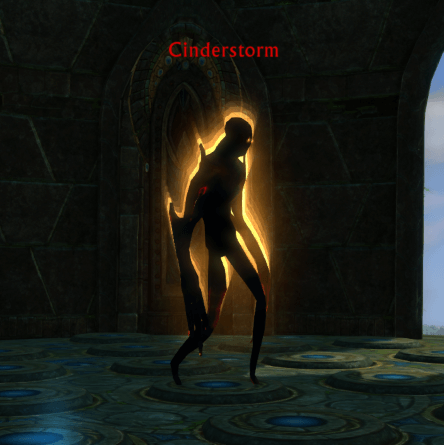
Comda will be next to the entrance of Cinderstorms platform, speak to him to get him to complete the puzzle and spawn the boss. (See end of boss 8 if Comda isn’t there) You can choose to complete the puzzle yourself if you want, this will then grant an extra loot chest when the boss is killed. See below for the guide.
Cinder Storm – A one shot death to anyone in line of sight of the boss. All players will need to hide behind one of the pillars that circles the small platform. Most groups will hide behind the pillar at the entrance to the platform.
Mote of Flame – Orbs that float around the platform in a circle – Getting hit by one will damage and slow you, which can make getting out for Cinder Storm more difficult.
Laser DPS race – After the boss hits 20% health all players will need to move back into the room and stay there. Around the edge of the room laser beams will appear that will slowly move inwards, anyone who touches the lasers will die. You need to kill the boss before the next Cinder Storm cast as you wont be able to LOS anymore.
Cinderstorm
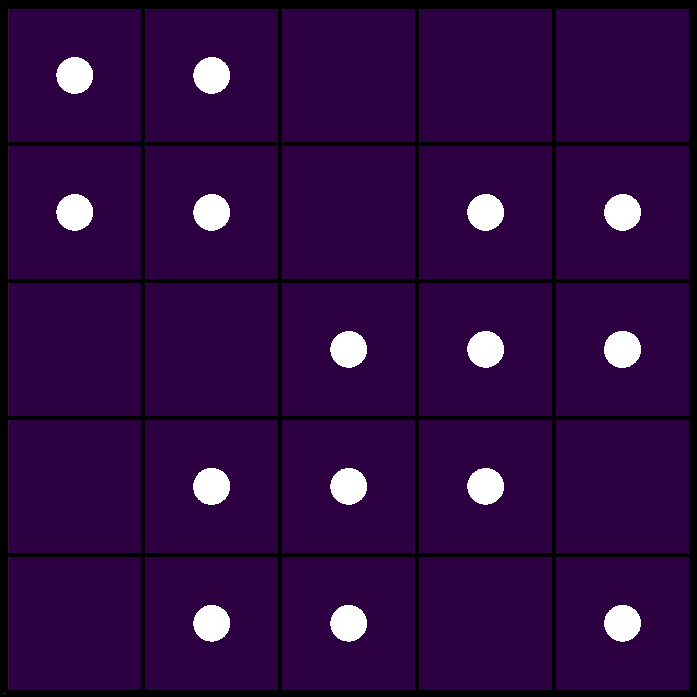
Completing the Caduceus Rise Puzzle
The puzzle is a grid of 5×5 lights. You need to turn on all the lights to complete the puzzle. Click each of the lights highlighted in turn. You only need to click each light once.
Boss 11 - Caduceus - Standard Mode + Lower Expert Mode + Upper Expert Mode + Master Mode
In Standard, Lower Expert and Master Mode, you can get to Caduceus by taking the path up from Hookmaster Palos. In Upper Expert Mode you need to stand on the bridge at /setwaypoint 909 1063 to teleport to Caduceus.
Kill the two baddies at the encounter entrance first.
Tremors – Spikes will travel along the ground from the players to the outer walls, you can pretty much ignore these.
Magma Blast – Damage over time debuff placed on 3 players, this can be cleansed.
Tectonic Disturbance – Stack up behind the boss or he will port around between players dealing lots of damage.
Adds – Erupted Core – Gather them up to the boss and AoE/cleave them down.
Adds – Erupted Ember – Floaty orbs that attack from ranged, just ignore them as they will respawn if killed.
Most groups will simply stack behind the boss the whole time and kill him.
Caduceus
Mini Bosses
You will see mini-bosses running around the paths of the dungeon, these are easy to kill but only drop health pots and other small items. You can just ignore them, or kill them as they run past.
You can see where they are in the Dungeon as they show up on the map with a golden boss symbol.
Achievements Available
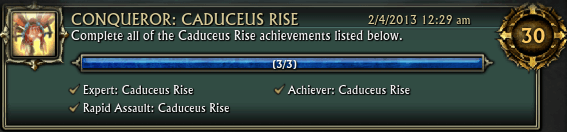
Conqueror: Caduceus Rise
Complete the 3 cheevos listed
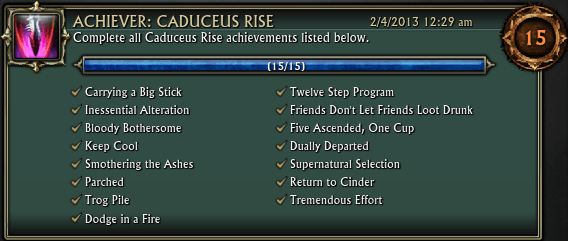
Achiever: Caduceus Rise
Complete all the cheevos in Caduceus Rise
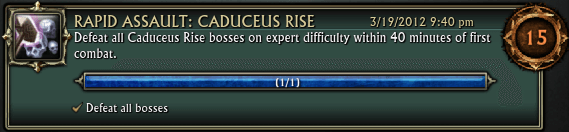
Rapid Assault: Caduceus Rise
Finish Caduceus Rise on expert difficulty within 40 minutes of first combat
Master: Caduceus Rise
Defeat all the bosses in Caduceus Rise on Master difficulty
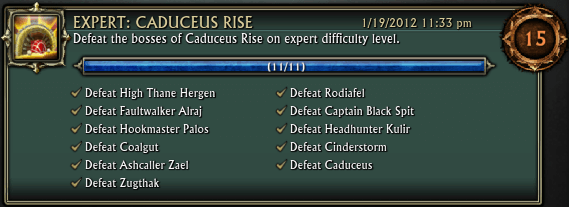
Expert: Caduceus Rise
Defeat all the bosses in Caduceus Rise on expert difficulty. This will require you to complete the Upper and Lower Expert dungeons.
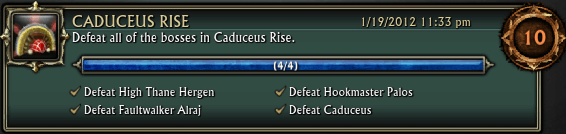
Caduceus Rise
Defeat the 4 bosses listed, on normal or expert mode
High Thane Hergen
Carrying a Big Stick
Interrupt the Wild Cudgel ability, this is cast twice in quick succession so you will need 2 players on rupt duty.
Faultwalker Alraj
Inessential Alteration
Keep the stack of the 3 coloured debuffs below 15. USe the circles on the ground to reduce the debuffs and kill the boss quickly!
Hookmaster Palos
Bloody Bothersome
Blood Pact – Targets a random player. All damage dealt to Hookmaster Palos during blood pact is transferred to that player. Stop all DPS until the Blood Pact debuff is gone.
Bound by Blood is the damage received by the player who has been targetted by Blood Pact. The Blood Pact spell is cast with very little warning. All players need to ensure they do not deal damage to the boss while Blood Pact is active. Ensure you have no active dots on the boss, its best to just not use any dots at all, also, cast time abilities can be tricky as the Blood Pact is so quick to be applied you may not have time to cancel them properly, so it’s best not to use these either. Stick to single shot instant cast abilities, which may slow down the DPS, but at least you can instantly stop all damage.
A level 70 player can of course just one shot this boss without Blood Pact even casting, easy mode!
Coalgut
Keep Cool
Ensure your DPS is focused on the boss and watch the splash damage on crystals so you don’t accidentally kill one! Keep check of when crystals die, ensure you don’t kill more than 2 within a 30 second timer.
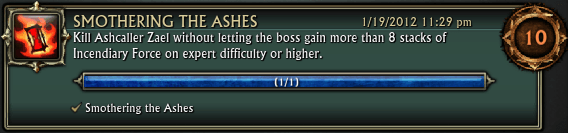
Ashcaller Zael
Smothering the Ashes
The boss will gain stacks of Incendiary Force every few seconds while he is in his ‘current phase’, the stacks will reset when he switches phases. The boss starts in his normal phase and will gain around 6 stacks before he switches to his adds phase. During the adds phase, he can gain around 12 stacks , unless you DPS the adds very quickly so he switches back to his normal phase.
So the trick is just to DPS the adds really fast!
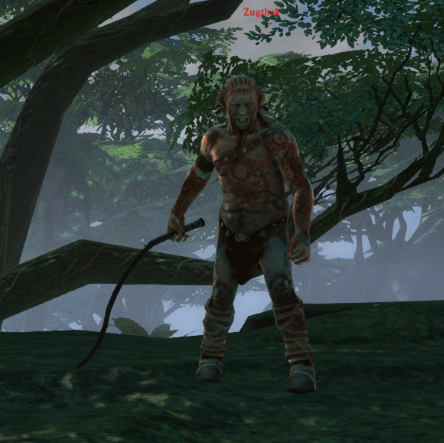
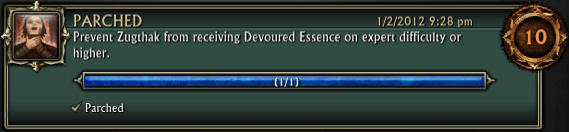
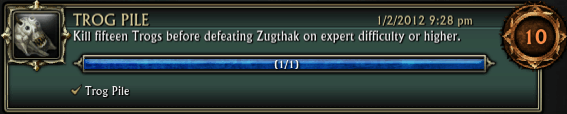
Zugthak
Parched
The boss is supposed to receive Devoured Essence when one of the water spirits die. This doesn’t appear to be happening at the moment so this cheevo should pop every time.
Trog Pile
Keep killing the Trogs until 15 have died, they respawn pretty quickly so this shouldnt take too long.
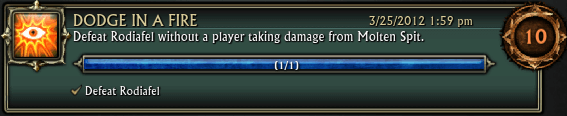
Rodiafel
Dodge in a Fire
Molten Spit – Places a red circle on the ground under a player, after a few seconds it will light up and hurt anyone standing in it. Move out of it quickly. This is going to be most troublesome for the player that the AoE is placed on. The best tactic is for you to keep moving around, then you will already be halfway out the circle by the time it lands!
Captain Black Spit
Five Ascended, One Cup
Make sure all party members are in the fight area
Kill the trash and then body pull the boss
Level 70 players will need to be careful not to accidentally kill the boss!
Pull the boss into the clearing and gather around him
All party members need to move into and then out of the red circle so they have between 1 and 4 stacks of the debuff
You can see on the raid frames that everyone has the debuff
All party members gather around the bucket
Kill the boss and then all party members quickly click the bucket to drink
Cheevo popping goodness
If a party member gets more than 4 stacks of the debuff then they will throw up and lose all stacks, at this point it is easier to just reset the boss and try again, use [/cast last resort] to die quickly!
Twelve Step Program
Kill less than 12 of the adds that are summoned during the fight. Kill the boss quickly to achieve this.
Friends Don't Let Friends Loot Drunk
Ensure that no one in the party has any stacks of Grog stupor when the boss dies. Stay out of the red AoE and time your kill carefully!
Headhunter Kulir
Supernatural Selection
Don’t interrupt the Magma Tempest cast soHeadhunter can gain over 30 stacks of the Magma Infused buff. This will be very heal intensive for a low level group, you may want an extra healer.
Dually Departed
Carefully manage the two bosses health so they die within 10 seconds of each other.
Cinderstorm
Return to Cinder
To do this cheevo you will need to be a mage or bring a mage with you!
Molten Orb is Cinderstorms main attack ability after the first Cinder Storm LOS spell has been cast.
The Mage will need to use ‘Reflective Command’ and ‘Reflective Presence’ from the Dominator Soul to reflect the Molten Orb ability. Remember to pop a few damaging abilities on your bar too so you can kill the boss! Ensure that Reflective Command has not been converted to the legendary version.
You will be able to see in the Combat chat when the Molten Orb is reflected, however, this will often show 2 reflects from one ability push, this is a LIE. Count your ability pushes up to 20, do not rely on the combat chat. Use the ‘Reflective Command’ and ‘Reflective Presence’ whenever they are off cooldown. You can use Bloom from Chloromancer Soul to regain charge and to heal yourself a little if needed. When you hit 20 reflects (plus a couple more to be sure) you can then kill the boss. This will take 4 to 5 minutes.
Caduceus
Tremendous Effort
Tremor is a spell that is placed on all the players in the group and then explodes outwards from them, in a frontal cone, towards the outer walls.
There are two different ways to get this cheevo.
The first, is the whole group stacks up very tightly, this way everyone is facing the same direction and the tremor will emanate in the same direction and wont hit anyone. The second is to have the group spread out in a circle around the boss and then when the boss emotes the whole group can turn 180 to face the wall so their tremors don’t hit the other players, then turn back again to continue DPS. You can use the red spots on the floor to help you spread out evenly in a circle around the boss.
Level 70 players can just one shot this boss and get the cheevo as he wont have time to cast tremors!