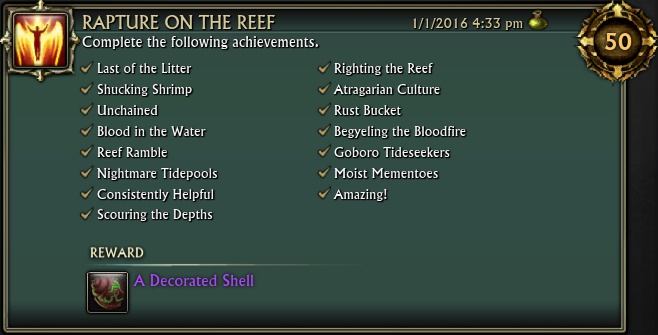
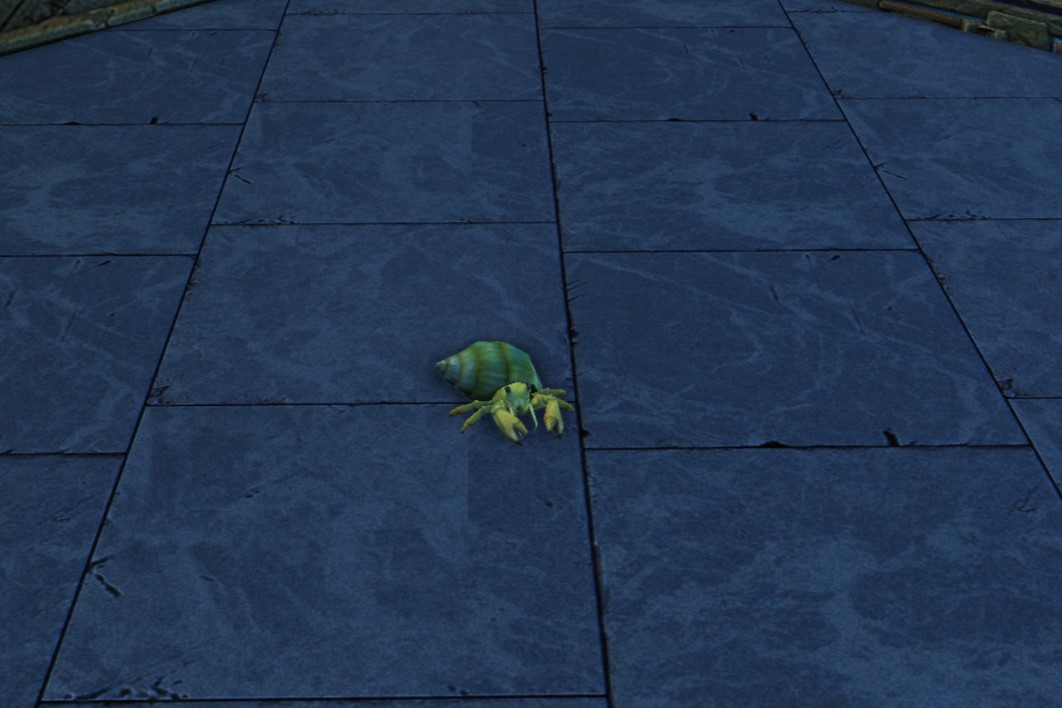
This is the meta cheevo for completing all the other cheevos in Goboro Reef. This cheevo awards the ‘A Decorated Shell’, using this item will turn your character into a crab! The item does not work in instances.
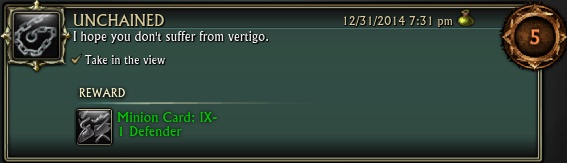
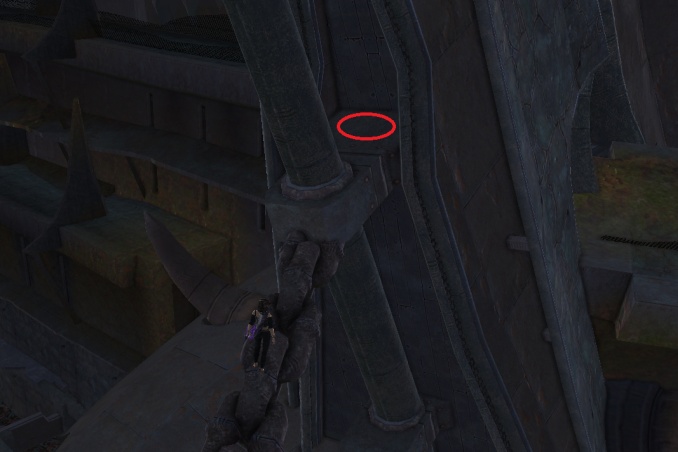
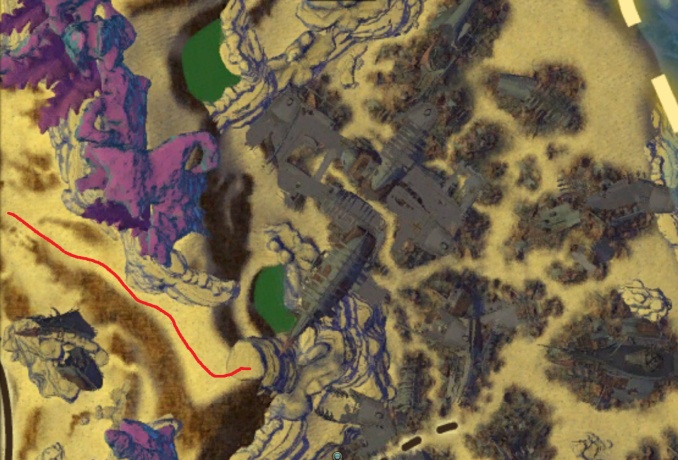
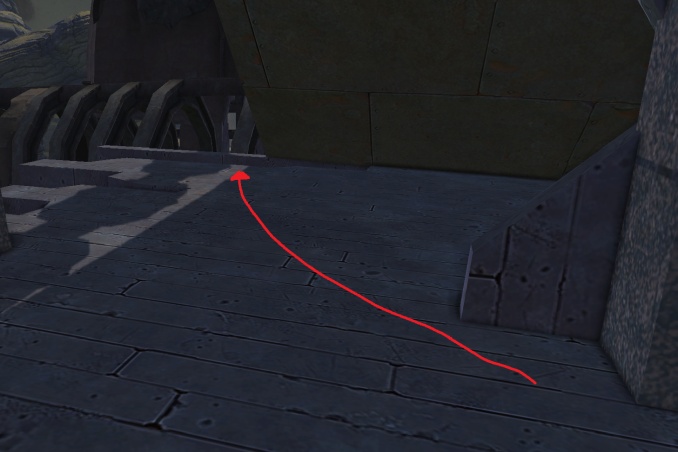
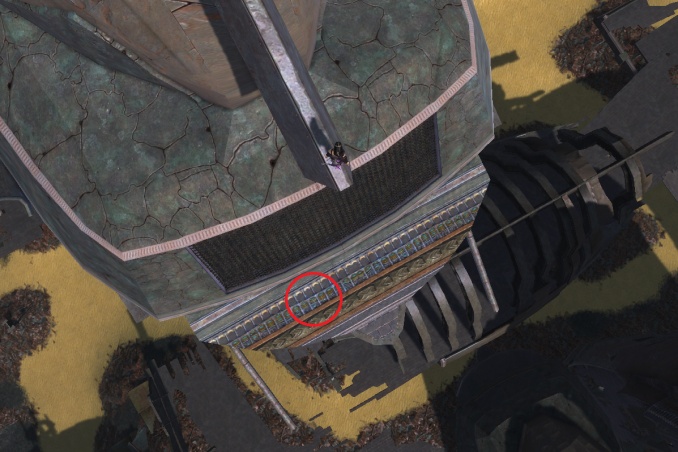
Unchained
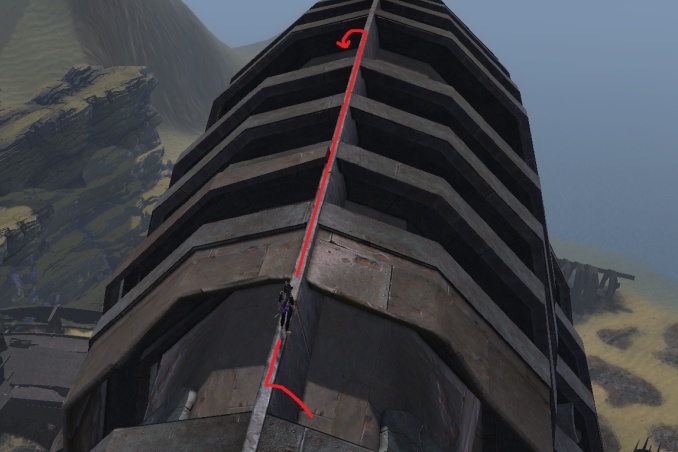
Right next to the Gyel Fortress portal is a wrecked boat with a chain that leads up above the Gyel Fortress area. Jump up the boat and onto the chain and walk along it to the end.
At the end of the chain simply jump off into the little alcove behind the support.
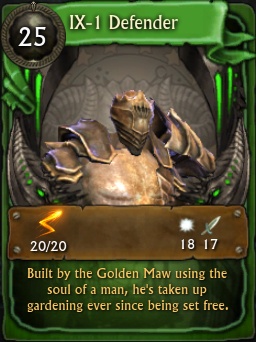
Completing this cheevo awards the Minion Card: IX-I Defender
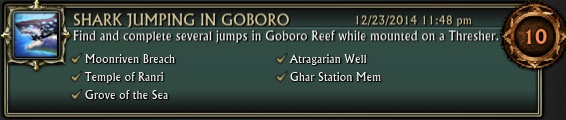
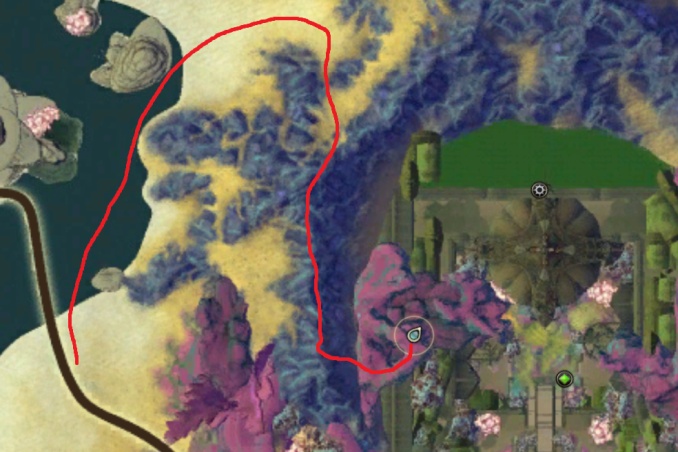
Shark Jumping in Goboro
Around the Nightmare Tide zones are mystical circles that you need to jump through while mounted on a Thresher mount. At each location you will see a circle in mid air that you need to jump through and a white patch of light on the ground behind it where you need to land. Some of the locations require you to jump perfectly and land exactly on the white circle, others give a bit more leeway. You may need to practice the jump several times before you get that perfect attempt!
Quick Guide
Moonriven Breach – /setwaypoint 2110 6395 Temple of Ranri – /setwaypoint 3872 7834 Grove of the Sea – /setwaypoint 4351 8345 Atragarian Well – /setwaypoint 3011 7147 Ghar Station Mem – /setwaypoint 3829 6500
You can find information about which mounts will work for this cheevo on the main Nightmare Tide cheevo page.
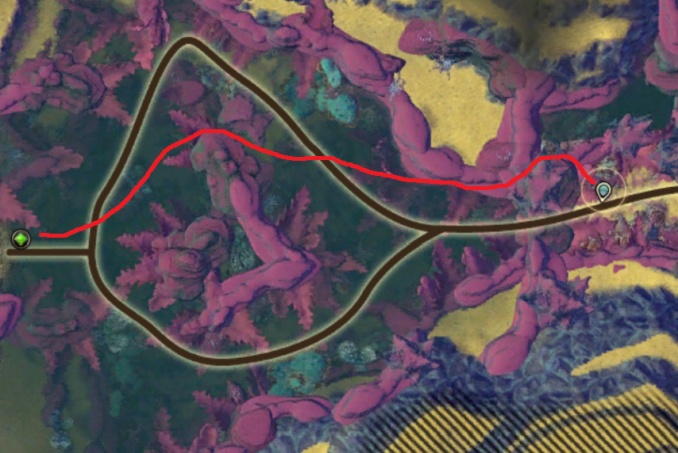
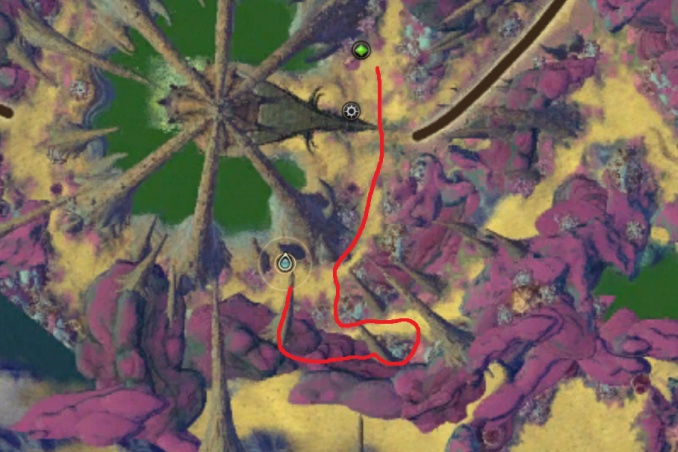
Moonriven Breach
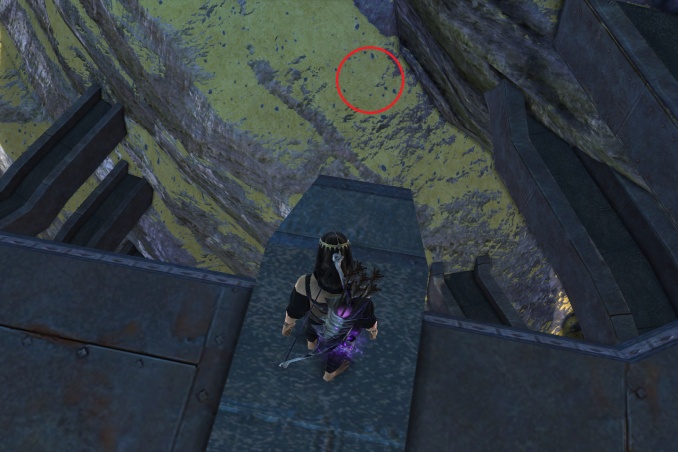
/setwaypoint 2110 6395 Y = 816 Easy to get to from the Luminous Passage portal, swim across the area and then climb onto the rocks. The jump is from one coral outcrop to another, this can be quite difficult to land properly and may take a few attempts!
Temple of Ranri
/setwaypoint 3872 7834 Y = 955 Climb up the hill and onto the coral then jump across. In the video I didn’t land correctly, but the cheevo still ticked off cos I hit the white circle before bouncing.
Grove of the Sea
/setwaypoint 4351 8345 Y = 887 An easy jump across.
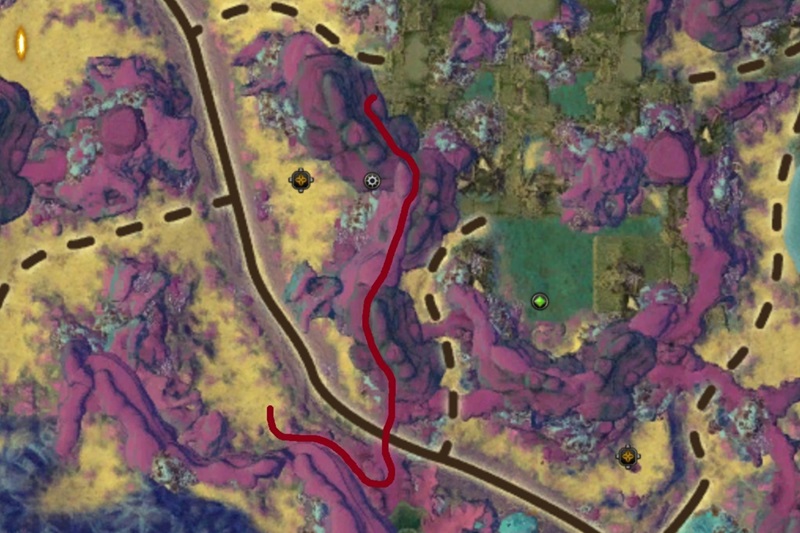
Atragarian Well
/setwaypoint 3011 7147 Y = 838 Climb up onto the spike and then jump across.
Ghar Station Mem
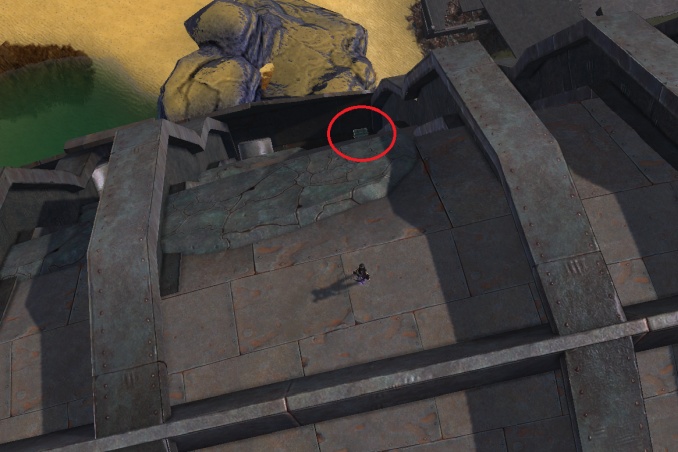
/setwaypoint 3829 6500 Y = 897 Go up the ramp at /setwaypoint 3773 6718 and walk across to the top of the rocks. Many thanks to PlukkiePanda for showing us the easier route to get there! The video still shows the harder route.
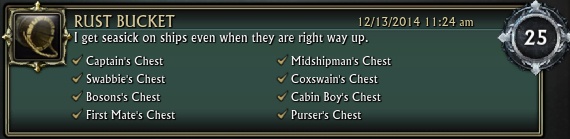
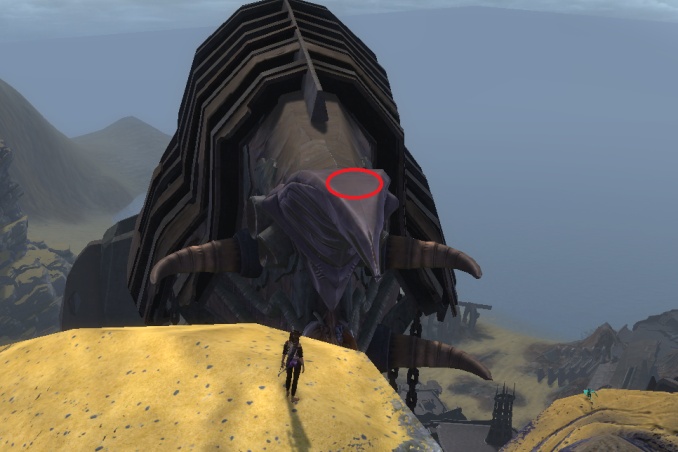
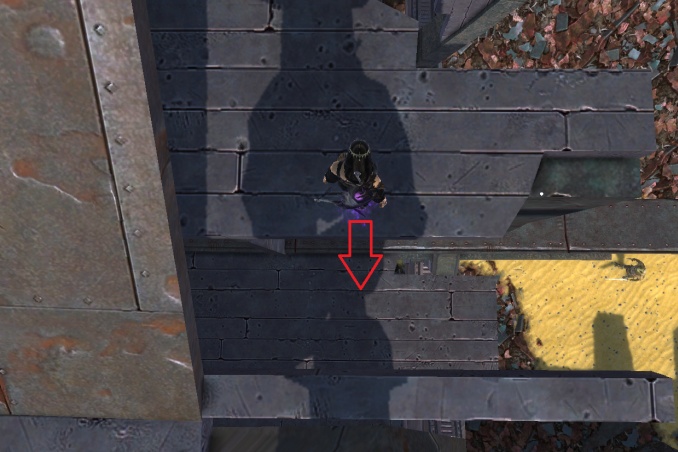
Rust Bucket
This guide has a step-by-step picture walkthrough followed by a video at the bottom. The chests are all hidden around a group of shipwrecked ships found to the north of Ghar Station Mem. They contain decent gear for a fresh level 60 that will help you in your journey through the Nightmare Tide zones. You will want to collect the chests in the order shown here to save having to backtrack too much.
There are a lot of abilities and shortcuts you can use to make this cheevo much easier to get. The jumping mounts, Opie and Jetpack can skip most of the difficult jumps with a few targeted leaps. You can also use racial abilities from Bahmi/High Elf to leap to the right areas. Rogues can utilise their flashback skills to save themselves from falling and allow them to try again much quicker!
For those moments where you need to be slower, use / to switch between the normal running and walking speeds. If you find you are still going too fast then try mentoring down below level 50 to remove your PA speed buffs.
Swabbie's Chest
/setwaypoint 3885 5863 Y = 963
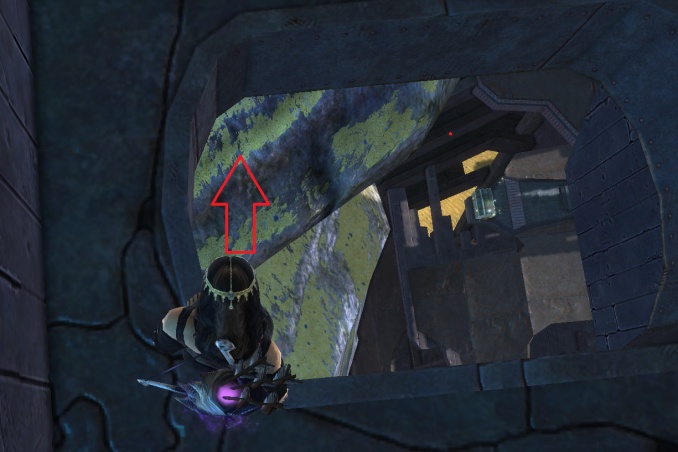
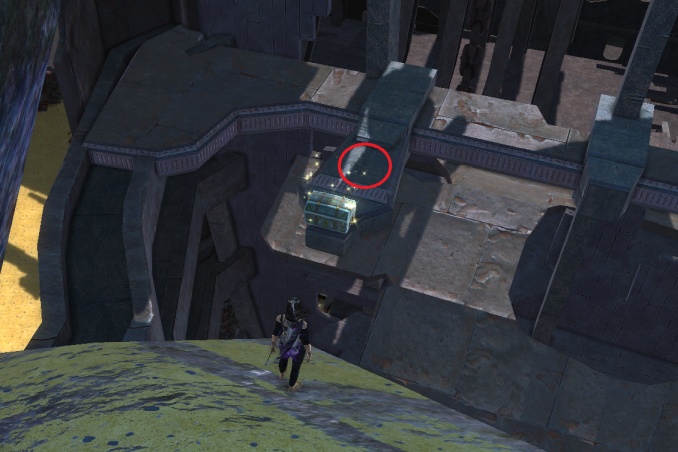
To get to the first jump location go up the hillside to the west of the boats til you reach the large rock on the top. /setwaypoint 3843 5912
From here you need to jump carefully onto the point of the upturned ship. This used to be quite a difficult jump, but with todays increased mount speeds it shouldn’t take you too many attempts!
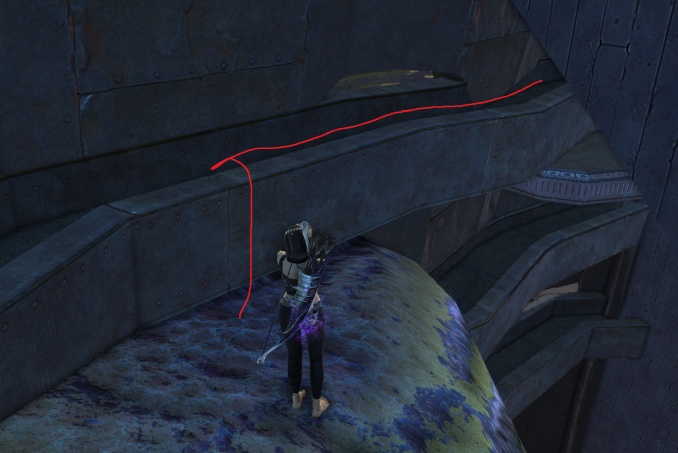
Walk along the top of the ship and then jump up to the central structure, walk along it and drop down inside the first gap on the right side.
Here you will find Swabbie’s Chest.
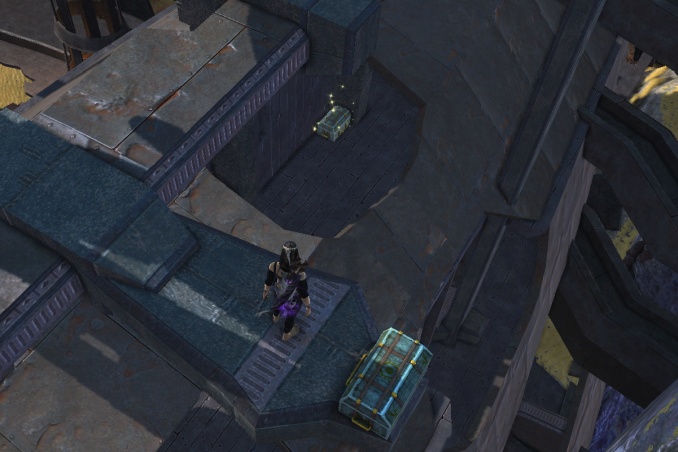
Cabin Boy's Chest
/setwaypoint 3891 5818 Y= 934
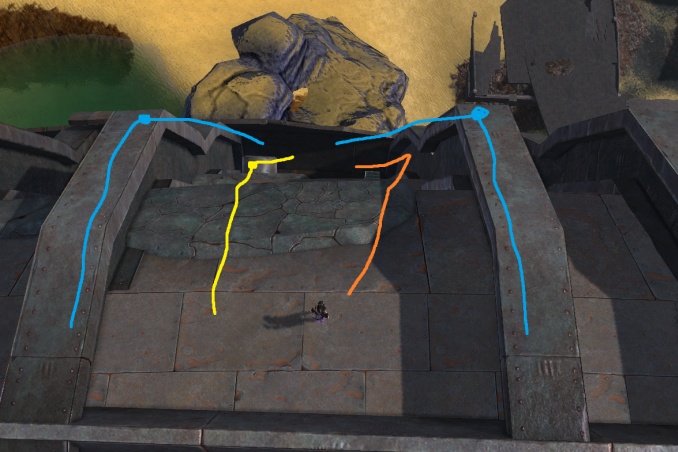
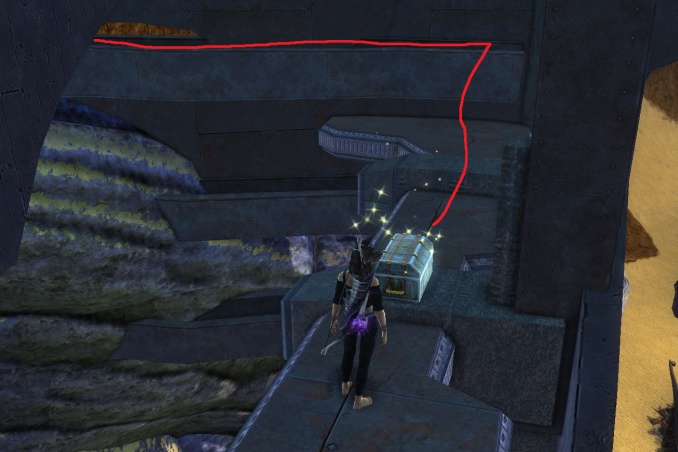
From Swabbie’s Chest, go back up to the central support and walk along til you reach the larger gap. Drop down on the left side.
There are a few different ways to drop down. Be careful not to overshoot the ledge, nor to fall too close to the ship and fall through the gap between the ledge and the ship
Blue paths: You can use the raised edges to get closer to the edge and then drop into the ledge from the side. Yellow path: You can use the pipe to catch you halfway down and make the final jump much shorter. Orange path: you can walk forwards towards the support structure to break your fall a little and bounce off it into the ledge.
Depending on your characters run speed you may just be able to walk off the top and hit the ledge without any fancy footwork!
When you hit the ledge you can loot the Cabin Boy’s Chest.
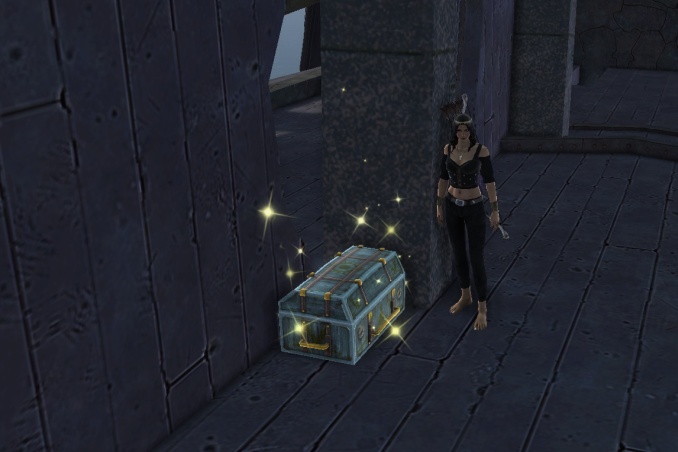
Bosons's Chest
/setwaypoint 3901 5839 Y= 913
From the Cabin Boy’s Chest ledge you can attempt to get inside the hole on the side of the ship. This jump is made easier by the current jump bug making the area around the hole much more ‘sticky’!
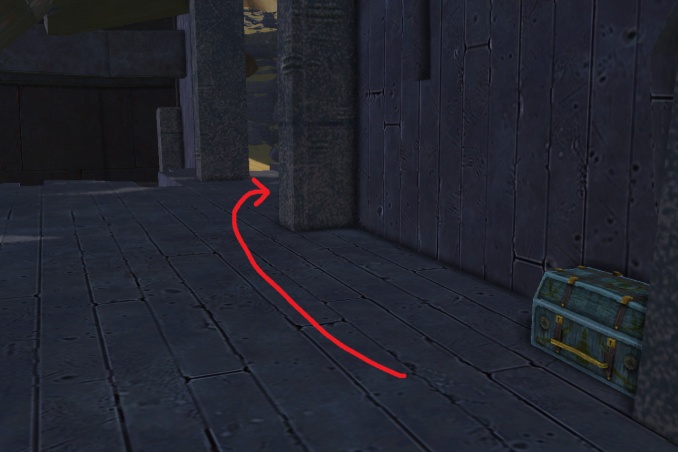
If you cant make the jump you will need to go back up the very top of the ship. Drop down to a different ledge, the one at the bottom of the third gap on the left.
From this ledge you will have a much better angle to jump into the hole.
Once inside you can clearly see and loot Bosons’s Chest.
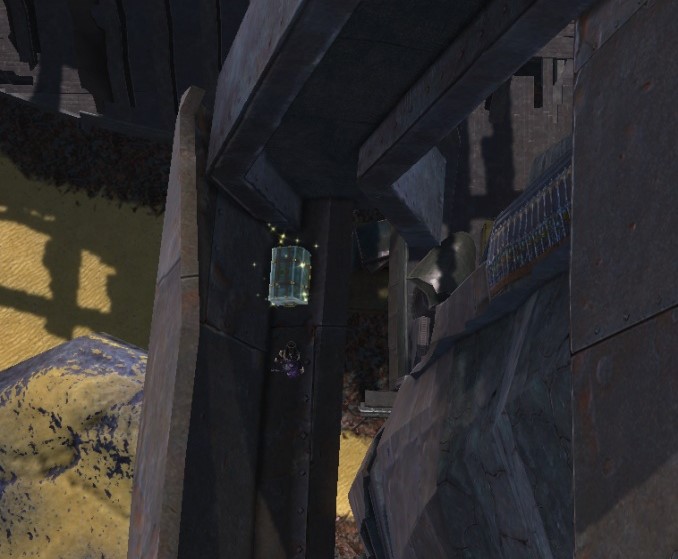
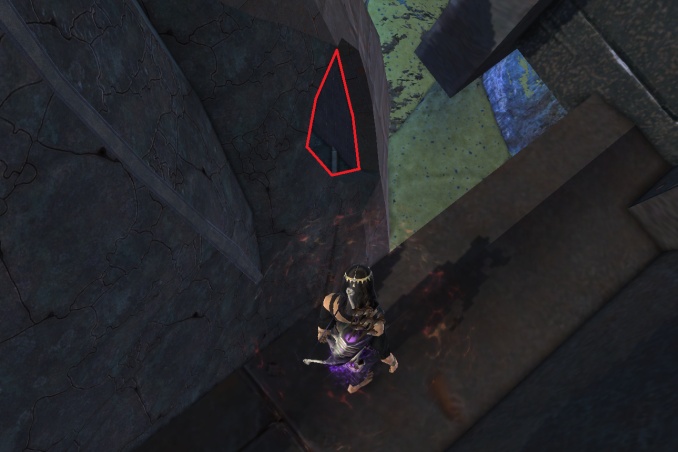
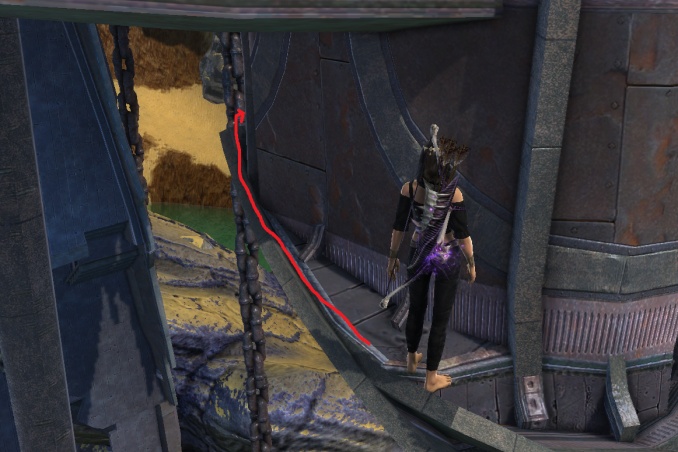
First Mate's Chest
/setwaypoint 3907 5829 Y= 907
From inside this small room with Bosons’s Chest you now need to drop down through the hole in the floor and land on the rock below. You need to land on the upper rock, not the one below.
Use / to switch to walking speed and then slowly edge yourself over the hole facing the rock til your character falls. You can also use a targeted jump/leap if you have one.
From this rock you need to jump up onto the beam beside you.. DO NOT drop down to the chest you can see!
Walk along the beam and then drop down to the cross beam and loot the First Mate’s Chest.
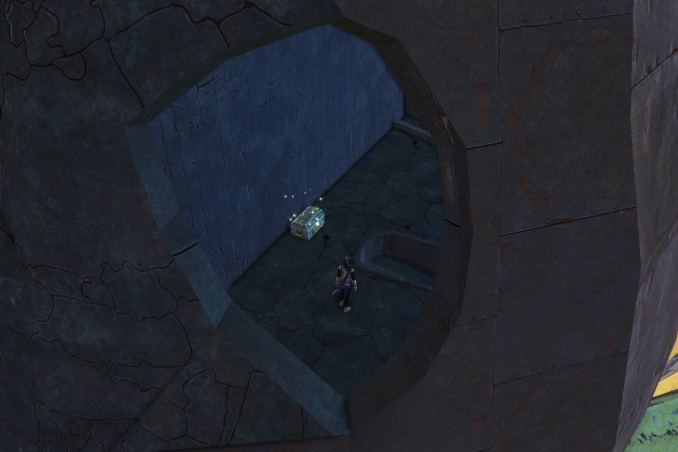
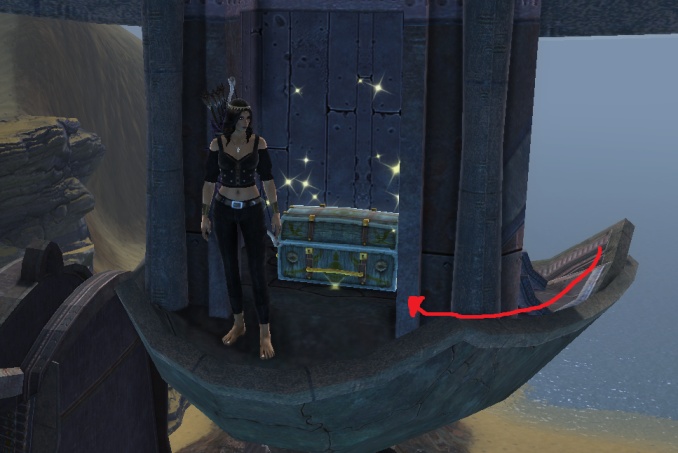
Purser's Chest
/setwaypoint 3900 5829 Y= 890
From this ledge you can now drop down to the lower rock. Walk off the jutty outty bit of the ledge, dont try to jump or you will hit the ceiling and miss the rock.
Jump onto the ledge where the Purser’s Chest is, aim for the wider bit behind the chest. Loot the chest.
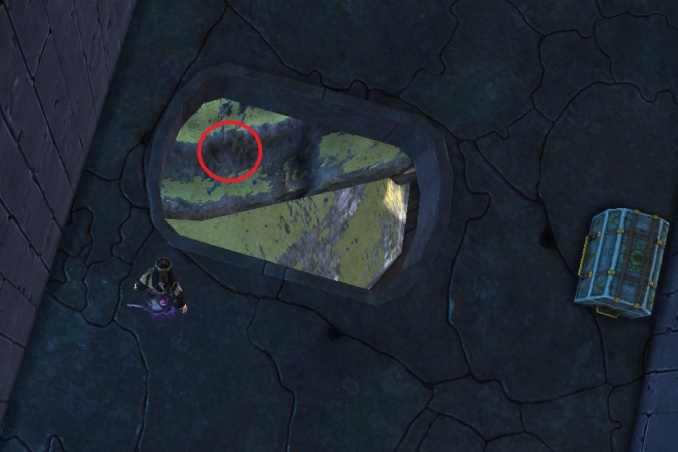
Midshipman's Chest
/setwaypoint 3912 5831 Y= 881
From the Purser’s Chest you can clearly see the Midshipman’s Chest in the hole below you.
Jump into the hole and loot the Midshipman’s Chest.
Coxswain's Chest
/setwaypoint 3919 5824 Y= 873
From the Midshipman’s Chest, follow the deck around the corner
Go to the corner of the deck where you will find a gap.
Drop down through the gap to the deck below. You will need to drop backwards or switch to walking speed and go forwards.
On this deck you will find Coxswain’s Chest.
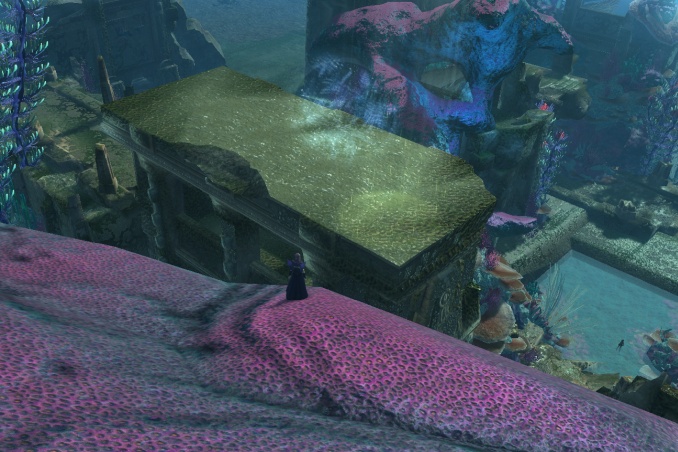
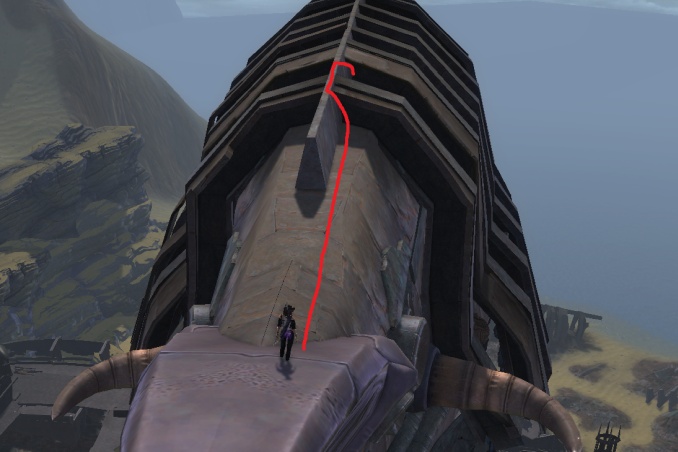
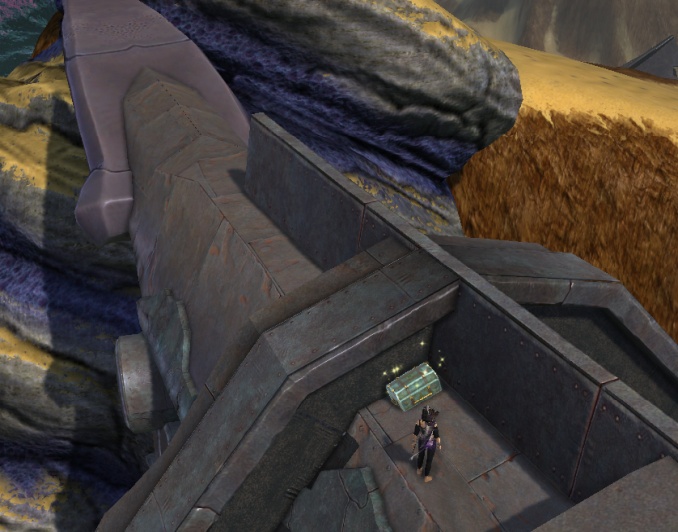
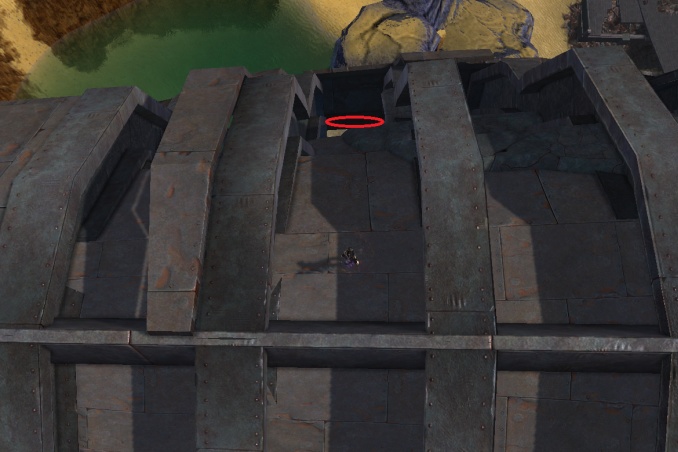
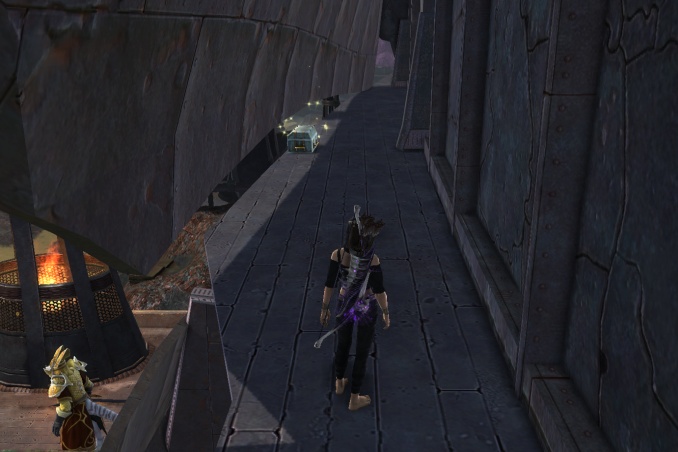
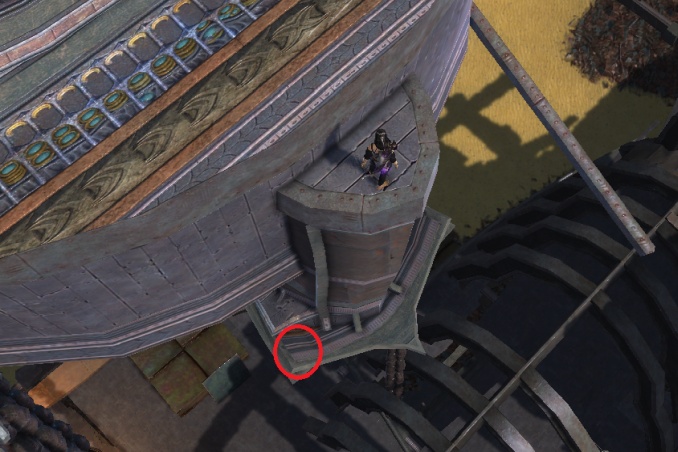
Captain's Chest
/setwaypoint 3931 5795 Y= 931
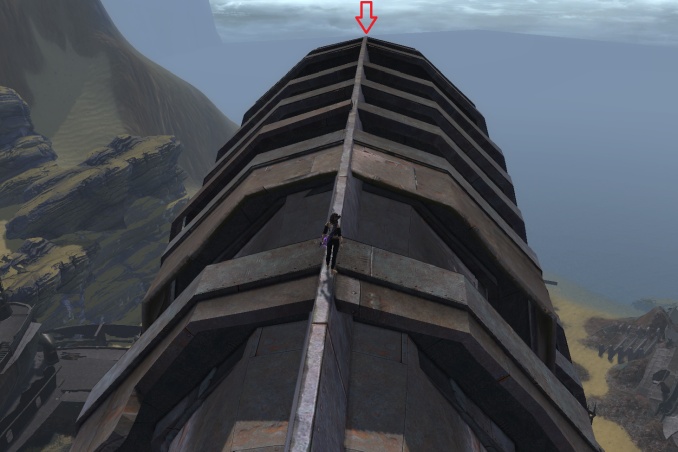
For the Captain’s Chest you will need to go all the way back to the top of the ship and travel to the very end of the top support.
Drop down to the ledge below. Walk backward to avoid overshooting.
Slowly drop onto the triangular platform and then super slowly onto the tiny ledge below. Use walking speed and drop down, ensure you have no speed buffs on, mentor down to below level 50! You can face your character towards the wall and slowly shimmy along til you drop (as seen in the video).
You now need to very carefully edge yourself along the edge of the cabin.. baby steps are best here, take it slow and face the wall to reduce your risk of falling.
And here you will find the Captain’s Chest.
Video of Rust Bucket
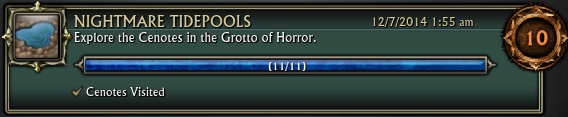
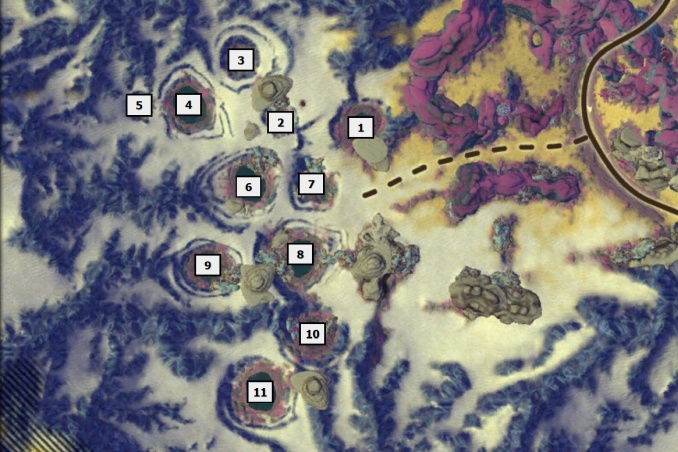
Nightmare Tidepools
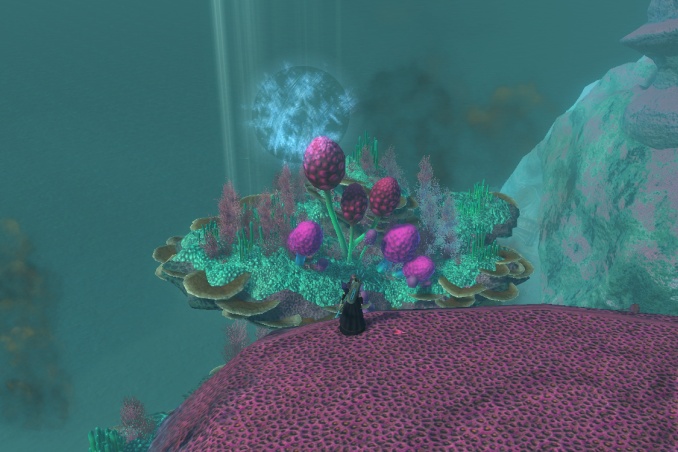
The Tidepools are all found in the southwest of Goboro Reef. You probably found a few of them during the questline. There is no way to tell which ones you have visited already so its best just to visit all of them in order til your cheevo pops. Jump into the pool and swim down a short distance to tick it off. If you are unsure if you have done a pool or not then just swim right to the bottom to be sure.
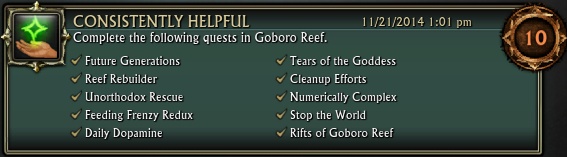
Consistently Helpful
A selection of daily quests available from the various quest hubs in Goboro Reef. Each quest hub has one quest giver that will choose one quest to give out. Keep checking each day until it gives the ones you need! You can find a guide for exactly where to pick up each quest here.
Future Generations – Picked up from the Atragarian Well portal. Reef Rebuilder – Picked up from the Atragarian Well portal. Unorthodox Rescue – Picked up from the Atragarian Well portal. Feeding Frenzy Redux – Picked up from the Ghar Station Mem portal. Daily Dopamine – Picked up from the Ghar Station Mem portal. Tears of the Goddess – Picked up from the Temple of Ranri portal. Cleanup Efforts – Picked up from the Temple of Ranri portal. Numerically Complex – Picked up from the Ghar Station Mem portal. Stop the World – Picked up from the Temple of Ranri portal. Rifts of Goboro Reef – Picked up from the Atragarian Well portal.
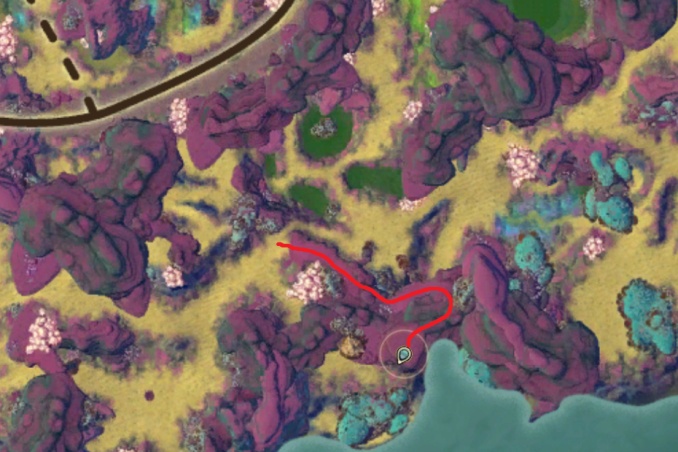
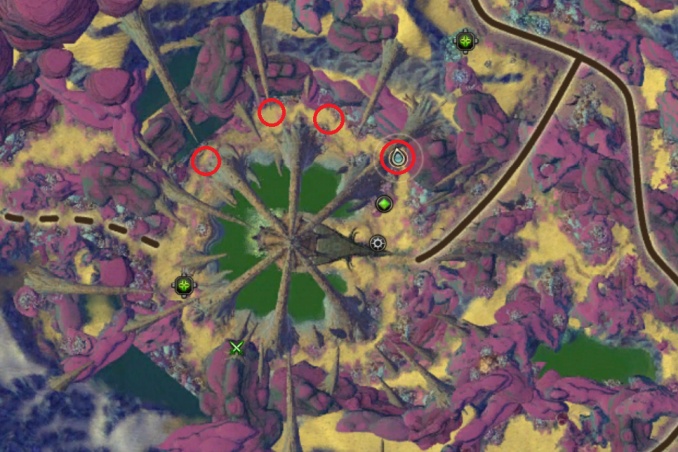
At the Atragarian Well portal there is a daily quest giver down inside the well at /setwaypoint 2929 7137
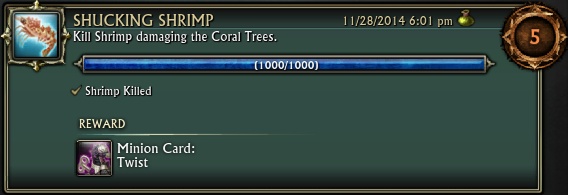
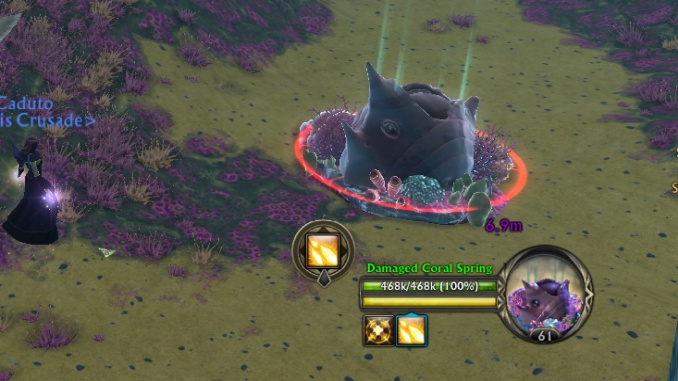
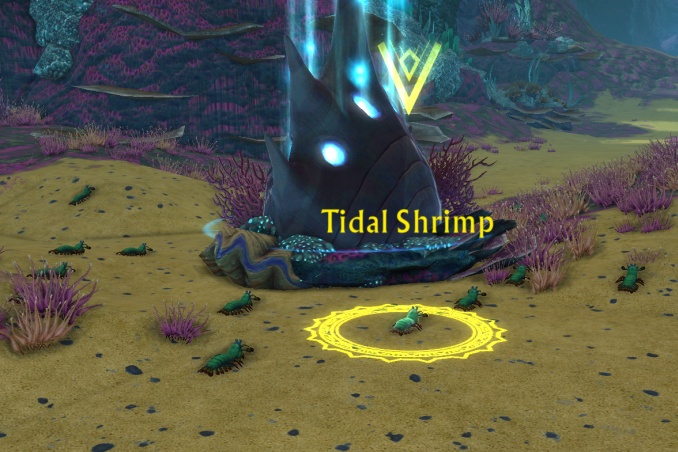
Around the northern path of the Atragarian Well there are 4 Damaged Coral Springs.
When you use Nexus Infusion to upgrade the Springs, Tidal Shrimps will appear all around it. Around 20 shrimps will appear and then keep respawning. Kill 1000 of them to complete the cheevo.
A nice way to farm this is to upgrade two of the springs and then alternate between them to give the shrimps time to respawn. You will want to use a large ground AOE or a frontal cone AOE to kill them.
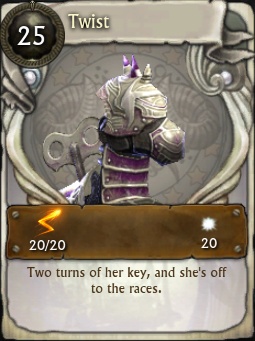
Completing this cheevo awards the Minion Card: Twist
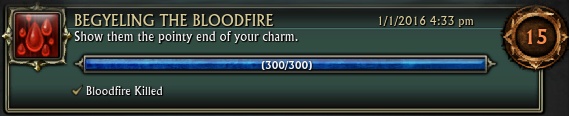
Begyeling the Bloodfire
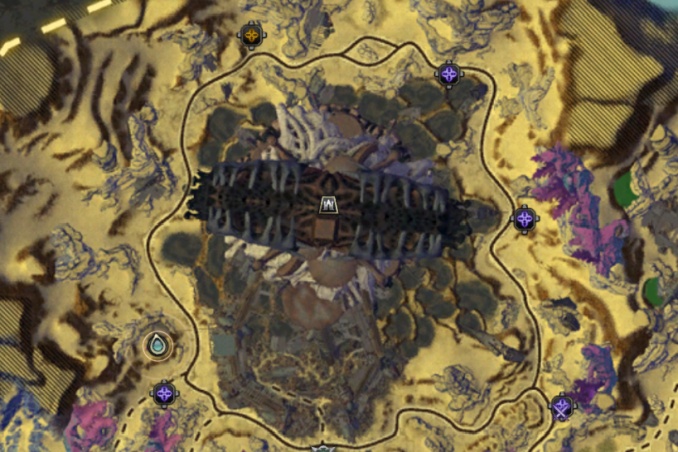
You can find a lot of these mobs all around the path that circles the Gyel Fortress area. A lot of the mobs inside the Gyel Fortress dungeon also count, so you will likely finish this cheevo in there!
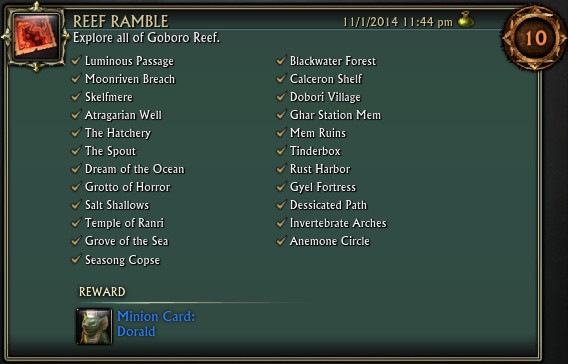
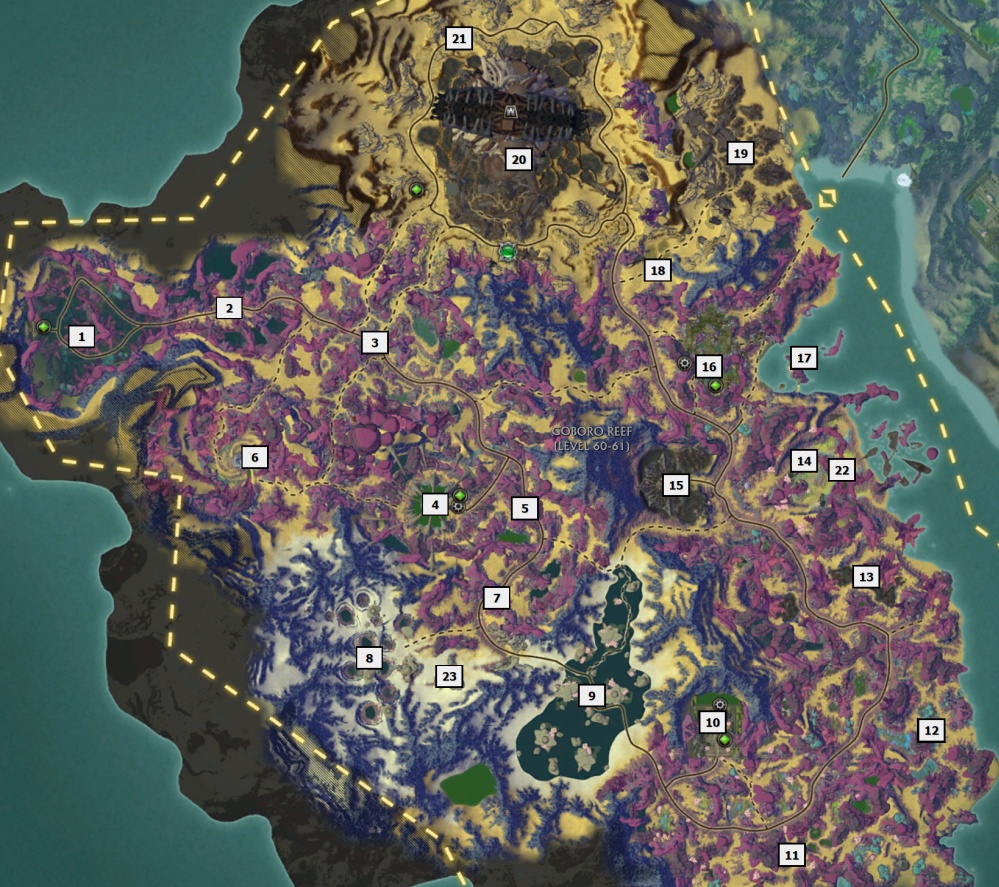
Reef Ramble
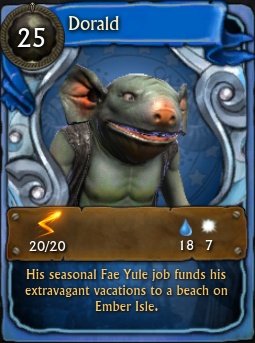
Completing this cheevo awards the Minion Card: Dorald
1. Luminous Passage 2. Moonriven Breach 3. Skelfmere 4. Atragarian Well 5. The Hatchery 6. The Spout 7. Dream of the Ocean 8. Grotto of Horror 9. Salt Shallows 10. Temple of Ranri 11. Grove of the Sea 12. Seasong Copse 13. Blackwater Forest 14. Calceron Shelf 15. Dobori Village 16. Ghar Station Mem 17. Mem Ruins 18. Tinderbox 19. Rust Harbor 20. Gyel Fortress 21. Dessicated Path 22. Invertebrate Arches 23. Anamone Circle