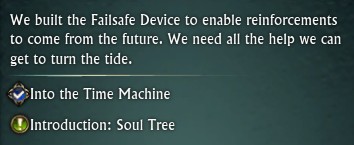
Upon creation of a Defiant Character you will find yourself in Terminus. Terminus is the last pocket of civilization experiencing the destruction of Telara. Your mission is to fight your way through the zone and use the time machine to travel back in time and stop this destruction from ever happening.
You will be given many pop up tips during your time in this zone, I highly recommend you stop to read them all, however if you choose to skip them you can always read them again later in the help menu ‘Help Tip Encyclopedia’.
During Rift 2.1 the tutorial areas of Terminus and Mathosia were streamlined for a faster more direct route to the real world.
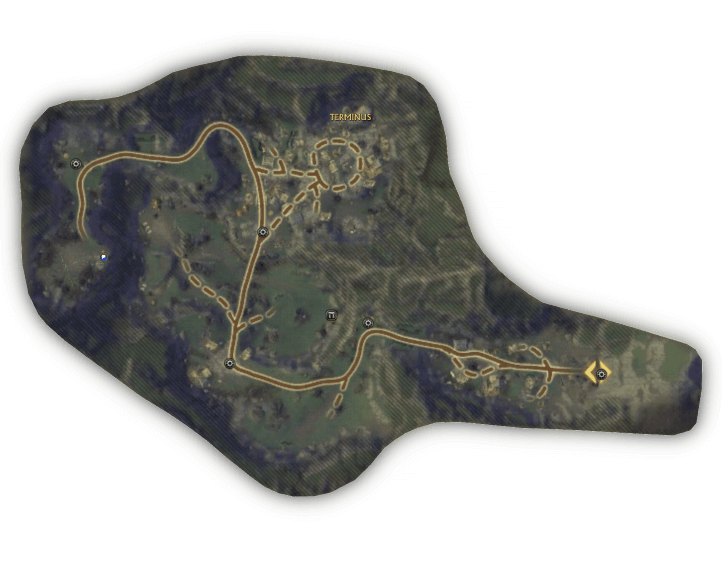
Map of Terminus
Terminus is a Tutorial level zone.
This is the first zone you enter when you create a Defiant character.
There are 0 portals in the zone. Once you leave you will not be able to come back.
There are a few rares to kill, but they do not count towards any kind of cheevo, so you don’t need to worry if you miss them, they are also super rare, with hours between spawns.
There is a single book to pick up, this book is not duplicated in the main game so be sure to grab it before you leave!
This zone will teach you the very basics of gameplay.
If you progress past level 8 and start getting the ‘Introduction’ quests, you will find guides for those on the Meridian Quest page.
Below is a guide for all 11 quests in Terminus. There used to be more quests! You can see an old guide for those here. The zone was streamlined on 16th January 2013.
This guide is for the Defiant Questline in The tutorial zone. For the Guardian version of this page, click here!
Link to video that Defiants see when they first enter Terminus
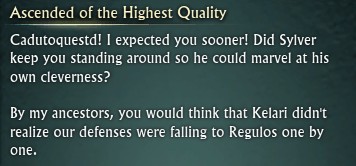
Ascended of the Highest Quality
QUEST 1
PICK UP The quest is picked up from Sylver Valis in the Life Factory /setwaypoint 998 1020
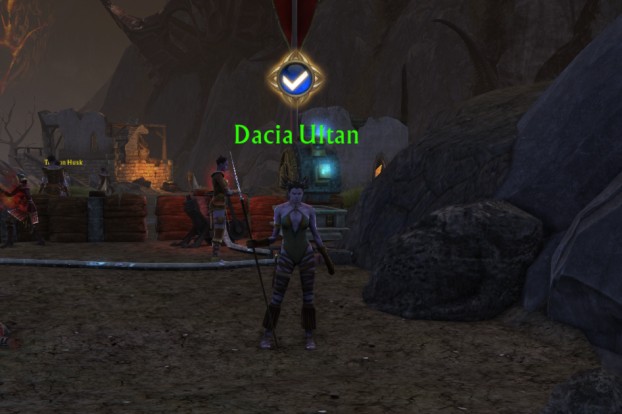
TO COMPLETE Speak with Dacia outside the Life Factory.
Simply walk out of the Life Factory and hand in the quest to Dacia Ultan at /setwaypoint 967 1011
You can see the blue ‘quest complete’ tick above her head, this indicates that you hand in the quest here.
Right click Dacia and the completed quest dialogue will pop up. Click finish to finish the quest.
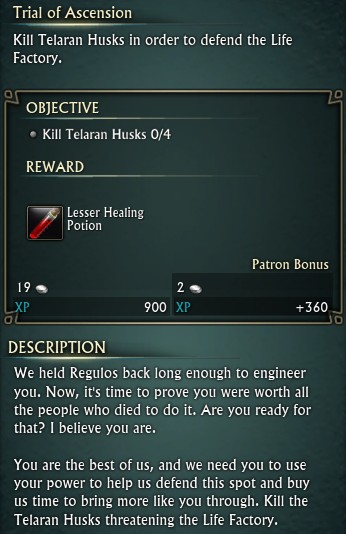
Trial of Ascension
QUEST 2
PICK UP The quest is picked up from Dacia Ultan in The Caul /setwaypoint 967 1011
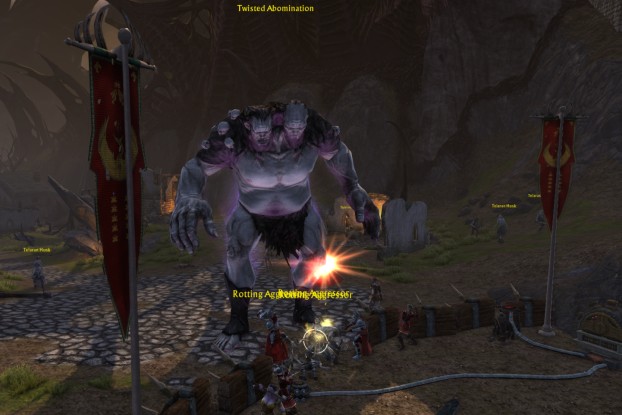
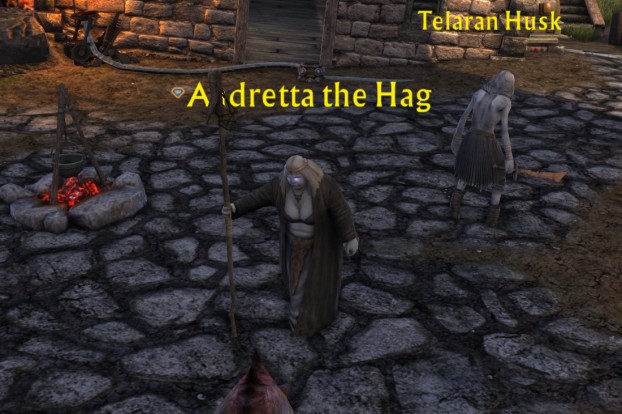
TO COMPLETE Kill Telaran Husks x4
Just past Dacia is a village that is being attacked by a variety of different mobs. You can see each of the mobs has a name above its head written in yellow text, the yellow text indicates that the mobs are neutral, they will not attack you until you attack them.
There is one large mob called the ‘Twisted Abomination’, this guy has a lot of hit points and gives a nice chunk of XP when killed.
The Telaran Husks can be seen running around in the ruined village, occasionally one will come up to the line of defence and join the group of mobs attacking the front line.
Find a damaging ability and use it on the Telaran Husks repeatedly, til they die! Most preset roles will load in with a few abilities already in your ability bar. You can pop this ability into slot 1 and then just spam button 1 to use the ability as often as possible. If you do not have a damaging ability on your bar then open up your ability book [default button P] and choose a damaging ability from the tabs with your 3 souls listed. If you need more help with abilities and souls you may find the Character Creation guide helpful or the New Player Guides page.
Kill 4 of the Telaran Husks to finish the quest. Go back to Dacia Ultan to hand in the quest.
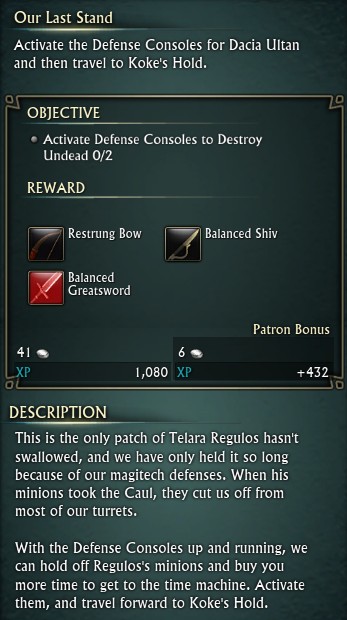
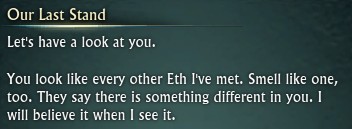
Our Last Stand
QUEST 3
PICK UP The quest is picked up from Dacia Ultan in The Caul /setwaypoint 967 1011
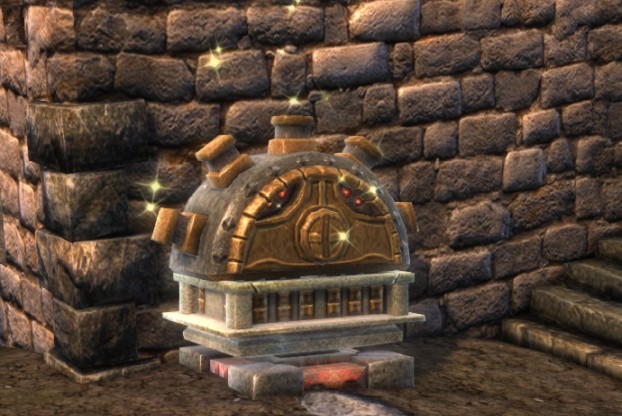
TO COMPLETE Activate Defense Consoles to Destroy Undead x2
Around the ruined village you will find Defense Consoles, these are very large clickable items generally up against the walls of the broken houses. The one pictured is at /setwaypoint 879 1024
Find two of them and right click them to activate them, it takes a few seconds to activate, you can see the progress on your progress bar, don’t move or you will interrupt it!
When you have clicked two of them you can head out of the village and down the path to the next camp. Hand in the quest to Koke Tegus at /setwaypoint 759 963
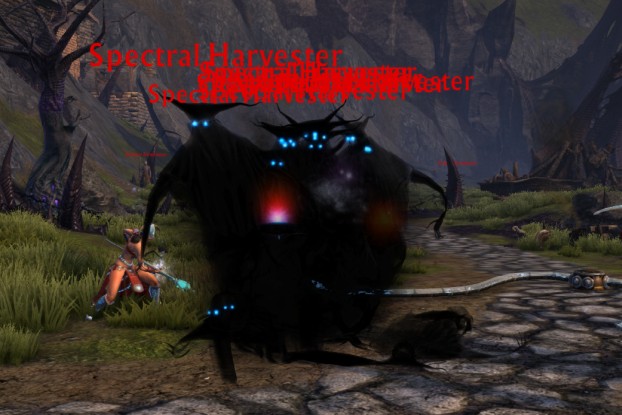
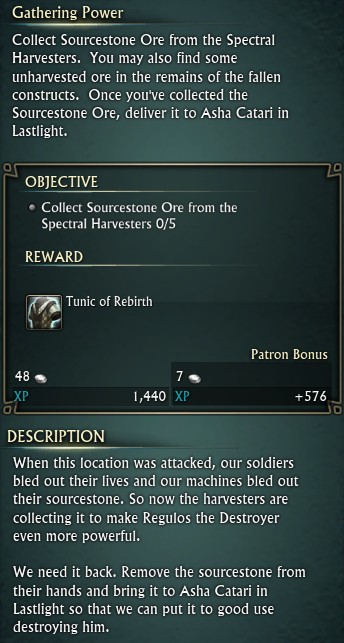
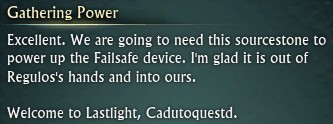
Gathering Power
QUEST 4
PICK UP The quest is picked up from Koke Tegus in Koke’s Hold /setwaypoint 759 963
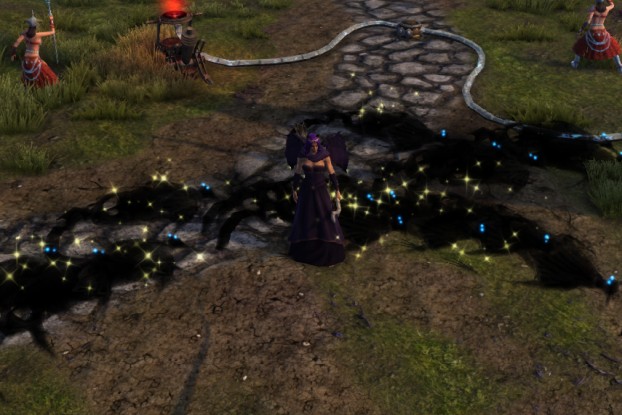
TO COMPLETE Collect Sourcestone Ore from the Spectral Harvesters.
Spectral Harvesters are constantly attacking the camp and there any be a nice group of them for you to kill, if you have an AOE ability then now is the time to use it!
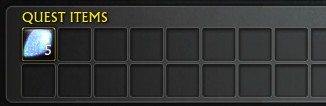
Right click the Spectral Harvesters corpses to loot the Sourcestone, you may want to check if your AOE loot setting is switched on, this allows you to loot all the corpses at once.
When you have looted 5 Sourcestone your quest will be ready to hand in. Note that the Sourcestone wont be in your normal bag, instead they go into your Quest Items bag which is attached to your quest log. Press L to bring up your quest log to see them.
Head down the hill to the next quest hub and hand in the quest to Asha Catari at /setwaypoint 602 1008
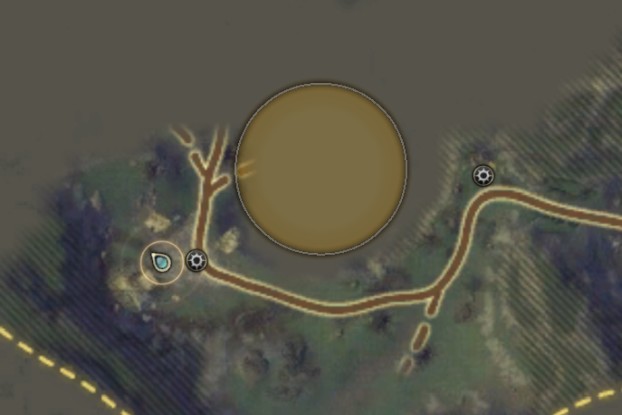
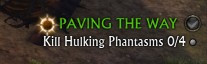
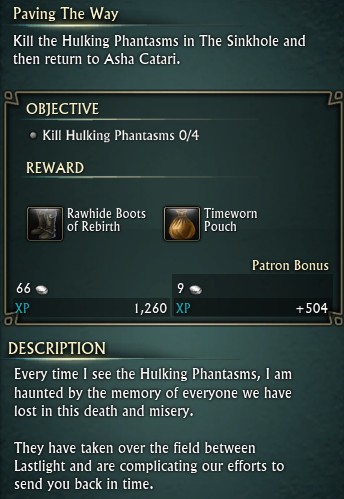
Paving The Way
QUEST 5
PICK UP The quest is picked up from Asha Catari in Lastlight /setwaypoint 602 1008
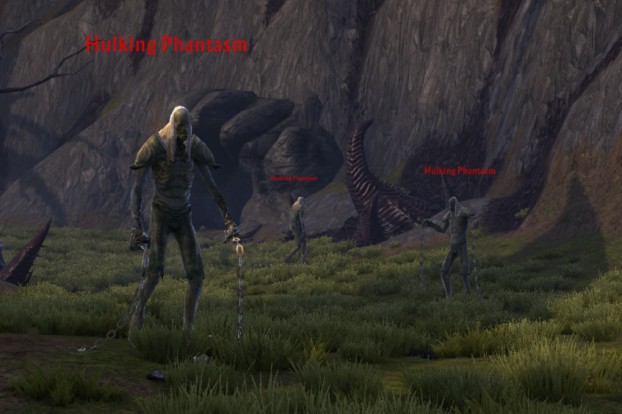
TO COMPLETE Kill Hulking Phantasms x4
If you open up your map (press M) then you will be able to see a yellow quest circle which indicates where you will find the Hulking Phantasms.
On the right hand side of your UI you will see a shortened version of the quest..
This is called a ‘quest sticky’, as long as a quest is listed in your stickies then you will able to see where to go on your map.
Head down the hill till you find some Hulking Phantasms and kill 4 of them.
When you have killed 4 you can head back up the hill to Asha Catari and hand in the quest at /setwaypoint 602 1008
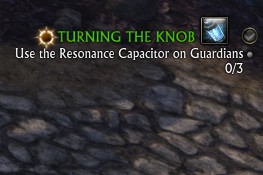
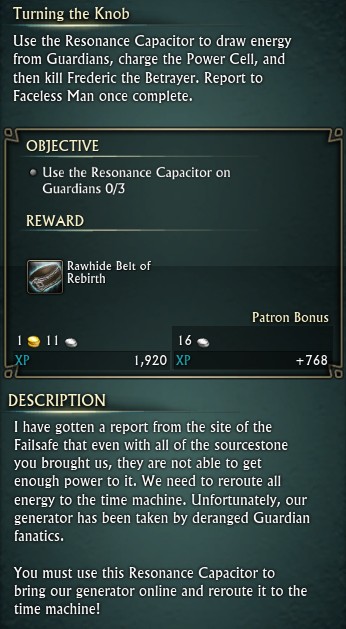
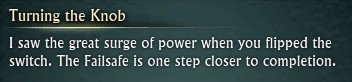
Turning the Knob
QUEST 6
PICK UP The quest is picked up from Asha Catari in Lastlight /setwaypoint 602 1008
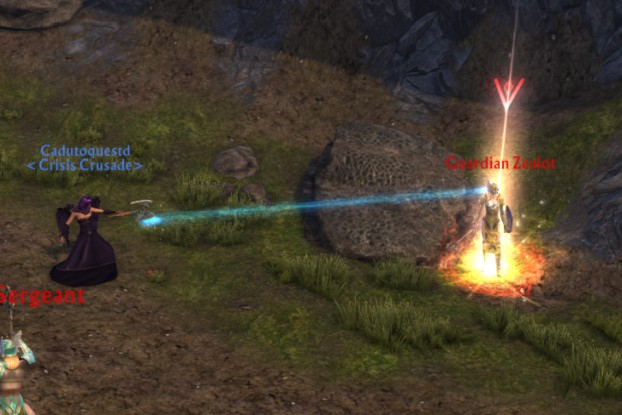
TO COMPLETE Use the Resonance Capacitor on Guardians x3
On this quest sticky there is an item to use called a Resonance Capacitor.
Go to the area marked on the map and target any of the mobs with ‘Guardian’ in their name, click on the Resonance Capacitor in your quest sticky to use it. You can also drag the item from the quest sticky onto your bar for ease of use.
A blue beam will hit the Guardian and kill them!
Do this 3 times to progress your quest.
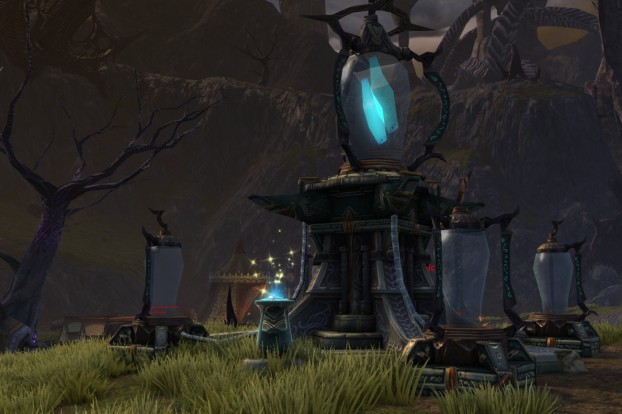
Your quest objective will now change to ‘Charge the Power Cell’
At /setwaypoint 549 909 you will find a clickable Power Cell.
The Power Cell is part of the larger Generator.
Right click the Power Cell to charge it.
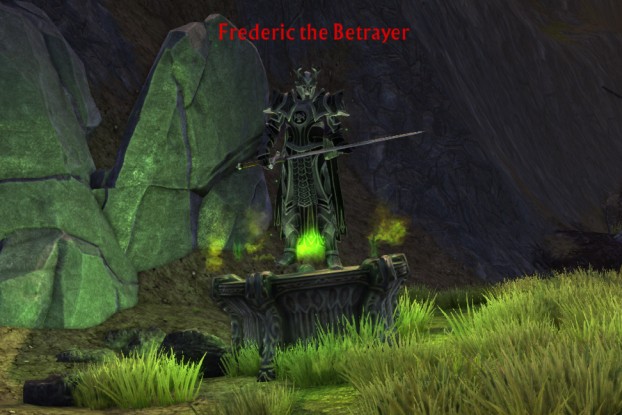
Your quest objective will now change to ‘Kill Frederic the Betrayer’.
Frederic the Betrayer will have appeared on a pedestal nearby, kill him! /setwaypoint 540 907
Your quest objective will now change to ‘Report to the Faceless Man at Tempest Station’.
Go across the bridge to the next part of the map and hand in the Quest to the Faceless Man /setwaypoint 634 864
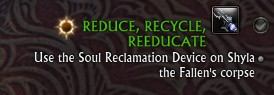
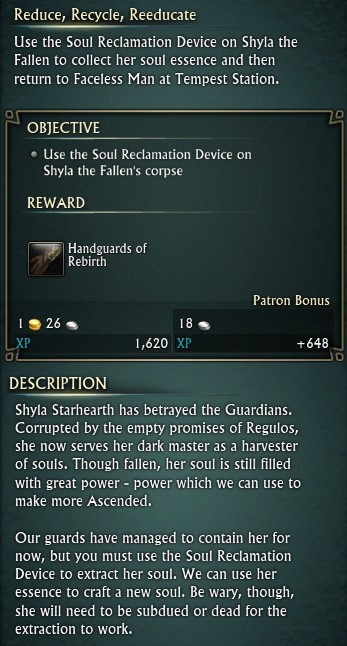
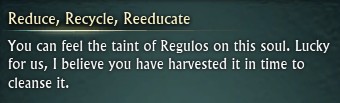
Reduce, Recycle, Reeducate
QUEST 7
PICK UP The quest is picked up from Faceless Man in Tempest Station /setwaypoint 634 864
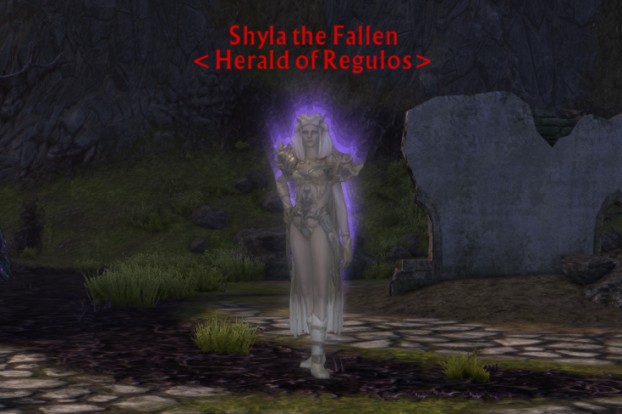
TO COMPLETE Use the Soul Reclamation Device on Shyla the Fallen’s Corpse
You will again have an item attached to your quest sticky a ‘Soul Reclamation Device’
Go to the are marked on your map, towards the back of the village on your right, to find Shyla the Fallen. /setwaypoint 665 783
You will need to walk right next to her to activate her and be able to kill her! During the fight she will go immune and spawn 3 adds, these are easily killed and then her shield will drop and you can kill her.
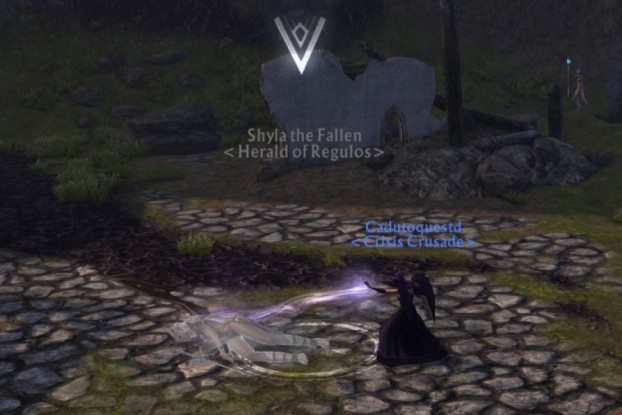
When she is dead, target her corpse and click the Soul Reclamation Device in your quest sticky to use it. This will extract her soul so you can take it back to the Faceless Man, lovely..
Hand in the Quest to the Faceless Man /setwaypoint 634 864
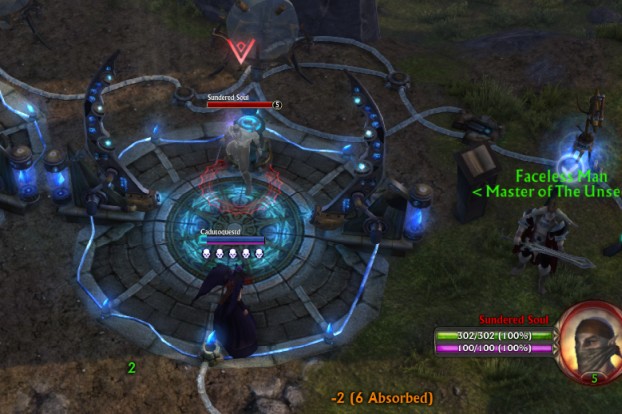
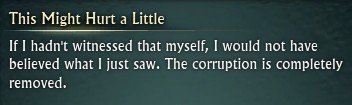
This Might Hurt a Little
QUEST 8
PICK UP The quest is picked up from Faceless Man in Tempest Station /setwaypoint 634 864
TO COMPLETE Use the Soul Cleanser
To the left of the tents are two Soul Cleansing machines.
You can see a clickable orb on both machines. It does not matter which one you use.
When you click the orb, some pretty lights will shine and then up pops a bad guy.
You quest objective will now change to ‘Defeat the Sundered Soul’
Kill the Sundered Soul.
Hand in the Quest to the Faceless Man /setwaypoint 634 864
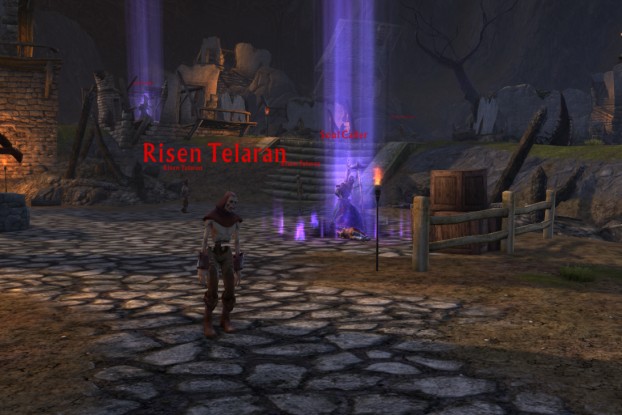
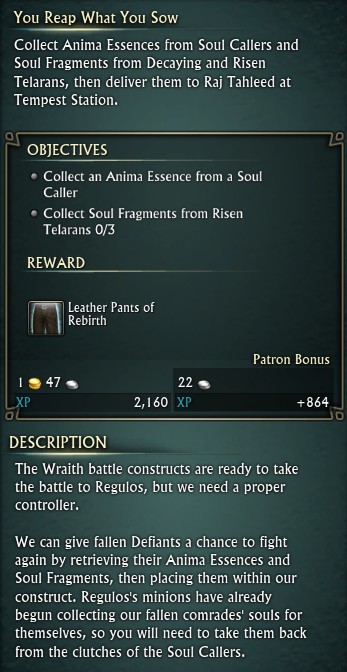
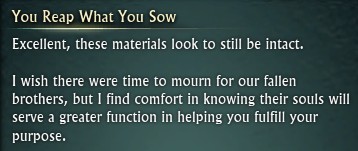
You Reap What You Sow
QUEST 9
PICK UP The quest is picked up from Faceless Man in Tempest Station /setwaypoint 634 864
TO COMPLETE ~ Collect an Anima Essence from a Soul Caller ~ Collect Soul Fragments from Risen Telarans x3
Soul Callers are Mages casting spells to summon baddies, you can find them easily as they have a purple beam of light emanating from them. Risen Telarans are wondering around the broken buildings.
Kill and loot them to collect the items and complete the quest.
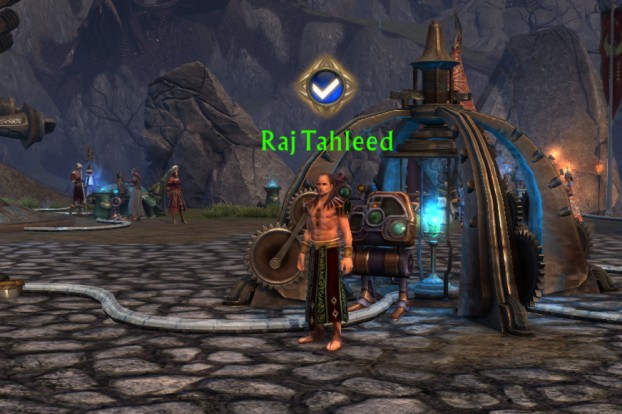
Your quest objective will now change to ‘Deliver the Anima Essence and Soul Fragments to Raj Tahleed at Tempest Station.
Raj Tahleed is stood in the middle of Tempest Station, hand in the quest to him /setwaypoint 655 872
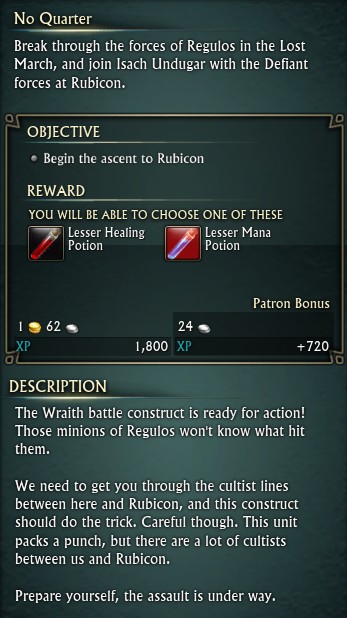
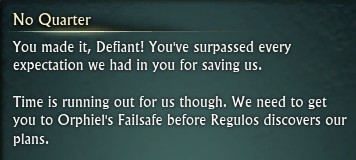
No Quarter
QUEST 10
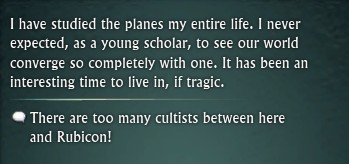
PICK UP The quest is picked up from Raj Tahleed in Tempest Station /setwaypoint 655 872
TO COMPLETE Begin the ascent to Rubicon
When you pick up the quest, another dialogue will appear, click the bit of text that says ‘There are too many cultists between here and Rubicon!’
Raj will then release a helper Construct that will escort you up the hill to the next quest area. This will not work if a construct has been released recently by someone else, if this is the case then just head up the hill anyway. The mobs you encounter will be hard and grouped up, the best thing you can do here is just run straight past them and continue up the hill till you reach the quest hand in.
Follow the path all the way up to the top of the hill to hand in your quest to Isach Undugar /setwaypoint 472 814
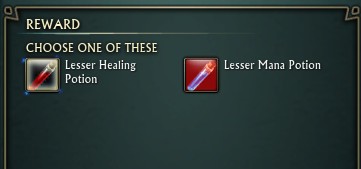
Note: This is the first quest where you will be asked to choose a reward. Click on the potion you would like and then hit the finish button. When you reach the real world the quests will nearly always have you choose between different rewards, generally different gear items for different classes, you will need to make sure you choose the right item for your class, you can find out more about this in the New Player Guides.
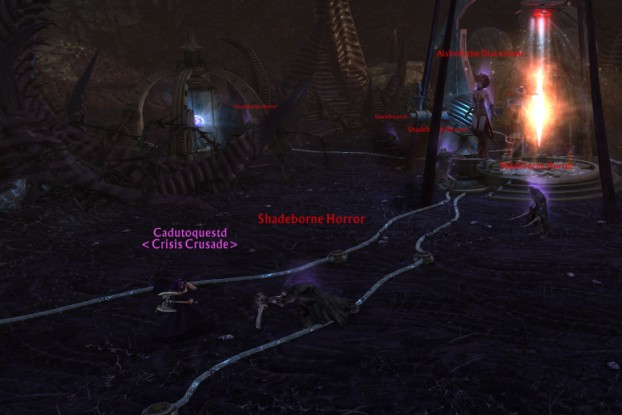
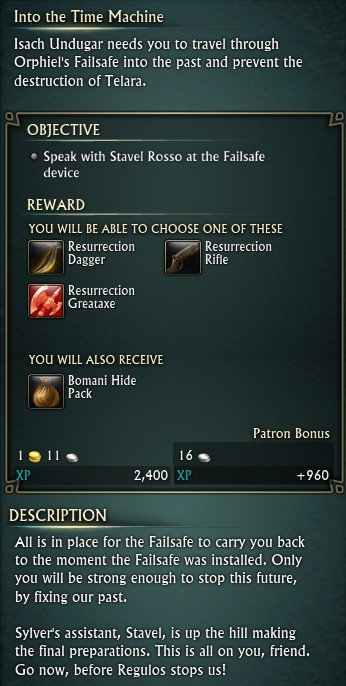
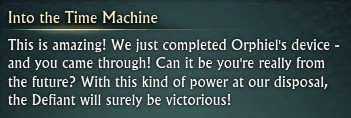
Into the Time Machine
QUEST 11
PICK UP The quest is picked up from Isach Undugar in Rubicon /setwaypoint 472 814
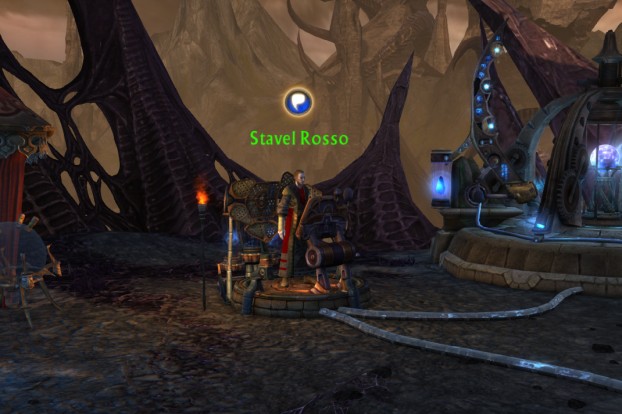
TO COMPLETE Speak with Stavel Rosso at the Failsafe device
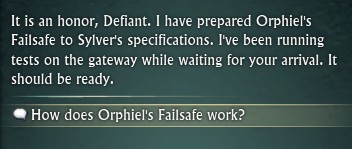
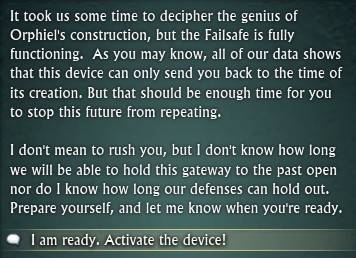
Continue up the hill to meet with Stavel Rosso and right click to talk with him.
Click the conversation bubbles to continue through the conversation and progress the quest.
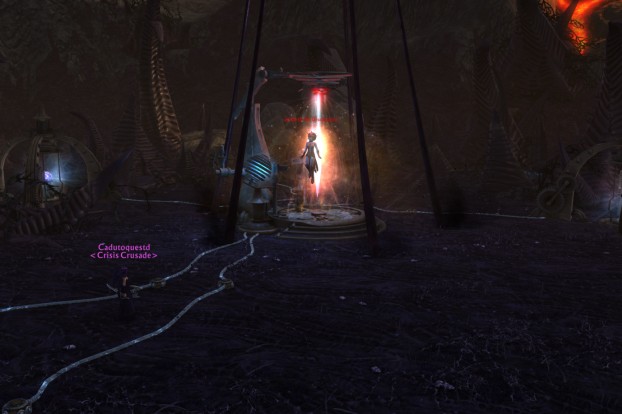
In the clearing nearby the failsafe device will start to activate, but as it does, a Death rift will open up right on top of it and Alsbeth enters the world to try to stop you!
You will now have a Rift Progress tracker on your screen, this tracker will tell you what you need to do to close the rift.
Start by killing 4 of the Shadeborn Horrors that have spawned.
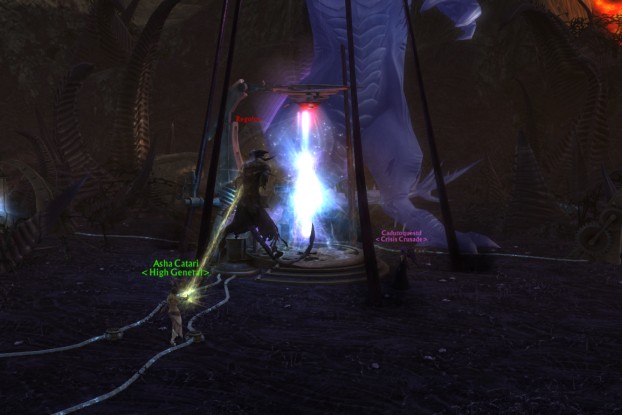
You then need to kill the Stitched Abomination.
Alsbeth will then join the fight, a few NPCs will help you to kill her.
Once Alsbeth is dead, Regulos will appear! Asha Catari will keep him busy while you wait for the portal to turn white, walk into the portal to go back in time and enter the real world.
Quest is handed in to Trinian Nillor in Freemarch /setwaypoint 6196 4293
Link to video that Defiants see when they leave Terminus
Rares
There are a few rares to kill, but they do not count towards any kind of cheevo, so you don’t need to worry if you miss them, they are also super rare, with hours between spawns. you can create the target macro and use it while you are in the zone, it is unlikely that you will find any of the rares unless you intentionally stick around in the zone before completing the final quest. There really is no need to do this.
A few of the rares path around the whole area where they spawn. The zones are so small that you can do a full check of the zone in a couple of minutes so its best to just run around spamming your macro rather than only doing so at the specific spots.
Andretta the Hag /setwaypoint 880 1015 Found in The Caul (the first village), she has a large walking path all around this village and possibly further.
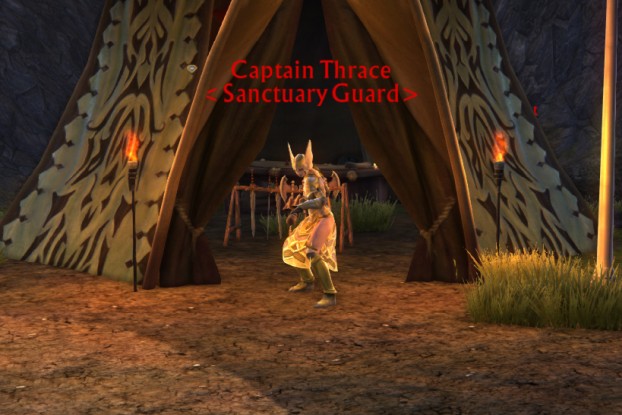
Captain Thrace /setwaypoint 550 853 In the tent in Clods Hollow, may be found in the other tents too.
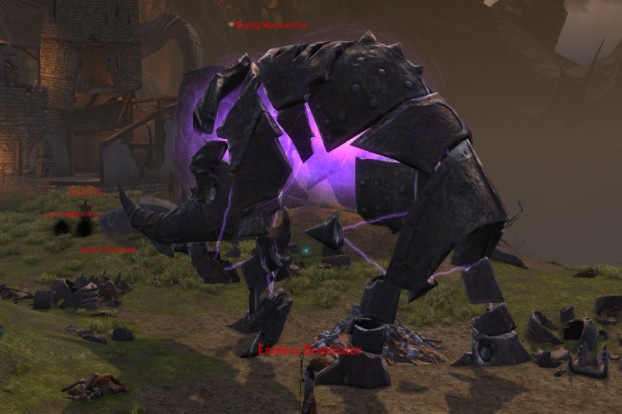
Raging War Machine /setwaypoint 704 1073 Walks up and down the path in Regent’s fall, very large construct, hard to miss!
Reborn Endless Cultist /setwaypoint 540 786 In the Lost March in the little enclave just before Rubicon and just after the Endless Barricade.
The Slave Driver /setwaypoint 764 967 He can be found in the middle of the cave filled with hulking phantasms within The Sinkhole.
Thundering Prognatus Corpus /setwaypoint 699 836 Unknown Location
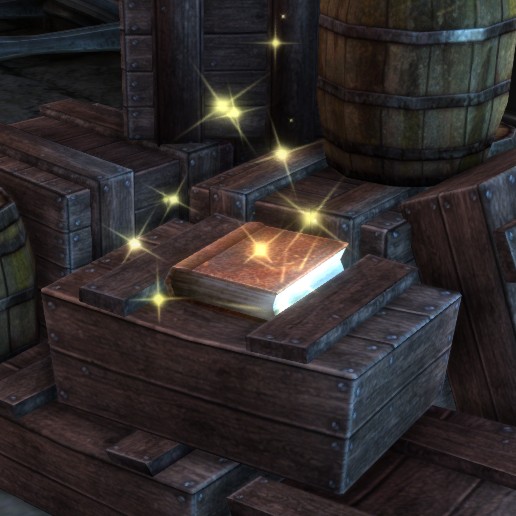
Book
/setwaypoint 1030 1021 The Price of Progress
I haven’t managed to find this books location out in the real world. If you know the location please let me know so I can add it here!