Helping you defeat bad guys in Dungeons and Raids!
KBM gives you additional UI elements that show you extra information during dungeons and raids. It will help you see when the next boss abilities are happening and let you know which raid members are being targeted with certain abilities. It also has a full ready check window so you can clearly see if people are ready! KBM also shows you battle rez cooldowns for your healers and tank swap mechanics. It has larger, moveable cast bars so you can place them where you can see them properly, as well as a ‘balance bar’ to help you see dual boss health on fights with 2 bosses.
Download KBM
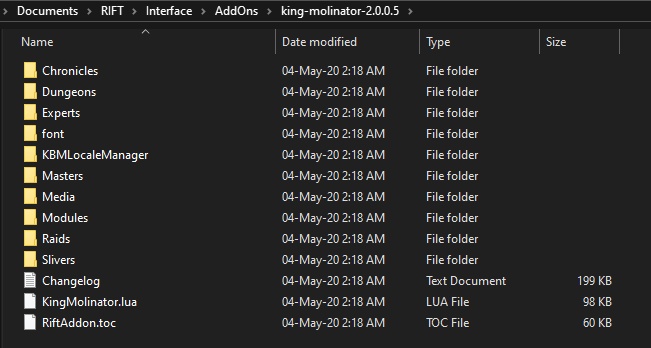
The most recent version of KBM is on curseforge. You can download it manually or use the curseforge App to download. Note: The Add On is actually called ‘King Molinator’ everyone just calls it KBM, an acronym for King Boss Mods.
See the Adding Addons Page for more information about how to install Addons. See the Addons page for a full list of recommended Addons.
This is what the inside of your KBM folder should look like.
KBM UI
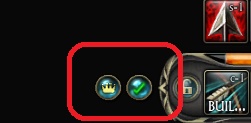
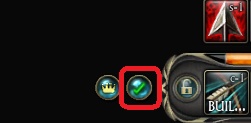
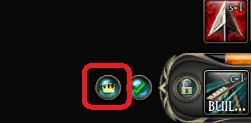
When you first install KBM it will show up in game as a small button with a green tick in the middle of your screen, you need to right click and drag to move this button around, when you move it, you will find another button underneath with a little crown, right click to drag this one too.. you can place these buttons out of the way near the edge of your screen. (I like to put them just to the left of my main action bar)
You can type ‘/kbmhelp’ in chat to bring up a list of commands..
The trick with KBM is to make it give the information you need in an easy to see location. For most of your playtime, KBM will be 2 small dots doing very little at all, it only ‘comes to life’ during boss encounters where it is needed. KBM will automatically detect when you are raiding and start giving you the information for the boss you are fighting. You now need to tell it where to display that information! I will go through this below.
The Ready Check UI
Clicking the tick button or performing a ready check using the in game UI will open up the KBM ready check window, in this table you will see a full list of all your raid members. Using this table you can check who has buffed properly for the raid, showing powerstones and vials, as well as eternal weapon buffs.
Ready Check – See who has clicked ready for the ready check and who is still waiting or not ready.
Player Names – Full list of all raid members.
Planar Charges – Shows how many planar charges each player has out of their max.
Powerstones – Shows the type of powerstone each player has on their weapons.
Feast – Shows who in the raid has a feast buff running.
Soul Health – Shows the soul % of all raid members.
Vials – Shows which vial your raid members have used.
Planar Protection – Not used much these days as the buff is so small for level 70s.
Insoles – Shows you which of your raid members have insoles on.
Rogue Eternal Weapon Buff – Shows which players have the buff from the Rogue’s Eternal Weapon.
Primalist Eternal Weapon Buff – Shows which players have the buff from the Primalist’s Eternal Weapon.
Mage Eternal Weapon Buff – Shows which players have the buff from the Mage’s Eternal Weapon.
Warrior Eternal Weapon Buff – Shows which players have the buff from the Warrior’s Eternal Weapon.
Cleric Eternal Weapon Buff – Shows which players have the buff from the Cleric’s Eternal Weapon.
KBM Version – Shows you which raid members also have KBM installed and their version number.
If the ready check windows gets stuck open after a ready check has cleared, simply click the tick again to dismiss it.
If you lose track of the two buttons, you can reset their position by using the chat commands.. /kbmdefault button or /kbmdefault rcbutton If you need to reset the positions of anything else, type just /kbmdefault to bring up the list of commands.
KBM Options and Elements
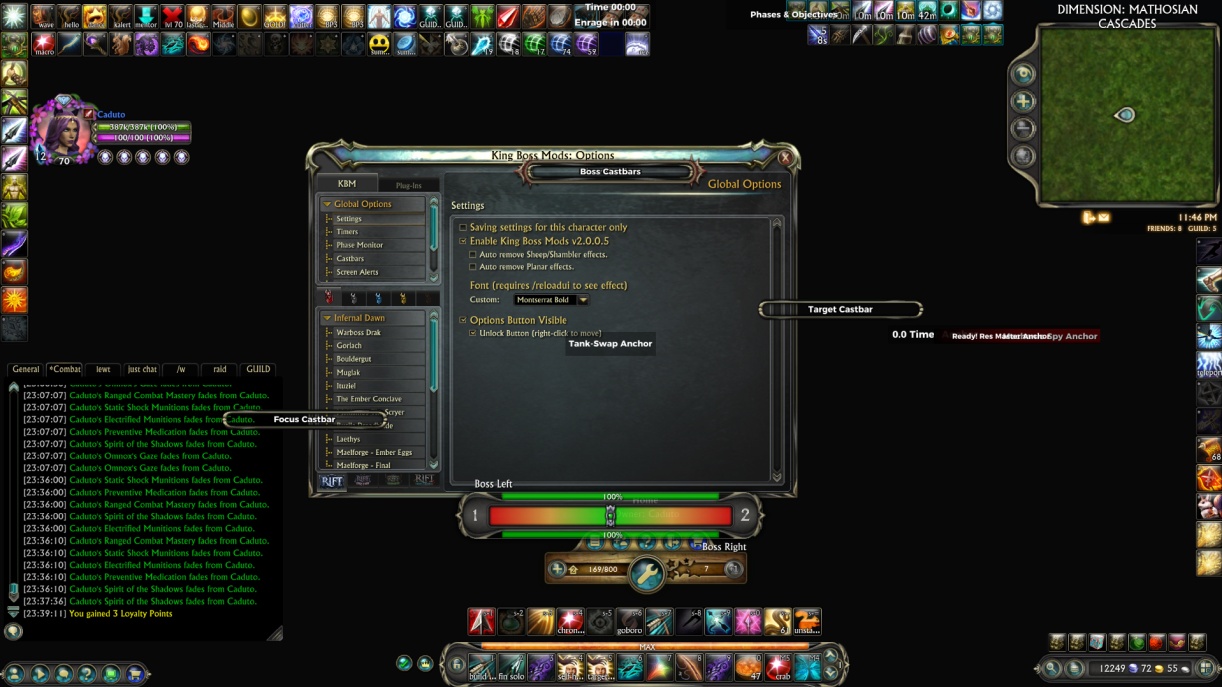
Clicking the crown button will bring up all the KBM settings and allow you to see and rearrange all of the extra UI elements. This is the main focus of KBM, you will need to spend a small amount of time rearranging these elements to your liking, and then maybe tweaking the positioning between boss pulls til you get it just perfect for yourself. Everyones UI is going to be different, there is no wrong or right way to set up your UI, as long as you can see the information you need at the right time to be able to play and react effectively.
When you first click the crown, your screen will suddenly be very busy as it shows you every UI element available to you. This can be a little daunting to a new KBM user!
So we are going to carefully go through every UI element and hopefuly help you decide if you want to show them and where to put them on your screen.
All of the UI elements can be dragged around the screen to wherever you want them, and they can also be deactivated using the settings menu.
Step 1
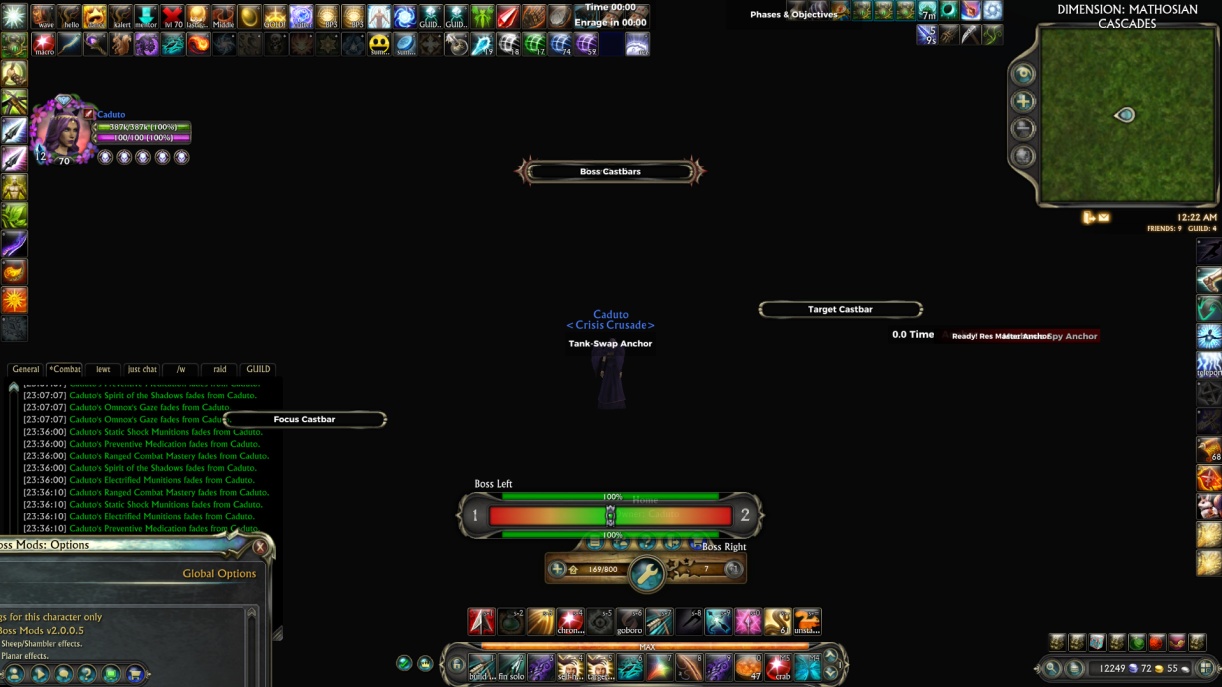
The first thing we are going to do is move the main settings window out of the way, I tend to place it in the bottom left over my chat box.
Once the main window is out of the way you can now clearly see the additional UI elements.
Step 2
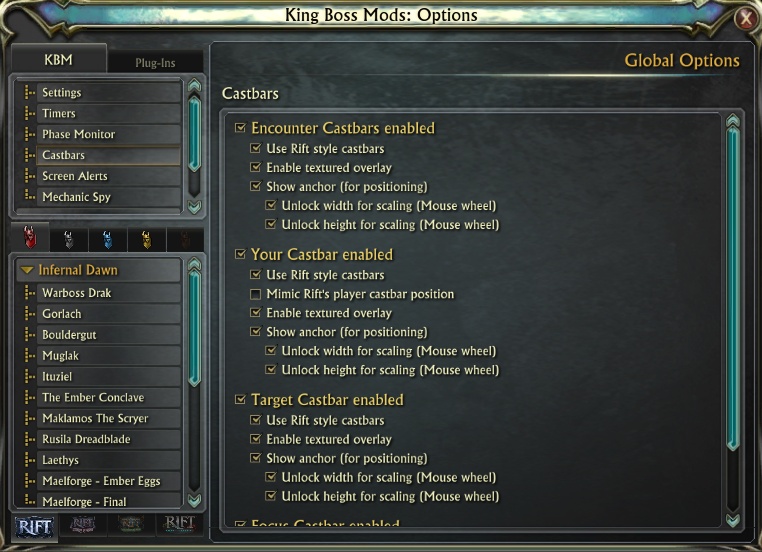
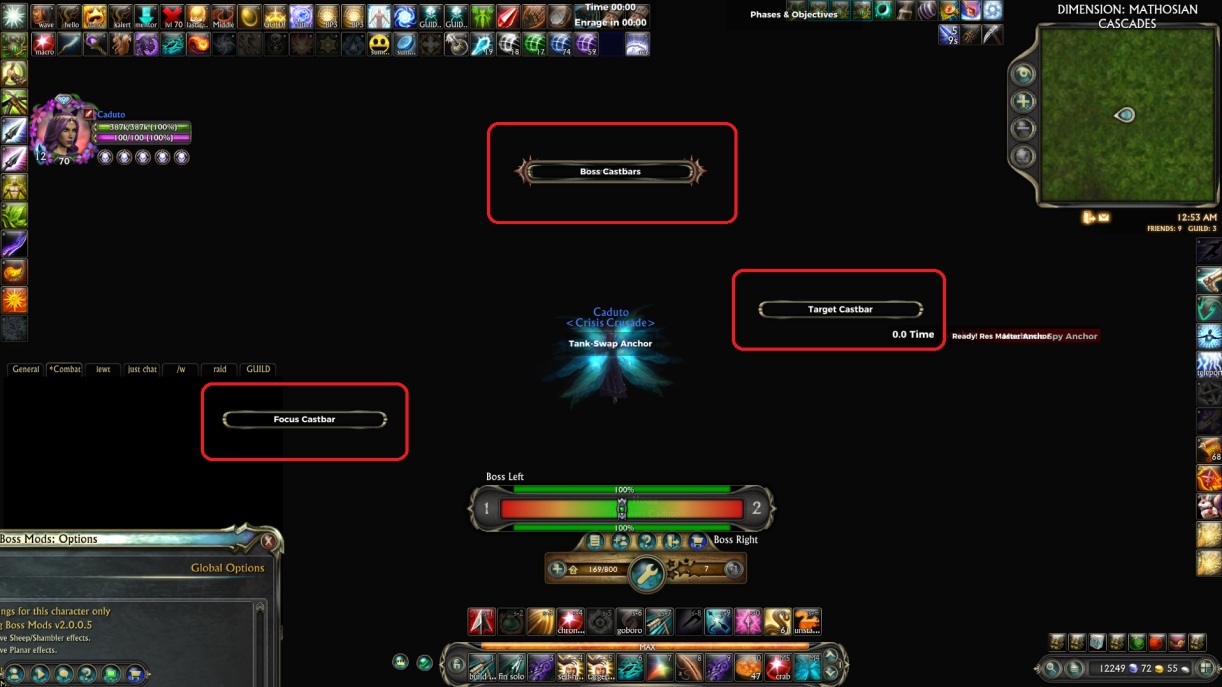
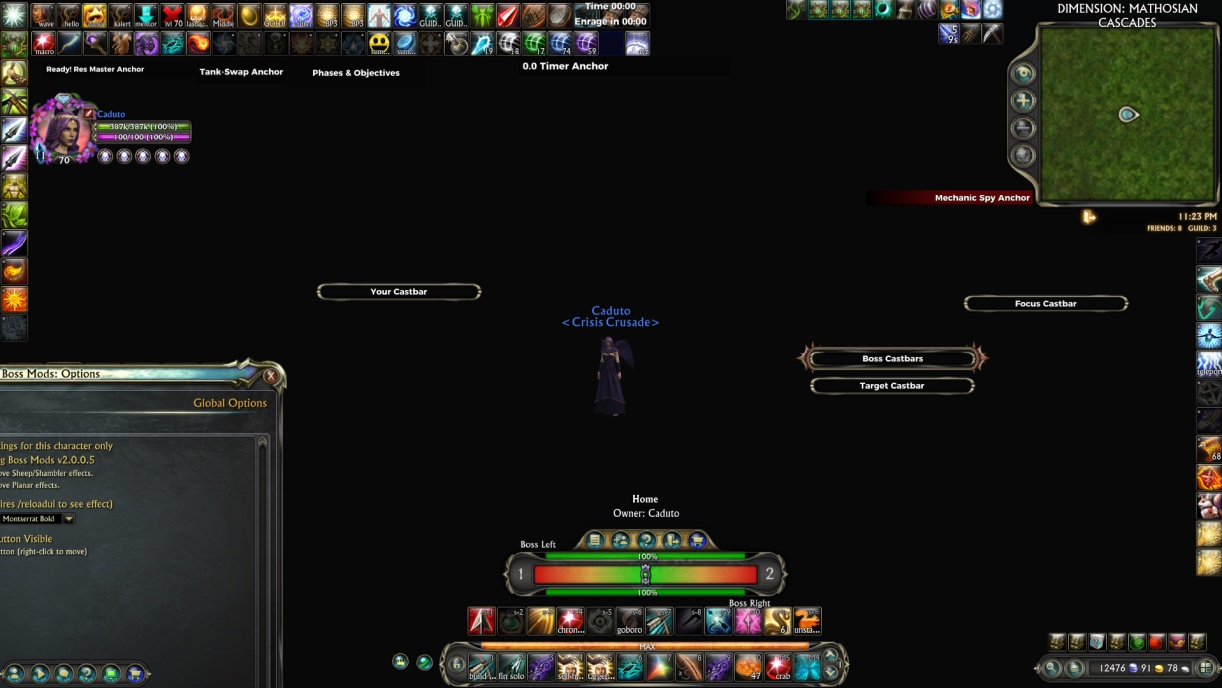
Now we can rearrange the cast bars, there are 4 cast bars to position.
Focus Castbar – This shows the cast of your focus target.
Target Castbar – This shows the cast of the mob you have selected.
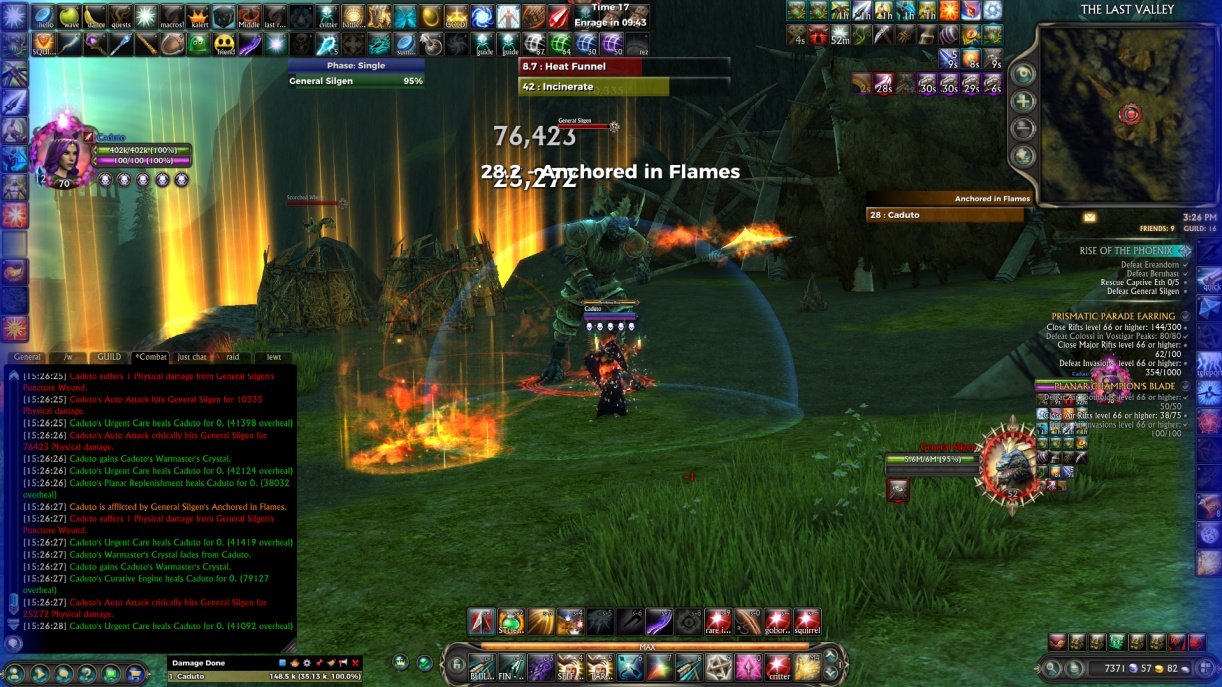
Boss Castbar – This shows the cast of the main boss, even if you have an add selected.
Your Castbar (hidden under the boss castbar) – This shows your own casts.
You can of course hide all these castbars and stick to the Rift Default ones, however the KBM bars can be sized much bigger, making it much easier to see that boss inturrupt!
You can enable/disable the KBM castbars in the main setting window, select castbars from the menu in the top left.
Be aware that these cast bars are in addition to your normal rift castbars (attached to the player/target portraits). They do not switch off or replace the normal Rift castbars.
Left click and drag to move the bars around til you are happy with their position on your screen. Use the mousewheel to change their size and the settings to change the look.
Step 3
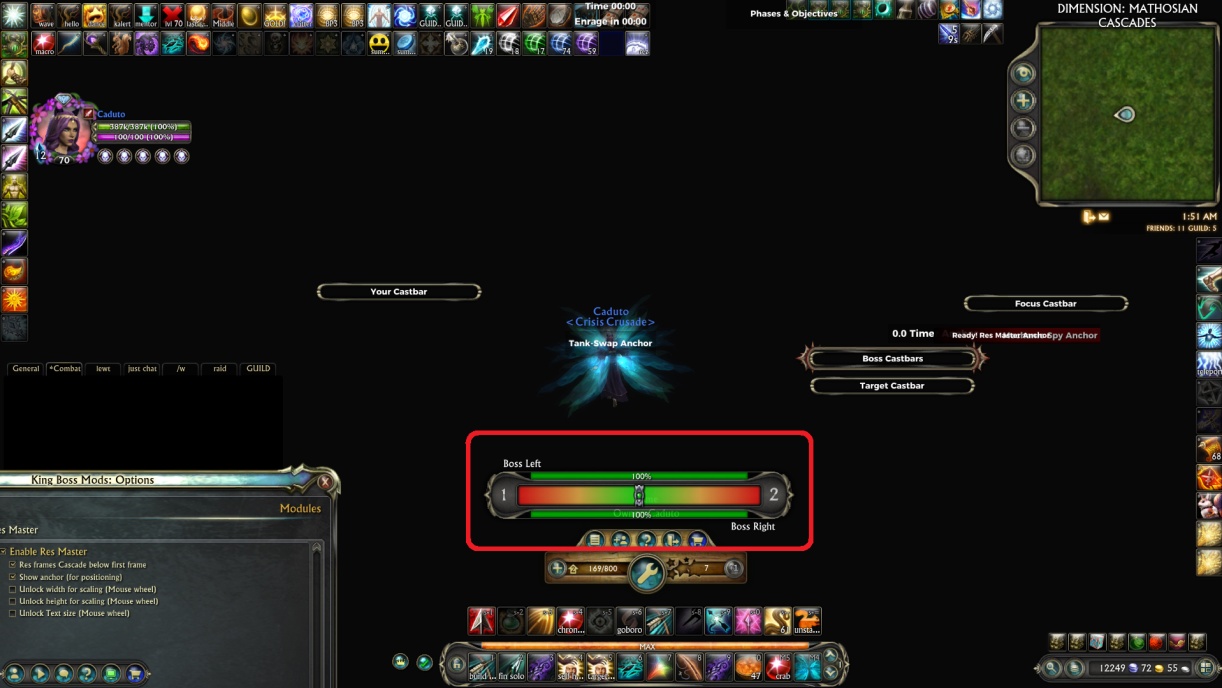
Next we can focus on the Boss HP Balance bar (Called the ‘Percentage Monitor’ in the settings)
This is the largest of the UI elements but also the one that is least used in raids. This element will only show if you have a dual boss situation where you need to keep the two bosses HP’s equal to each other.
This isn’t used at all during the Current level 70 content and only a handful of times during previous raids. You can just disable this if you want to, but if you find yourself in an older content raid one day then you will find it very useful for those few encounters, so its best to just shrink it down a little and move it to the side or bottom of your screen.
Step 4
Now we can position the Boss Timers and the ‘Phases & Objectives’.
— Boss Timers is a simple little element that will show you how long you have been in combat and the enrage timer for the boss (if there is one).
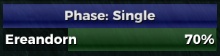
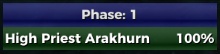
— Phases & Objectives will show you which phase of the fight you are on and (sometimes) a list of all phases for the boss fight with timers for each phase (if they are timed).
Step 5
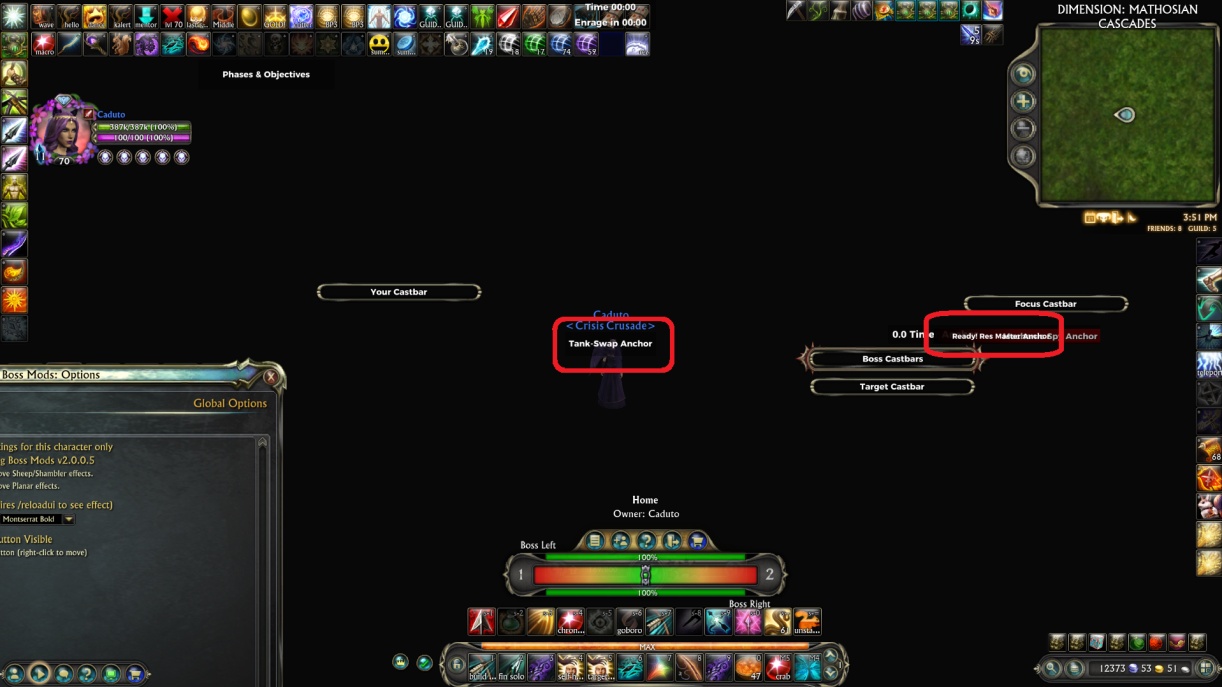
Now we can decide where to display the ‘Tank Swap Anchor’ and ‘Battle Rez Anchor’.
— Tank Swap Anchor – On many raid fights you will need 2 tanks, those tanks will tank one a time and while tanking will gain a stacking debuff, when that debuff gets too high the other tank will need to take over til the debuff wears off and they can switch again. The Tank Swap Anchor will show you the debuff count next to each tank, allowing you to easily see when the swap needs to occur. This is super helpful for the tanks, helpful for the healers and even helpful for the DPS, just for that extra bit of situational awareness.
— Battle Rez Anchor – This will show you the battle rez cooldowns of all the healers in the raid that also use KBM. It is super helpful for the raid leader and the healers to see at a glance how many battle rez’s are left and how long til the next is available!
Step 6
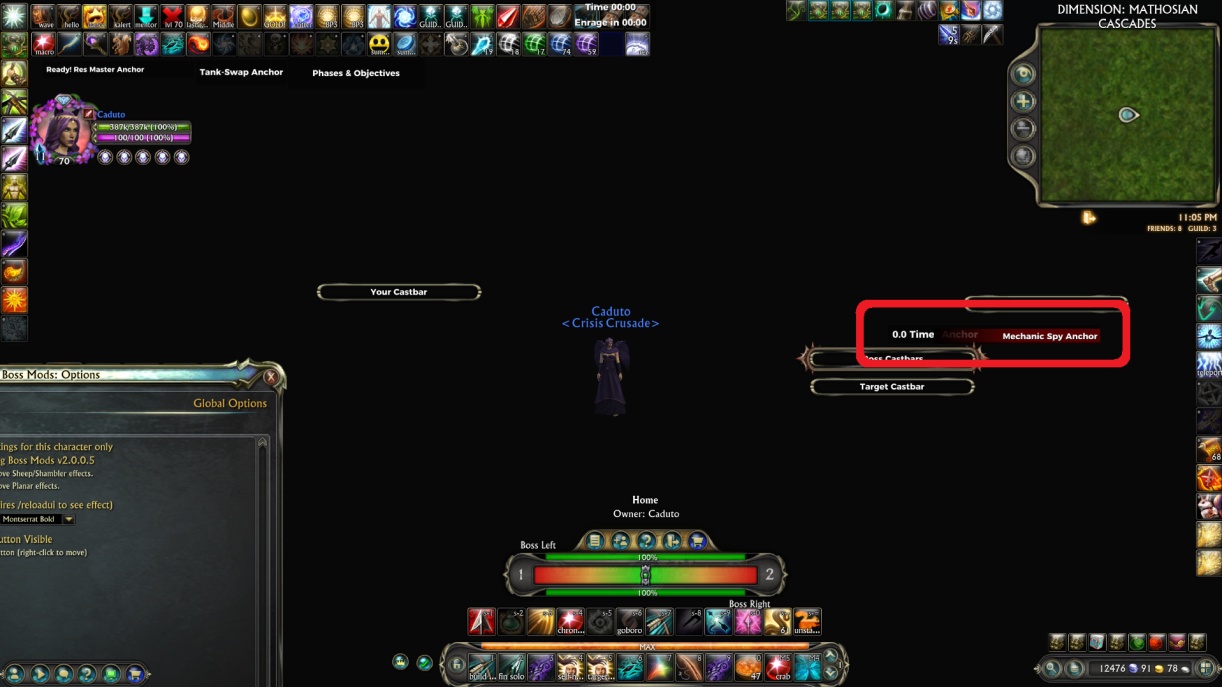
And finally the main sources of information from KBM, the ‘Timer Anchor’ and the ‘Mechanic Spy Anchor’.
— Timer Anchor – This is where you will see the boss ability timers. Any ability that the boss has that happens at a specific time interval will be displayed here, with timers to show you how long is left til the next ability.
— Mechanic Spy Anchor – Here you will see the specific abilities generally targeted at a single person. It will also show some debuffs on the raid that need to be cleansed.
You should place both of these anchors in easy to see locations to help you keep proper track of all those abilities during the raid.
All Done!
Once you have positioned all the UI elements you can then close the settings window and watch them all disappear!
The different UI elements will only show up during a boss fight when they are needed.
Additional Settings
You may want to have a quick look through the settings in the ‘global options’ section to fine tune your experience.
— Settings – Has a tick box for turning off sheep/shambler effect automatically ( I recommend you don’t click this) — Settings – Has a tick box to automatically switch off ‘Planar Effects’ currently this will just switch off the glowing eyes effect from the planar earring. — Screen Alerts – This is the big countdowns for big abilities that will likely instantly kill you if you don’t take action. The default for this is big bold and in the middle of your upper screen, you can show the anchor to reposition it and change the size (I recommend you leave this as default) — Screen Alerts – Here you will also find the Vertical and Horizontal alert bars. These are glowing flashing bars that show on the edge of your screen when big abilities are happening, it is up to you if you wish to turn them off.