Primeval Feast

Cheevos found in H > Raids > Rift

General

Location: Droughtlands – Near the Fallback portal — You will need quantum/omen sight To see the entrance.
Waypoint: /setwaypoint 8591 6877

Difficulty Tier: Tier 3
Hit Requirement: N/A
Level of bosses: 52
Number of bosses: 4 (plus a mini-boss)
Max Group Size: 10
Recommended Minimum Group Size for Level 70 cheevo run: 4

Solo at 70?: No, a 2 player minimum is required.
All cheevos while solo?: No, a 2 player minimum is required.

Note: A lot of the tactics that require 2 players can be instead completed with a pet spec or with a second account. It is much easier to just bring another person!

You can enter this raid solo, you do not need other players in the group.

A couple of level 70 players can easily kill everything in this raid.
This guide is mainly designed to show you how to get the cheevos.
If the content becomes ‘relevant’ again then I will expand the boss guides as needed and add more detail.

The Trash

The first trash encounter is a small bit of roleplay around Prince Hylas at the entrance.

There are lit up circles with ‘Goblin Scorchers’ in them. If you pick these up then you will be given the ability to place down an explosive Goblin, placing these near the mobs that are attacking Hylas will kill them. In an ‘At level group’ you would want your tanks to gather up the mobs and then have a couple of DPS be dropping multiple bombs to explode the baddies, or just keep your tanks alive until Hylas stuns the mobs (30 seconds). As level 70s you can just wait until Hylas stuns all the mobs and then drop the bombs one at a time to clear them.

Once you have cleared all the mobs, Prince Hylas will do a bit of roleplay and then a blue circle will appear around him.
This circle, and others like it, will disguise your character and give you special abilities. These are explained below.

Note: You can just ignore this whole encounter and go straight to the anchors.

Prince Hylas first enounter

Mini Boss - 2 Life Anchors

The Fae Glamour disguise

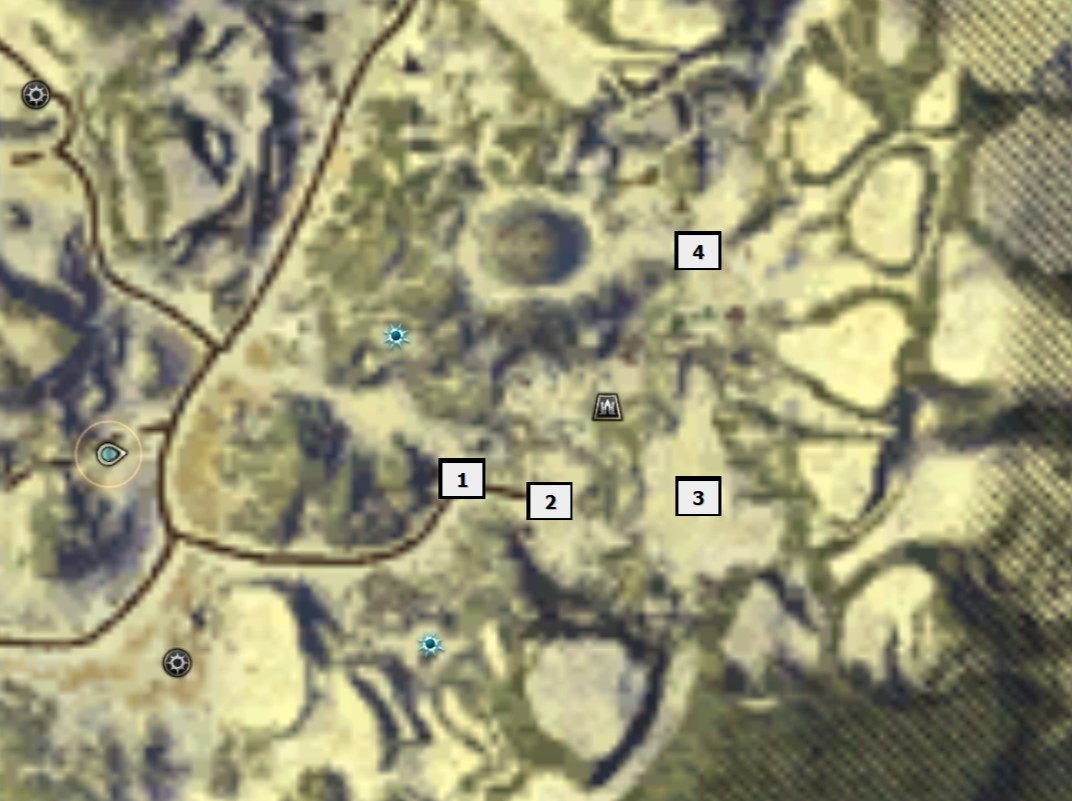
The Life Anchors are protected behind locked doors. The keys for these doors are being held by some bad guys, you need to kill the right bad guys to loot the keys and open the doors.
The bad guys cannot be killed by your normal abilities, instead you will need to use special abilities and traps to get the keys.
This is much easier to do with a group of players (We would normally assign 5 players to each side and work as a team), but it is possible to solo each anchor, it will just take a bit of time.

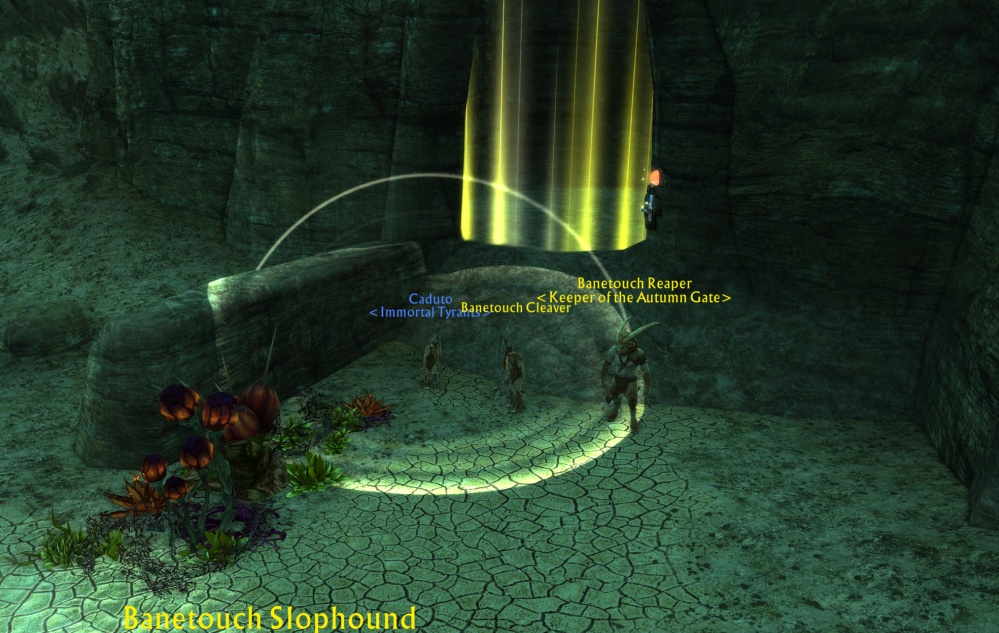
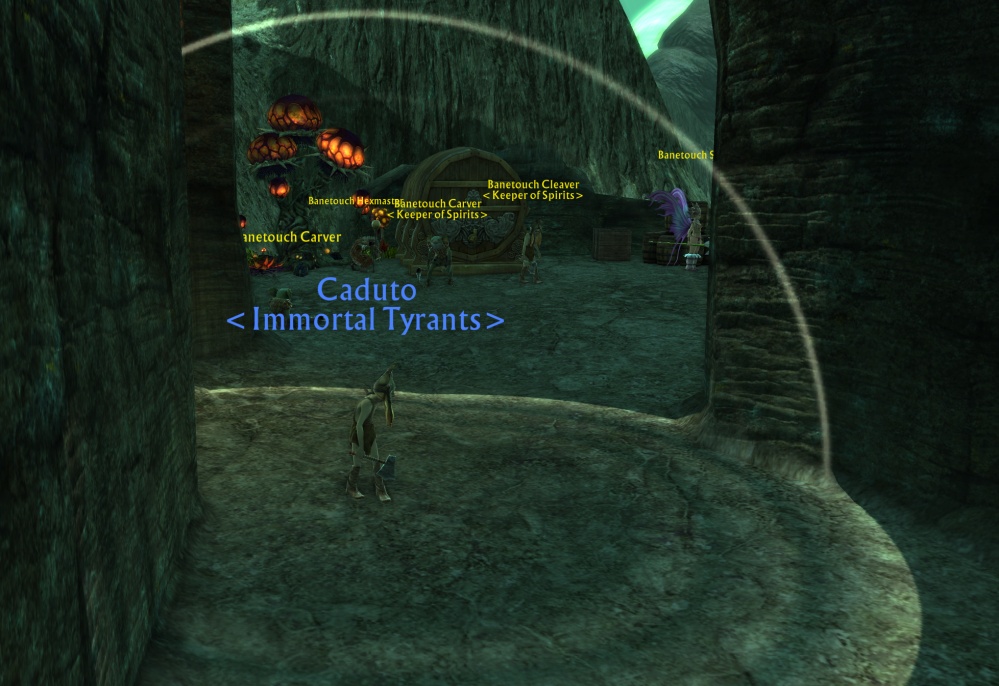
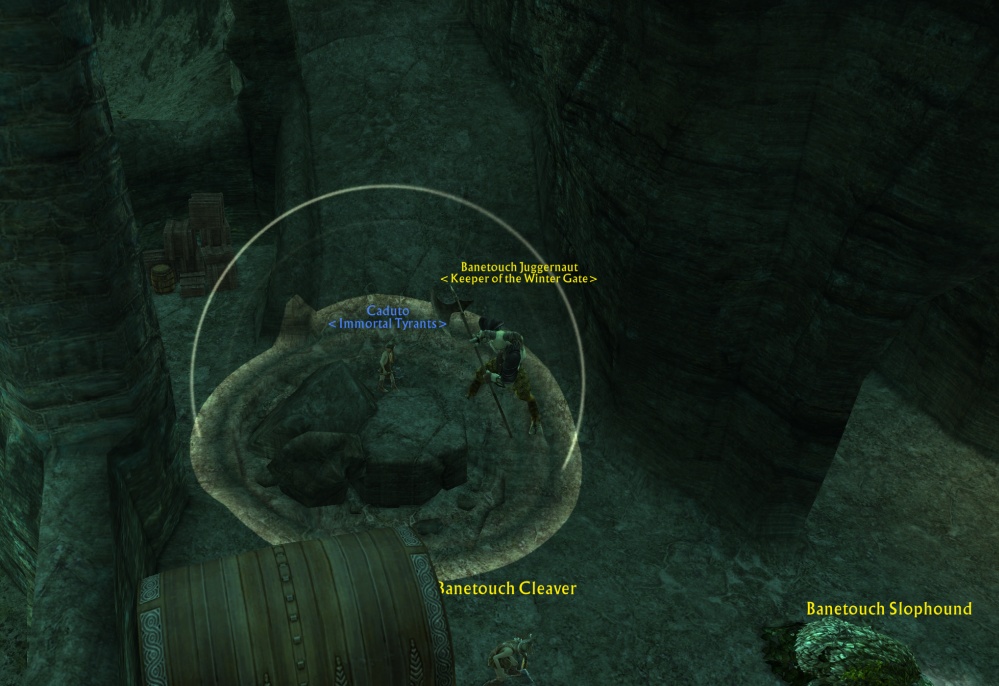
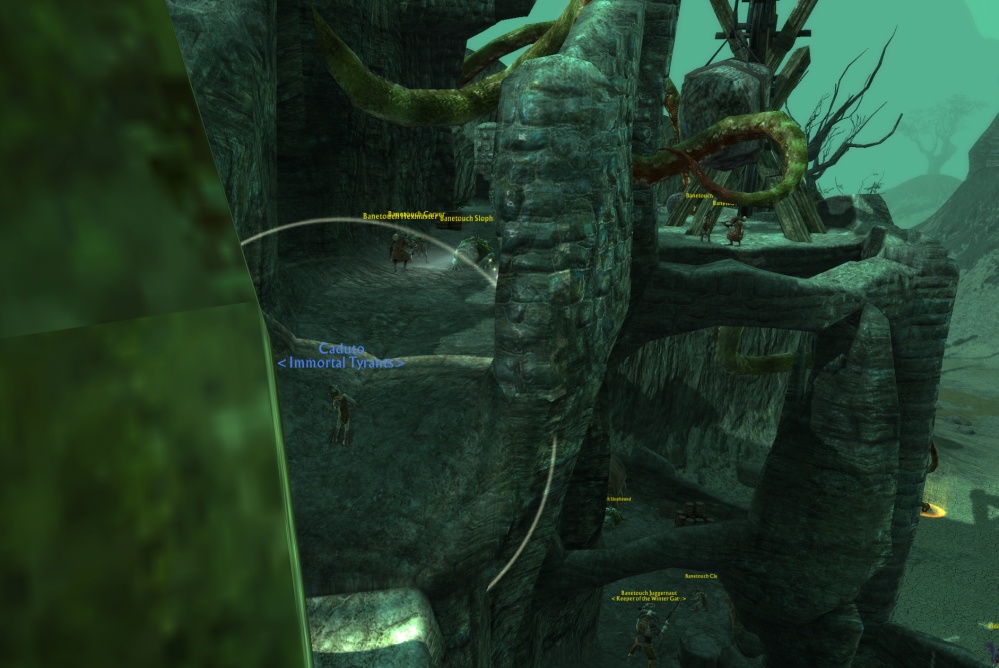
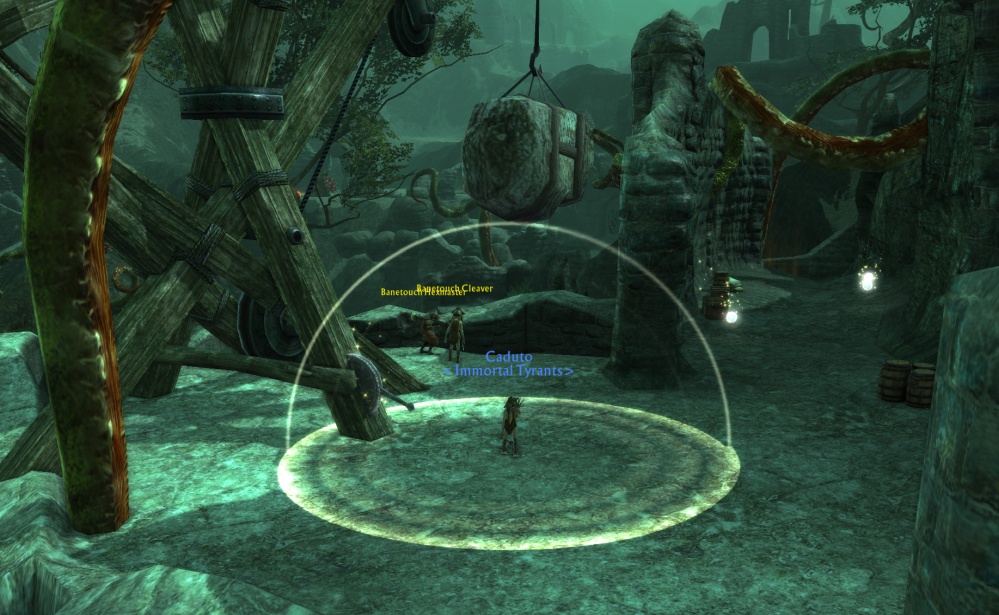
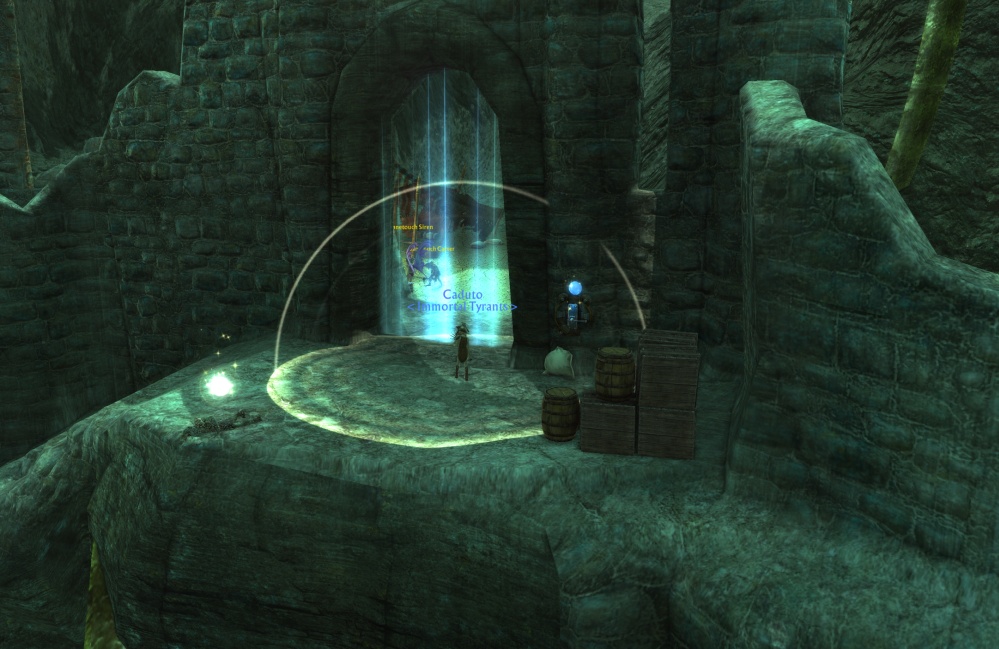
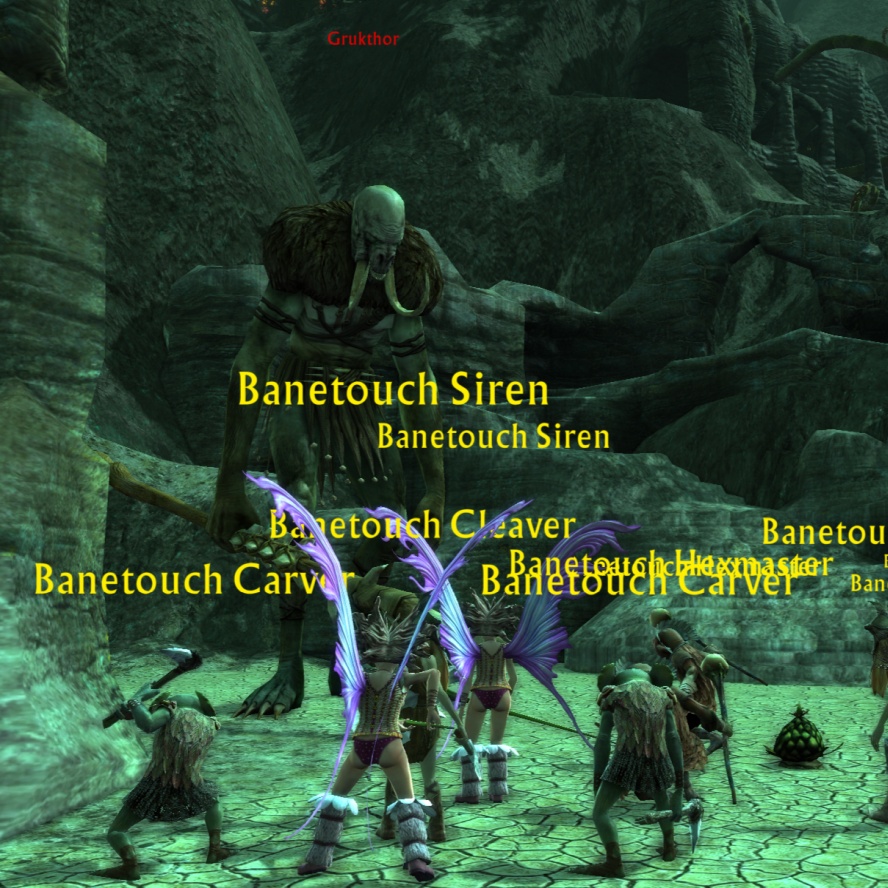
At the start of each encounter area is Prince Hylas in a blue circle. Standing in this circle will give you buff called ‘Fae Glamour’. this buff will disguise your character and give you two extra abilities; Garrote, and Revive.

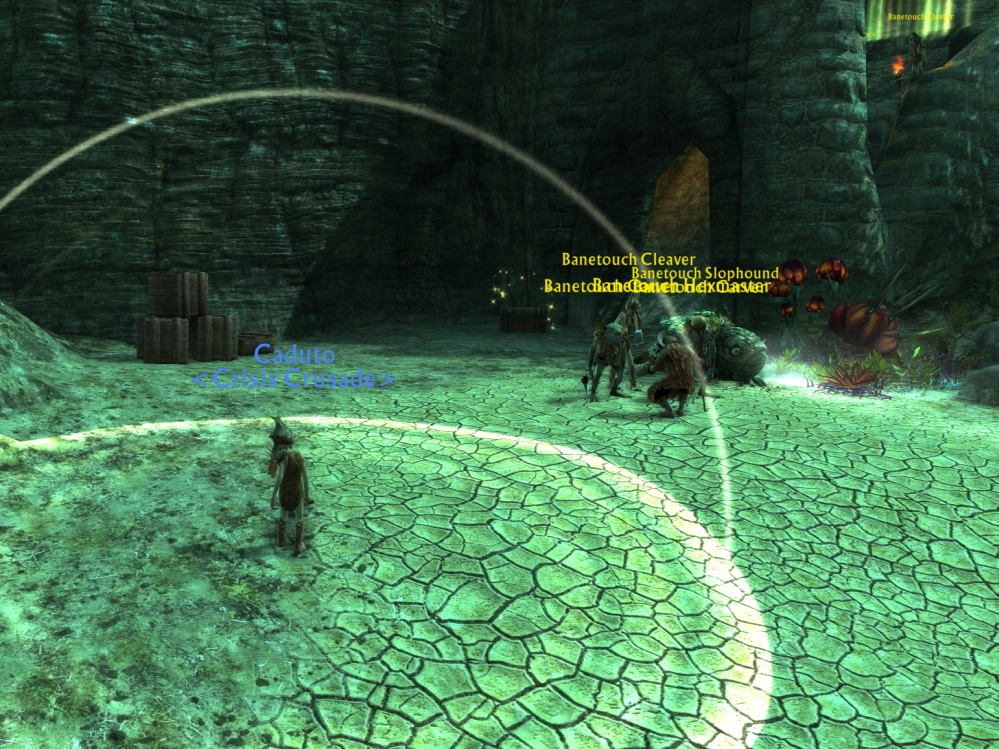
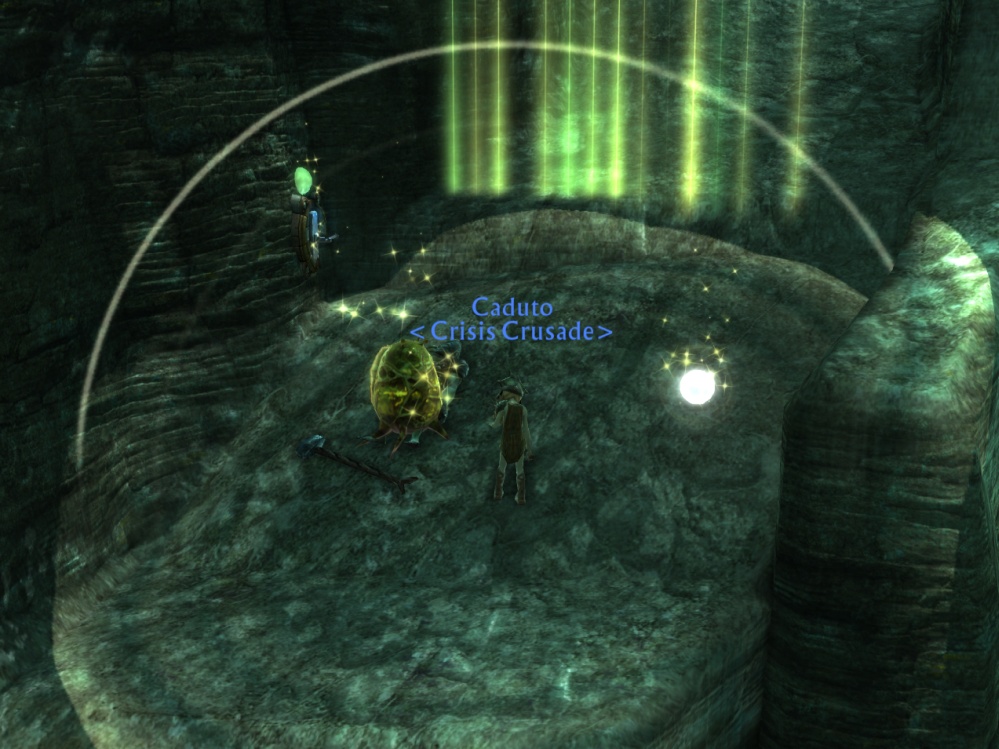
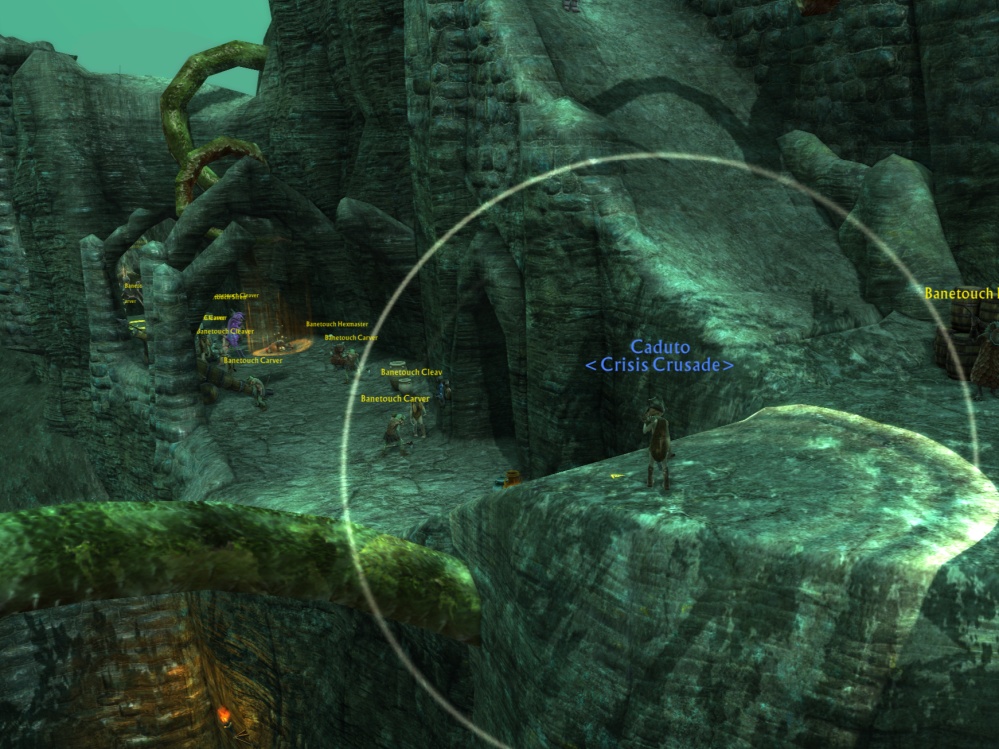
Garrote – This ability will be used to kill bad guys. Stand behind a bad guy and use Garrote, then move away so the AoE circle around you doesn’t hit any enemies. This is great for killing any enemy that gets in your way, especially if you are playing solo.
Revive – Used to resurrect an ally and chuck a disguise on them.

The Fae Glamour buff lasts 2 minutes from application. You can refresh the timer by coming back to the blue circle, or by picking up orbs that fall out of enemy corpses.

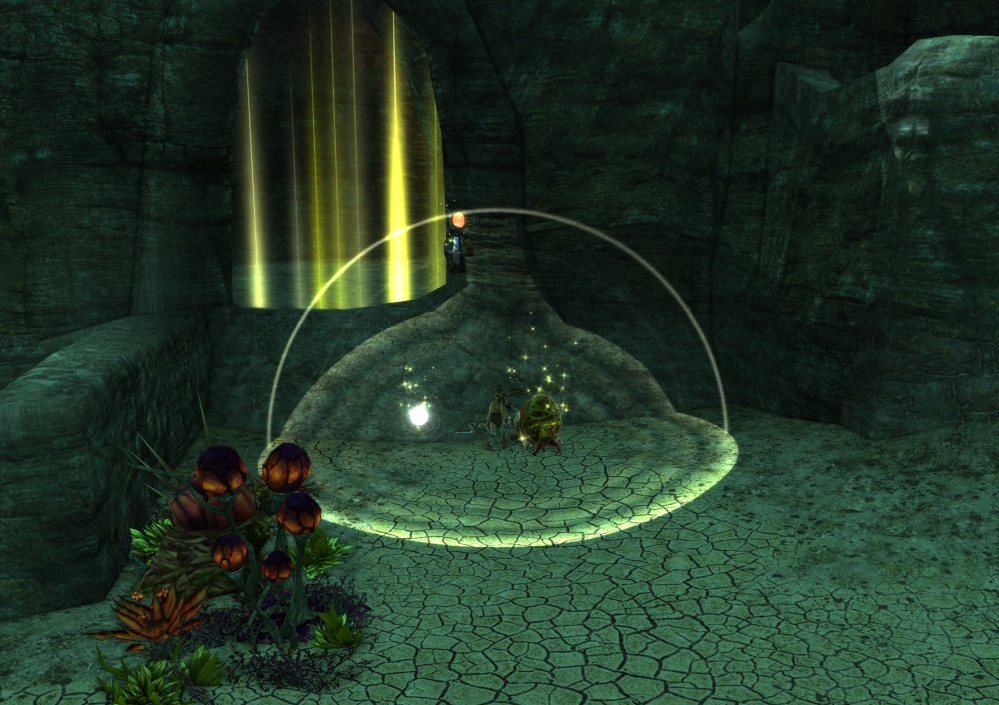
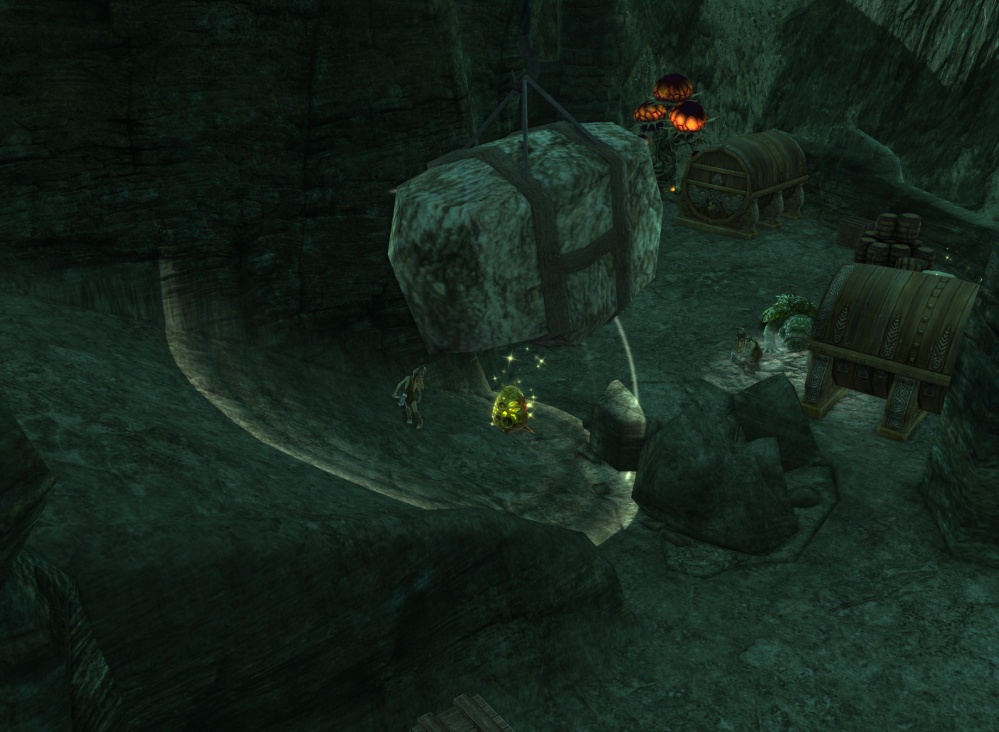
Goblin Scorchers can be found throughout the encounter. When you place them near mobs they will create an AoE explosion.. however the mobs know this and will run to the Scorcher to diffuse the bomb before it goes off. To use them properly you want 2 players. The first player places a Scorcher to bring the mobs in and start defusing, then the second player quickly places their Scorcher overlapping the first. The mobs wont have time to defuse the second bomb.

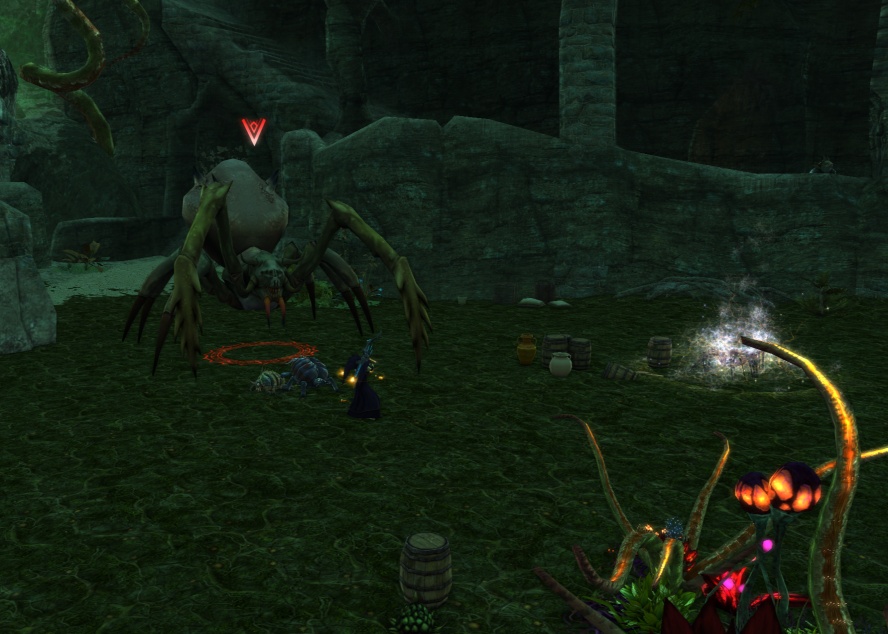
Slophounds (Shamblers) can see through your disguise if you go too close to them, you can see their frontal cone that look like headlights of a car, don’t stand in them! You can drop a Scorcher just in front of them to kill them, as long as no other mobs are nearby to defuse it!

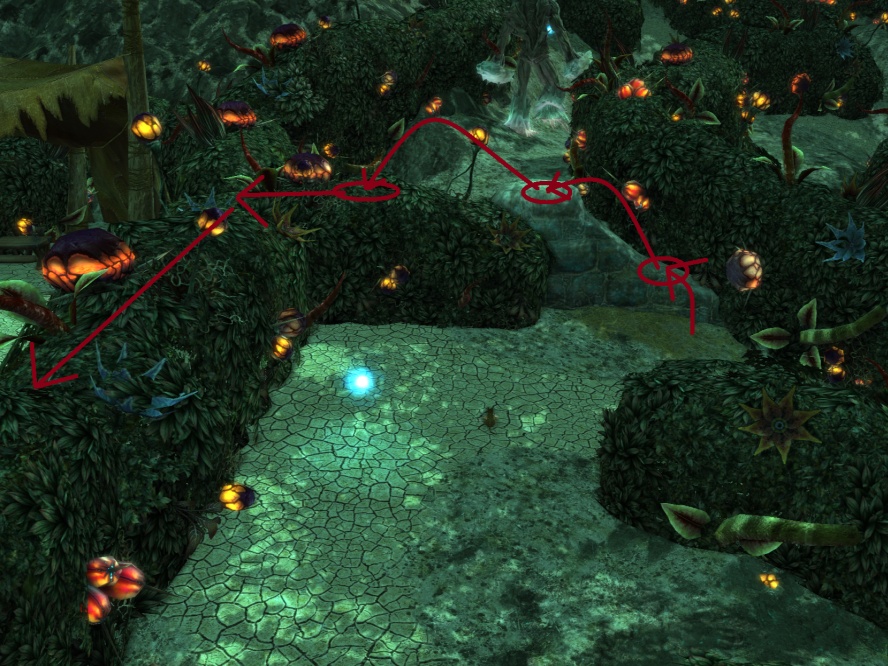
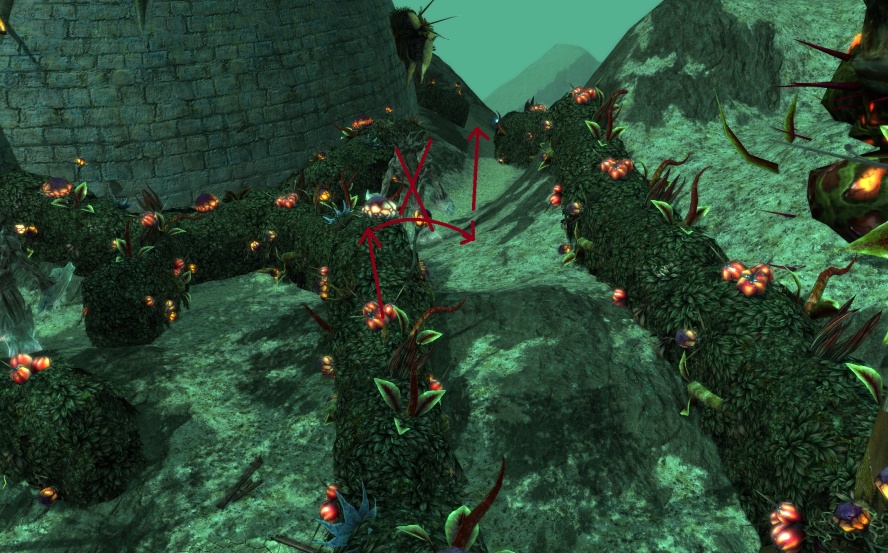
If you get stuck in combat and unable to reapply the disguise effectively then try to hide in the box near the first door, or try running back to near the entrance to lose all agro.
Killing all the Banetouch Siren mobs will make this less likely to happen.

Note: Primalists will be unable to participate in the clearance of the creatures as they wont get the Fae Glamour applied correctly. Primalists will be helpful during the Hedge Maze later! 

Anchor positions
Stand in blue for disguise
Make your way up!
The Left Anchor (Spring and Summer)

Don your disguise and then use Garrote or Scorcher bombs to kill anything that gets in your way!
Only players holding keys can open doors. The key is an item in your bag. Make sure you only pick up keys if you know what you are doing!

Step 1

Use Garrote to kill the baddies near the first door. Run back to the blue circle or pick up white orbs when you need to reapply the disguise.

Step 2

Start your way up the slope and you will reach the ‘Spring Gate’, Use Garrot to kill the two guards and then loot the ‘Springs Key’.
You can then click the lever to open the gate.

Step 3

Keep clearing mobs until you reach the middle level with the long path. At the end of this path is the mob who holds the key, called the ‘Banetouch Overseer’

Step 4

To the right of the path is a small room. Clear the mobs path so you can get into this room, be sure to kill all the mobs inside and by the door.

Step 5

Lay down a Scorcher bomb in the room to blow up the canister at the back.. This will get the Banetouch Overseer to run into the room to investigate your shenanigans.

Step 6

While the Banetouch Overseer is in the room, quickly lay down another bomb and then run out of the room, use the lever by the door to trap him inside while the bomb explodes.

Step 7

The doors will open and you will have a ‘Summer’s Key’ to pick up.

Step 8

Go up the next slope and click the lever to open the final door to the Life Anchor.

The Right Anchor (Autumn and Winter)

Don your disguise and then use Garrote or Scorcher bombs to kill anything that gets in your way!
Only players holding keys can open doors. The key is an item in your bag. Make sure you only pick up keys if you know what you are doing!

Step 1

Head straight to the first door and kill the two nearby baddies to loot the Autumn key.

Step 2

Use the Autumn key to open the door and head to the right.

Step 3

Clear mobs using Garrot or the Scorchers, your main target will be the 3 mobs tagged with ‘Keeper of Spirits’.

Step 4

Once the three Keeper of Spirits are dead, the ‘Banetouch Juggernaut’ will come down and stand in his special spot.

Step 5

Make your way up to the middle level and clear the mobs to the end.

Step 6

Pull the Winch Release Lever to make the rock drop!

Step 7

Oh no! The rock has landed on the Banetouch Juggernaut! You can now loot the Winter’s Key.

Step 8

Go up to the top level and open the door to the right side Life Anchor.

Destroying the Anchors

The Anchors can be damaged with your normal DPS abilities.
They do need to be killed at the same time, running very fast between them is not going to cut it. I don’t know the exact timer for the ‘at the same time’ part, but it would be safe to assume within 10 seconds would be acceptable.
As level 70 players you can easily solo each Anchor, so a 2 player minimum is required.
You could also use a second account logged at the same time.

For low level players, The Life Anchors gain a stacking buff that increases their damage, this is you DPS check!

Boss 1 - Atrophinius

For level 70s, Atrophinius can just be killed fast enough that you don’t have to worry about tactics.

At level..
Assign a player to be on bucket duty.. this would historically have been the bard. Have them stand nearest the well on the left side to save time later.
Assign 3 players to DPS down the 3 Green Label Casks, they will need to have destroyed them before the boss reaches 75%
Players need to spread themselves out around the area 10m away from each other, being careful not to stand too close to the 4 sleeping Drunken Revelers.

The boss casts a basic Cleave ability, which confirms your tank should face him away from the raid. His main abilities come from 3 songs, his song changes every 35 seconds, each song brings different abilities.

  • Song of SolitudeSpread Out – 5 second cast time, can’t be interrupted. Places a 3 second debuff on 7 members of the raid. At the end of this debuff you and everyone else within 10 meters will take damage. The damage area is marked with a blue bubble. To avoid this ability you have to spread out. Only tricky part will be for the melee to spread out if there are more then 2, but with a 5 seconds cast time there should be enough warning.
  • Song of AnguishWater Bucket – 3 second cast time, can’t be interrupted. Places a 15 second debuff on a random player. He will emote: “Grandmaster Atrophinius glares at [target] !” so you know who will get it. The raid member under the effect of this debuff will start dancing and will not be able to move or cast anything until the debuff is removed using the water bucket or until the debuff time runs out. The player assigned to the bucket will need to fill up with water and then carefully move to the dancing player, being careful not to wake the sleeping adds, then douse the dancing player with the water.
  • Song of SteelOut of Charge Area – A 15 second long charge ability. He will bounce between the 2 furthest away players dealing damage every time he hits. Anyone caught in the path between these 2 players will be killed so it’s best to move out. He will have a 20 second buff on him so the tank knows when it’s going to end. The tank needs to taunt him as soon as his buff runs out because he will reset aggro. Also everyone should stop healing/dsping when the buff has 2 seconds left to prevent useless deaths.
  • Run to the caskDPS the Casks – When the boss reaches 75% HP he will run to one of the Green Label Casks and start drinking from it. He will use this ability every minute after the 1st time. This will make him heal for 1% every second. To prevent this, have your DPS break the casks.
Atrophinius

Boss 2 - Swarmlord Khargroth

For level 70s, Swarmlord Khargroth can just be killed fast enough that you don’t have to worry about tactics.

At level..

  • Acid CloudDrop acid safely! – Every 50 seconds or so (depending on the submerge phase) he will emote: “Swarmlord Khargroth sends a swirling cloud of acid at [target] ! A bolt of poison will fly from the boss to his selected target. That person will receive an 8 second debuff. While the debuff is active pools of poison will spawn under that person. To survive this mechanic the person with the debuff needs to keep moving until the debuff runs out. It’s best to run on the edge of the encounter room so you don’t place the trail of poison in the middle of the room and risk having people step in it by accident.
  • Poison SprayJobs for Healer – Every 15 seconds he will cast this ability. It has a 4 second cast and can’t be interrupted. This ability deals raid wide damage that should be healed by your healers.
  • Pestilent ClawBring strong tanks – Every 30 seconds he will place a dot on the tank that lasts for 10 seconds and ticks 3000 damage each second.
  • Lethargic VenomTanks Swap – Swarmlord will apply a 1 minute debuff on the tank that increases the damage taken by 5% and decreases the healing taken by the tank by 5%. A tank can take a maximum of 4 stacks before it becomes hard to heal.
  • SubmergeKill the adds! – He will periodically submerge and 9 Swarming Ironsting adds will spawn. They will role play around the room for a bit then bunch up in the middle. From when the boss submerges you have 35 seconds to dps down all the Swarming Ironstings or the boss will heal. Start dpsing them as soon as they spawn, you can target them while they roleplay. Save your aoe nuking for when they bunch up in the middle. Swarmlord will do his 1st submerge when he reaches 85% HP, then every minute after that.
  • Crawler JuggernautAvoid – Spawns when the boss hits 30% health. He is a giant spider that spawns behind the boss to the left. It moves very slow and can’t be tanked. Every 15 seconds it will emote: “Crawler Juggernaut chases [target] and for 15 seconds it will follow that person, then emote again and change target. You have to kite it around. If it will reach you, it will one shot you. It’s not hard to kite him around because he moves really slow and it doesn’t cleave so you can kite it through the raid. You can concentrate your DPS on the boss and ignore the big spider!
Swarmlord Khargroth

Mini Boss - Grukthor

A little mini boss.

Be sure to interrupt his Stomp ability.

Grukthor has a chance to drop Artifacts from the ‘Holy Relics from Primeval Feast’ set.

Grukthor

Boss 3 - Alltha the Reaper

The trash leading to Alltha will just keep respawning, the trick is to pull everything and go all the way up the stairs and tank/DPS the adds just inside the boss area.

The area where you fight Alltha will be fenced off with a full circle shield, ensure your raid is inside before the shield goes up!

For level 70s, Alltha the Reaper can just be killed fast enough that you don’t have to worry about tactics.

At level..

Alltha has 2 phases which she switches between every 35 seconds.

The First Phase is marked by a purple buff called Reapers Rage on the boss which starts ticking down from 35 seconds. While this phase is active she will have the following abilities:

  • Fae TorrentBig Heals – A debuff on 8 raid members. This debuff lasts 20 seconds and it will absorb 5000 healing before wearing off.
  • PortalsAvoid adds – 2 portals spawn at random places on the outer edge of the room. Dodge the wisps that spawn from them. Stick to the edges of the area to avoid them.
  • Withered FleshTank soak – A cleave that needs to be shared by both tanks. It’s easier if both tanks stay in front of her at all times. She doesn’t do other cleave attacks except this.
  • Festering SliceTank swap mechanic – I didn’t catch the name, but the tank gains a stacking debuff that increases damage taken from the attack she does in the next phase, so tank swap at the end of the timer.

The Second Phase is marked by a green buff called Nature’s Fury on the boss, same 35 seconds duration. While this phase is active she will have the following abilities:

  • Toxic SporeDrop Poison – Cast on 2 raid members. After 3 seconds puddles of poison will spawn where the raid members are stood. To avoid dropping the poison on the raid or dying to it, run to the centre of the room and keep running until the debuff is gone and you are out of the puddle. Being on the move ensures you will take no ticks or just 1 tick of the poison.
  •  CyclonesStay Away – She will spawn some cyclones in the room, you will be flung into the air if you hit them. If you are standing close to the edge of the room it is less likely to get hit by one.
  • Whirling BladesDon’t get hit! – At the end of the second phase she will cast this ability, places a green bubble around a raid member and follows them around for 10 seconds while spinning. She will also emote: “Alltha the Reaper’s beady eyes narrow as she focuses on [target]. Run !”. Stay away from the person she picks and from her path. The tanks can take the damage, so if it’s on a tank there is no need to kite her.
  • Festering SliceTank swap mechanic – same as in phase one.

At the end of every second phase she will cast Rampant Growth for 6 seconds and spawn a tree with the same name. Kill the Rampant Growth as fast as possible. While it is up the entire raid will be slowed and the boss will gain a healing over time effect. Each Rampant Growth that is spawned will have more and more HP.

For the tanks, they need to be in front of the boss when there are 10 seconds left on her buff to share the cleave, move backwards if a portal spawns on top of them in Phase one, same if they get the Spore in phase 2. Stick to the edge and taunt her after she is done casting Rampant Growth for the Phase 2 -> Phase 1 tank swap.

For the DPS, stay away from the middle of the room, react fast on the Spore debuff and DPS down the Rampant Growth when it spawns.

Alltha the Reaper

Encounter - The Hedge Maze

During the Hedge maze your character will be transformed into an animal and given a temporary ability…

  • Rogues – Cat – Ability: Intimidating Roar – Root your target for 4 seconds.
  • Clerics – Cockatrice – Ability: Cleansing Spirit – You and nearby allies are cleansed of disorienting dust.
  • Mages – Coyote – Ability: Coyote’s Guile – You and nearby allies move 70% faster for 3 seconds.
  • Warriors – Deer – Ability: Daring Assault – Charge into your foe knocking them back and stunning them for 3 seconds.
  • PrimalistsNothing! – Primalists do not get transformed, this is very helpful with the boss at the end of the maze.

During your journey through the maze you can use your abilities on the Hedgeslammers to help avoid them, however, as long as you are careful and don’t rush it, you can go through the whole maze without having to use any abilities, just wait for the Hedgeslammer to move out of the path ahead and then carry on.

There is a green wisp called ‘Helpful Spirit’ that will attempt to show you the way.

Note: A player with a summon ability will be able to complete the maze and then summon the rest of the group to the tower to defeat the boss, summon abilities (such as Planewalker’s Call) can be used while transformed.

The Hedge Maze
Step 1

Upon entering the maze, head to the right, then take a left turn and go under the archway.
Be mindful of the Hedgeslammers position and avoid running in to him. You could also Stun him.

Step 2

Once under the arch turn into the path second on the right, theres another Hedgeslammer that comes this way, so be careful! at the top of this path, turn left

Step 3

At the top you can see the Hedgeslammers you will need to avoid. Make your way through the maze, turning to the right twice.

Step 4

Halfway along this path you will be met with a broken wall joining a hedge. Climb up this broken wall and go along the top of the hedge.

Step 5

Drop off the hedge when it is safe to do so and continue on to the tower entrance.

Tower Boss - Copse Warden

The Copse Warden boss cannot be killed with normal abilities.. instead the way to damage him is to drag wisps into him. The Explosive Sprites will damage the boss when they explode, as long as they are close enough to him!
Run through the boss to activate the fight and then players will be chased by wisps. Players should run in circles around the boss to guide the wisps in to him.
We found that running just outside the bosses ‘cage’ was effective. It doesnt matter which direction you run in, just keep running in circles and the wisps will explode near the boss and kill it.

After killing the Copse Warden, exit the tower and you will see the hedge maze has been replaced with the next boss!

Note: Primalists can kill the Copse Warden using their normal abilities, making this much quicker!

Copse Warden

Boss 4 - Lord Twyl

For level 70s, Lord Twyl can just be killed fast enough that you don’t have to worry about tactics. You will need 2 players, as the boss will turn you into a Critter quite quickly and you will need another player to DPS your chaser down.

At level…

Faelord Twyl has 4 phases, each phase representing 1 season.

Phase 1 – Spring (Air phase)

  • Twyl will fly up into the air and stay there for the duration of this phase.
  • Tasty Critter Deer – A random player will be turned into a Deer and will be chased by a Wolf. DPS need to kill the Wolf before he reaches the player. The player can run away and the Wolf can be stunned or knocked back to help.
  • Tasty Critter Bunny – A random player will be turned into a Bunny and will be chased by a Tiger. DPS need to kill the Tiger before he reaches the player. The player can run away and the Tiger can be stunned or knocked back to help.
  • Tasty Critter Squirrel – A random player will be turned into a Squirrel and will be chased by a Spider. DPS need to kill the Spider before he reaches the player. The player can run away and the Spider can be stunned or knocked back to help.
  • Scorching TorrentBig Heals – AoE damage on the whole raid during this phase, just heal it!

Phase 2 – Summer (Ground phase)

  • Summer FlareFrontal Cone – Fire breath, frontal cone attack, which hits for around 4k/tick on the tank.
  • Flickering FirePurge – A 10 second long reflect shield on the boss, must be purged immediately.
  • Toxic BlossomMove away – A Toxic Blossom spawns every 30 seconds and explodes after 5 seconds. Anyone caught in the explosion zone will take damage and be knocked back. Move away from them when they spawn, you have enough time.
  • Primeval QuakeBe alone – Every 30 seconds he will place a 5 second long debuff on a random raid member (except the tank). When the debuff runs out, anyone standing too close will die. The area of effect of this ability is marked with a yellow circle.
  • Scorching TorrentBig Heals – AoE damage on the whole raid during this phase, just heal it!
  • Phase 2 will finish when the boss reaches 50% health.

Phase 3 – Autumn (Air phase)

  • Boss will fly up again!
  • A bunch of adds will spawn.. they seem to be making a sacrifice on an altar, oh no! one of your group is the sacrifice!
  • A raid member will be strapped to the Altar while a ‘Ritual Shaman‘ spawns and starts a 20 cast of ‘Wicker Pyre‘. You need to kill him before the cast finishes.
  • Grab any other adds and stack them up so they can be AoEd down.
  • Each troll alive will be dealing raid wide damage, so keep them dead!
  • This will all repeat twice and then we move into phase 4.

Phase 4 – Winter (Ground phase)

  • Chain LightingHeal up! – Hits 5 targets no matter how spread out you are. Really hurts at level.
  • Frozen NovaInterrupt! – 3 second cast, must be interrupted or the raid will wipe. He will emote: “Lord Twyl begins to channel a Frozen Nova.” before he does it.
  • Strangle PlantMove away –  Every 20 seconds he will spawn a plant with 106k HP. While they are alive, these plants will spawn Frost Trails around the room. Don’t worry about the trails, just move away from the plants. Anyone to close to a plant will gain a debuff that slows you down and ticks damage.
  • Crippling SpiderKill them! – Every 20 seconds he will send 6 Crippling Spiders to entangle a raid member. While the spiders are alive, the person being entangled will not be able to move or cast. Kill the spiders!
Lord Twyl

Achievements Available

Conqueror: Primeval Feast

The meta-cheevo for most of the cheevos below.

Primeval Feast

Kill the Anchors and all 4 bosses.

Rapid Assault: Primeval Feast

Kill the Anchors and all 4 bosses within 40 minutes.

Life Anchors
Anchors Away

Destroy the Life Anchors at the same time.

Royal Assassin

The meta-cheevo for the 4 cheevos below.

Don't Exceed Your Carrion Limit

Don’t resurrect anyone using the special ability. Would be best if everyone just stays alive.

Anchor Man

Make your plan before you even enter the instance as Hylas is easy to accidentally activate.
Split your two teams (or two players) to each anchor, get to them and DPS them down within 5 minutes.

Solid Sneak

Don’t be dying!

40 Days and 40 Knives

Use Garrot or bombs to kill at least 40 of the mobs, you will pretty much need to clear both sides.

Atrophinius
Party Down

Kill Atrophinius.

Splash Dance

Have the bucket dude use his bucket very quickly!
As a 70 you will likely kill Atrophinius before he does this ability, so will get the cheevo anyway.

Mind on my Honey

Don’t get too close to the Drunk guys, let them sleep!

Swarmlord Khargroth
Swatted Like a Fly

Kill Swarmlord Khargroth.

Taster's Choice

Be sure to kill all the adds that are making their way to the boss, assign DPS to concentrate on adds, the off-tank can collect the adds so the DPS can AoE them down. Main tank should tank boss well away from where the adds are spawning.

Down Comes the Pain

The Crawler Juggernaut spawns when the boss hits 30% health. He is a giant spider that spawns behind the boss to the left. Kill him!

Grukthor
Never Saw It Coming

Kill Grukthor.

Alltha the Reaper
Reap the Whirlwind

Kill Alltha the Reaper.

Growing Pains

Wait for 2 Rampant Growths to spawn (around 2.5minutes) and then kill the boss!

Fear the Reaper

RUN! – Or just kill the boss before she even casts this (Before 35 seconds)

The Hedge Maze
Hedge Fun

Don’t be dying!
Note: back in the olden days when this content was current, it was a well known bug that once a player died in the maze then you could not get this cheevo for that lockout, even if you reset the raid. I would assume that this has not been fixed and you will get only one chance at this each week.

Hedging Your Bets

The ‘Entering the hedge maze’ timer will start as soon as any raid member get transformed into a critter. If you are going for this speed run, then be sure to gather on the stairs and all enter the maze area together with a clear route in mind.

Lord Twyl
Twyl We Meet Again

Kill Lord Twyl.

Champion of the Sun

Kill Lord Twyl quickly and with no one dying!

Kitten Mittens

During the first phase, kill the beasts quickly so they don’t hurt their targets.

Day Man

Kill Lord Twyl quickly!

Night Man

Kill Lord Twyl quickly!

Troll Toll

You will want your off tank to keep the trolls separate so no splash hits them.
The trolls spawn only during phase 3, so you will need to get the boss to 50% and then wait until 4 trolls have spawned, then keep the trolls away from the boss while the boss is killed.