Difficulty Tier: Tier 1 Hit Requirement: N/A Level of bosses: 52 Number of bosses: 5 Max Group Size: 20 Recommended Minimum Group Size for Level 70 cheevo run: 1
Solo at 70?: Yes All cheevos while solo?: Yes but you will need at least 2 separate runs.
You can enter this raid solo, you do not need other players in the group.
A group of level 70 players can easily kill everything in this raid. This guide is mainly designed to show you how to get the cheevos. If the content becomes ‘relevant’ again then I will expand the boss guides as needed and add more detail.
The Trash
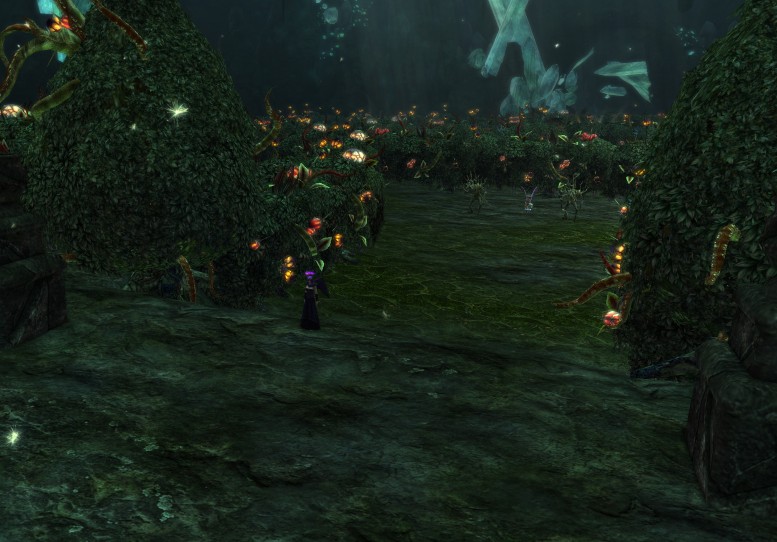
When you first enter the raid you will be in a large cavern. In the centre is a raised platform with a bunch of the bosses stood on it. Approach the platform to start a small roleplay and you will be teleported back to the entrance of the raid while the cavern is filled with a hedge maze.
Kill the first 3 trash mobs, try to interrupt the ‘Thumped‘ ability cast by ‘Blightleaf Hexmaster’ or you will be turned into a bunny! Turn left into the maze and follow the path around until you reach the boss room.
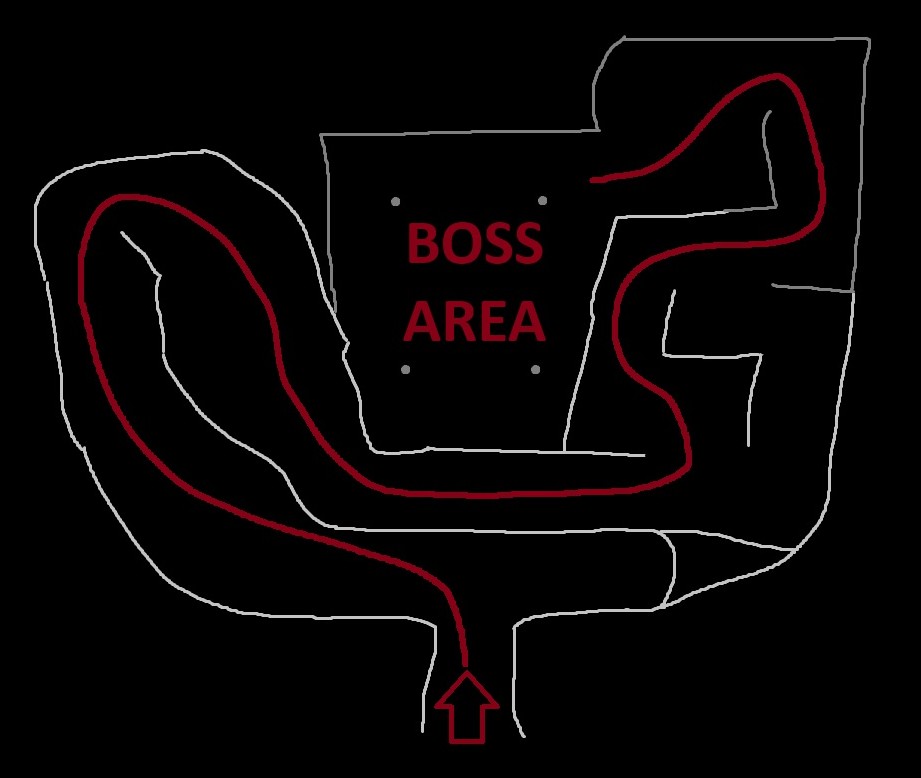
The Hedge Maze
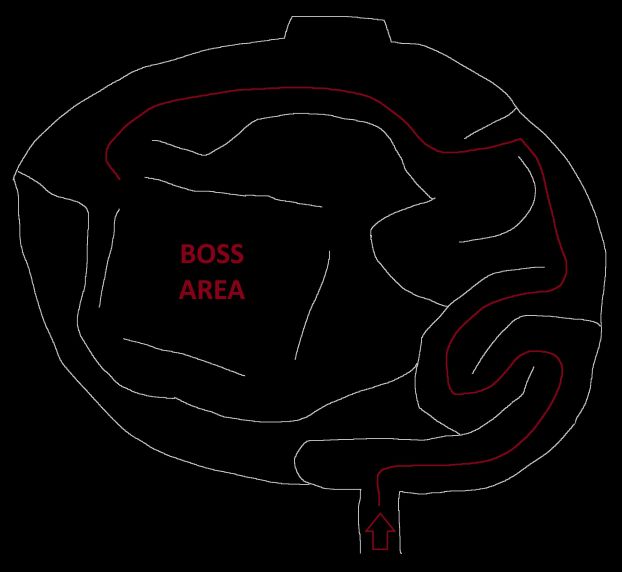
Map to first boss
Boss 1 - Duke Letareus
For Level 70s
A level 70 player can easily solo kill this boss before any tactics are required.
Main Abilities
Unleash Wrath – Get away from boss – 5 second cast, creates an AoE around the boss that will kill anyone who enters it. The tank should start kiting the boss towards the Shamblers.
Furious Pursuit – Kite boss through Slime. – Cast straight after Unleash Wrath – The bosses speed will increase and he will chase the tank while casting a big cleave. The tank must kite the boss from a distance around the edge of the room.
Basic Tactics
The main tactics of this fight involve managing the adds that spawn, and surviving the Duke’s Furious Pursuit ability.
The tank should charge forward and hold the boss where he stands. DPS/Heals should all stack up in the middle of the room, slightly away from the boss to avoid being hit by Unleash Wrath when it is cast. The off-tank should go around the room and pick up the Shamblers, while carefully lowering their health for easy killing later.
Unleash Wrath & Furious Pursuit – These abilities will happen 4 times during the fight when the boss reach certain percentages of health. Unleash Wrath is the warning that Furious Pursuit is about to happen. During Furious Pursuit the tank will need to drag the Duke to the edge of the room and then kite him around the edge of the room from a safe distance, being careful not to let the boss get too close to the raid stack in the middle of the room. The off-tank should be dragging the 4 Shamblers around the room in front of the boss, killing the Shamblers one at a time (with help from DPS as required) to create a stream of slime that will slow the boss down as he passes through it. You will need to balance Shambler killing with the bosses health, if you kill the Shamblers too quickly then you may not have enough slime to keep the boss slowed for the duration of the Pursuit. Low level groups may need to bring Shambler health to low before the Pursuit starts to enable quick killing of Shamblers during the pursuit as required. Furious Pursuit will finish after the boss has lost another 10% of his health, thus the DPS will need to keep DPSing while the boss is being kited. Note: If the boss has not lost sufficient health after the 20 second cast then Furious Pursuit will just be cast again until the boss reaches the correct health percentage.
First Furious Pursuit – 86-77% Second Furious Pursuit – 61-52% Third Furious Pursuit – 36-27% Final Furious Pursuit – 10-0%
Once the Pursuit has ended, the boss can be tanked back near the middle and 4 new Shamblers will appear for the off-tank to pick up again.
Adds
Throughout the fight adds will be spawning, you should allocate DPS to deal with the adds as too many spawned will become unmanageable.
Brownies – Spawn in the group, do not need to be tanked, AoE them down.
Ground Faeries – Appear after boss reaches 50% health, they cast Fae Barrage, an AoE cast that must be interrupted, be sure to allocate DPS to rupt and kill them.
Fluttering Pixies – Flying adds which should be killed by an allocated ranged DPS.
It is best to try to kill off all adds before the Duke enters his Pursuit phase so that all DPS can then focus on the Duke.
Duke Letareus
The Trash
After killing the Duke you will be teleported back to the raid entrance where you will find the loot chest. Head left through the maze again to make your way to Infiltrator Johlen.
Map to second boss
Boss 2 - Infiltrator Johlen
For Level 70s
A level 70 player can easily solo this boss. You will still need to DPS down each Devastating Bomb as they spawn and then switch back to the boss.
Bombs
Devastating Bomb – Destroy the Bomb! – Spawns at 75%, 50%, and 25% bosses health. Must be DPS’d down before it explodes. Each Devastating bomb has more health than the last.
Landmine – Move out of the bad – Small AoE on the ground, move out of it.
Blinding Bomb – Look away! – Starts dropping after the first Devastating Bomb. These are orbs that float around a small area before disappearing. They will ‘confuse’ anyone who looks at them, the ‘confuse’ debuff can be cleansed.
Concussion Bomb – Move away and DPS – Drops on a random player, move away from it within 2 seconds and then DPS it down.
Wisps
Wisps will be flying around the outer edge of the room throughout the fight, the wisps hurt, so stay in the middle! After the boss hits 25% health, random wisps will also travel across the middle of the room, getting busier and busier the closer you get to killing the boss. It is best to stay stacked as a group to avoid these, moving as one to get out of the bomb AoEs.
Basic Tactics
Phase 1 – 100% to 75% Infiltrator Johlen will spawn Concussion Bombs and Landmines. Tank should hold boss in the middle of the room while DPS spread out a little.
When the boss reaches 75% health, he will spawn a Devastating Bomb and then go into stealth until it is destroyed. The first Devastating Bomb needs to be destroyed within 22 seconds or it will detonate and wipe the raid. All DPS need to save their big cool downs for Devastating Bombs (every 25%).
Phase 2 – 75% to 50% The boss will spawn Concussion Bombs, Landmines, and Blinding Bombs. Avoid like above plus make sure to turn away from the Blinding Bomb.
At 50%, he will spawn another Devastating Bomb which must be destroyed within 22 seconds as before.
Phase 3 – 50% to 25% The boss will spawn 3 Concussion Bombs, 1 Landmine, and 2 Blinding Bombs.
At 25%, he will spawn another Devastating Bomb which must be destroyed within 22 seconds as before.
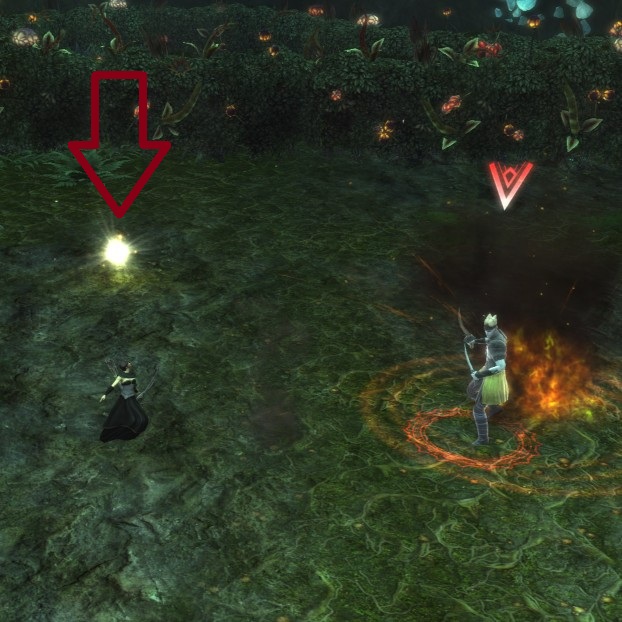
Phase 4 – 25% to death When Infiltrator Johlen’s health reaches 25%, Swarming Wisps begin to criss-cross the room leaving only a space in the very middle and in front of the trees/pillars. These Wisps do 1.7k damage each hit so it is important to stay out of them. The boss does not cleave so everyone should stack on the tank. This way the Concussion Bombs and Landmines get spawned on top of the group which leaves enough room to move together out of them. If the party does not stay stacked up, there will be nowhere safe to move. It may be helpful to use a top-down camera angle at this point to clearly see where it is safe to move.
In this final phase, the boss will spawn Concussion Bombs, Landmines, and Blinding Bombs.
Infiltrator Johlen
Blinding Bomb
The Trash
When Jolene is dead you will again be teleported back to the entrance of the raid to collect your loot from the chest.
This time you will be heading right to get to the next boss.
Map to third boss
Boss 3 - Oracle Aleria
For Level 70s
A level 70 can easily solo this boss. You dont need to worry about keeping the 2 wolves at equal health.
Main Abilities
Necrotic Energy – LoS everyone – Get behind the conveniently placed hedges to break Line of Sight with all raid members while the debuff counts down. Once it reaches zero you can come back out again and restack with the raid.
Spirit Volley – Big Heals – Healers should heal.
Basic Tactics
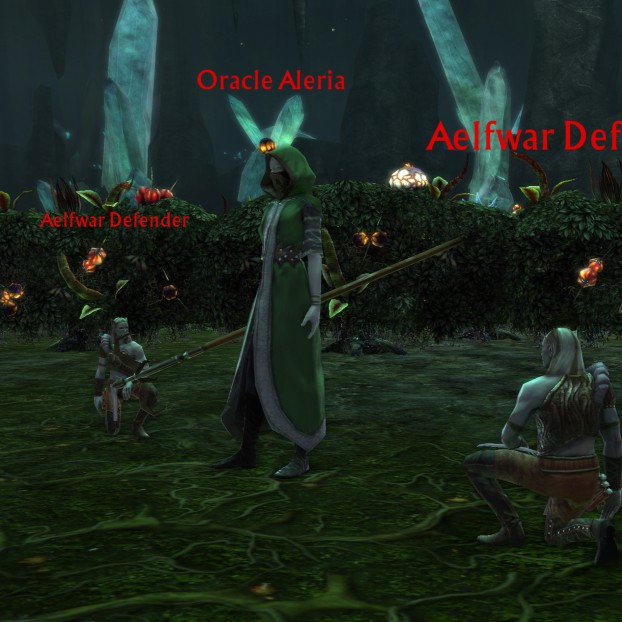
The tank will pull the boss and grab the two adds next to the boss once they have turned into werewolves! The raid should stack up near the entrance, being careful to allow the tank to fully get agro before they start blowing all their DPS cooldowns.
The Necrotic Werewolf has a pulsing AoE, Necrotic Miasma, which stacks up to 10 times and inflicts damage per stack. Tank it away from the raid while the ranged DPS kill it. Every time the Necrotic Werewolf is hit it gets a stacking debuff of Necrotic Binding which reduces its movement speed by 10% up to 5 stacks.
The Primal Werewolf has a frontal cleave, Primal Thrash. It should be tanked close to raid but faced away.
Oracle Aleria will be immune until both the Werewolves are killed. They must be killed within 10 seconds of each other or the remaining one will enrage and do considerably more damage. Wisps will spawn from 2 corners of the room and move towards the Werewolves. If they reach them then they will apply a stacking damage buff. You can assign DPS to kill these, or hope that splash damage does the job.
Once both of the Werewolves have died, Oracle Aleria becomes active, transforms into a werewolf and can be tanked in the same place as the Primal Werewolf. Now, one wisp will be spawning from all 4 corners of the room which will apply the stacking damage buff to her. Again, you can AoE these down or assign a DPS to them. Once Oracle Aleria is active, she will begin to put the Necrotic Energy debuff on a random raid member. As soon as the person’s name is broadcast across the screen they have 8 seconds to LoS the entire raid or it will be a wipe. The player needs to run out of the room and behind the hedges away from the other raid members making sure not to stand too close to the hedge or the effect may still wipe the raid. The raid should be stacked up near the end of one of the hedges to make the LoS route short and easy. She will also put a healing debuff on the tank that cannot be cleansed. Depending on the tank’s gear, you may need to swap tanks out when they get debuffed.
Oracle Aleria
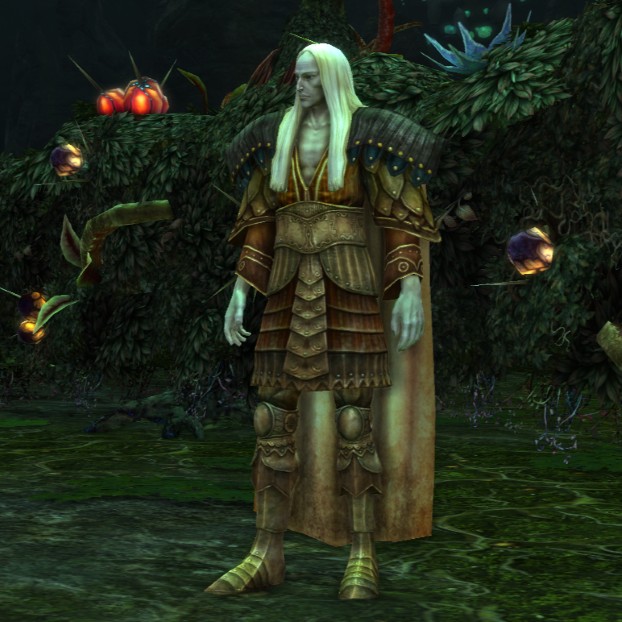
Boss 4 - Prince Hylas
For Level 70s
A level 70 player can easily smash Prince Hylas down, preferable with some DoTs as he will still turn you in to a critter at 11%, but if he bleeds to death during the roleplay then you wont have to run all the way back.
Main Abilities
Contagious Cottontail – Spread out! – Targets one player and morphs them and anyone within 15 meters of them into a bunny, cannot be cleansed.
Soul Fracture – Big Heals – Cast after Contagious Cottontail, deals damage to all raid members and places a DoT on them that will needs some big heals.
Spirit Fracture – Cleanse – Single target DoT that can be cleansed.
Prince’s Wrath – Move out of the bad – AoE around Prince Hylas that kills anyone inside of it, all melee (and pets) need to move out as soon as the channel begins, begins after Duke Letareus is spawned.
Landmine – Move out of the bad – Targeted at a player and will show a ground effect, deals a knockback and damage to anyone in the affected area, starts after Infiltrator Johlen is spawned.
Spiritual Wrath – Big Heals – Randomly hits 6 raid members for damage, begins after Oracle Aleria is spawned.
Basic Tactics
Prince Hylas will summon each of the previous bosses in turn as an add. These bosses will bring with them one of their main abilities, which will then be cast for the remainder of the fight. Prince Hylas also has a bunch of his own abilities, making this a very intense fight with lots of situational awareness required.
Duke Letareus – Spawned 15 seconds after Prince Hylas is aggroed, places poisonous void zones on the ground. Players should move out to avoid extra damage.
Infiltrator Johlen – Spawned 45 seconds into the fight, teleports to random players and drops a Landmine on them. Players should move out asap.
Oracle Aleria – Spawned 1:15 into the fight, casts Spiritual Wrath which randomly hits 6 raid members for damage.
Treants – Spawned after Prince Hylas’ health reaches 11% and is channelling his heal, does pulsing AoE damage and will pull random raid members into him.
Wolves – Picked up on the run back into the room after Prince Hylas’ health reaches 11%, will charge random raid members doing damage and stunning them.
Pull the boss and take him to one side. Raid should spread out, trying to be at least 15 metres away from each other to avoid spreading the bunny debuff. Use the whole room! Be sure everyone is in range of a healer. Kill each of the add bosses as they spawn, mitigating the extra abilities as best you can.
Once the 3 add bosses are down, you can bring Prince to middle of room and focus all DPS on him. When Prince reaches 11% health the entire raid will be transformed into critters (bunnies, deer, etc) and teleported back to the raid entrance. The entire raid needs to move as a group back to the boss area, allow the off-tank to go first so they can grab any wolves that can’t be avoided. Stick to the left side of the path to pull as little as possible.
When the raid reaches Prince Hylas he will have a shield active and will be healing himself, the quicker you get back the less he will have healed. DPS down the shield, if you are not fast enough then Treants will spawn that will also need to be tanked by the off-tank. DPS should focus solely on Prince Hylas, removing his shield and then killing him. After he is dead the adds can be cleaned up.
Prince Hylas
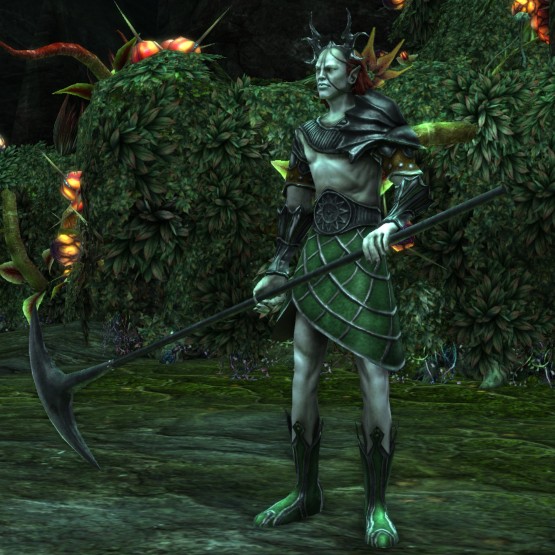
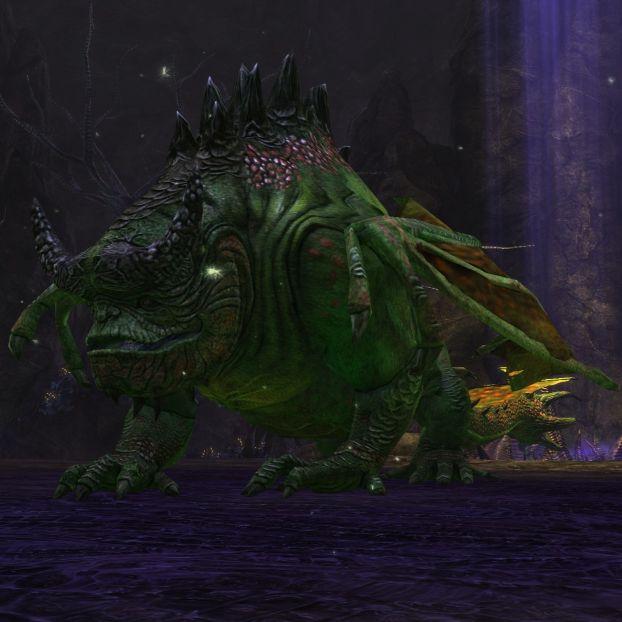
Boss 5 - Lord Greenscale
For Level 70s
A solo level 70 player can easily kill this. DPS Greenscale until he flies into the air, then just keep DPSing him in the air, ignore all adds and he will get to 1%, land, and die.
Main Abilities
Noxious Fumes – Tank Debuff – A frontal cone from Greenscale cast every 30-45 seconds, the cast time is 2 seconds and is a 3 second channel, anyone this ability hits will get a 75% healing debuff that will last approximately 30 seconds
Rending Cleave – The poor tank – A frontal cleave which happens after Noxious Fumes
Genesis Torrent – Big Heals! – Damages all raid members during the air phase.
Life Reclamation – Kill the adds! – At the end of the air phase, Lord Greenscale will absorb the hit points from all adds that have not been killed which can heal him for a great deal
Mortal Extermination – Stand in the bubble – Deals 80% damage to everyone in the raid per tick, the entire raid must stand in a pulsating bubble that is spawned after the Verdant Annihilator dies to survive this ability.
Basic Tactics
Greenscale has two main phases, Ground, and Air.
Ground Phase
During the Ground phase there will be a bunch of different plants to deal with..
Strangle Plant – Off-tank kills them – Spawn all throughout the encounter, uses the ability Lashing Vines which deals AoE damage and slows anyone in the affected area, off tank will kill these.
Toxic Blossom – Move away – Immune to damage, players must move from these within 5 seconds of their spawning or they will take 1.5-2k damage and be knocked back. Start spawning after first Air phase is complete.
Noxious Bracken – Ranged DPS – Spawn after Greenscale’s health reaches 50%, uses the ability Noxious Spores which deals AoE damage and drains 10% energy, mana, and power from anyone in the affected area, range DPS need to target and kill these ASAP.
Sentient Pollen – DPS to kill these – Only spawn during final Ground phase below 25%. Does negligible damage but they split into 3 more pollen every 6 seconds and can become overwhelming, if they reach Lord Greenscale he gets a stacking damage buff, dedicated DPS need to target and kill these ASAP.
Greenscale should be tanked close to the centre of the room and faced away from the raid. Melee need to stack together on the outside of his back legs and move together when plants are spawned or there will quickly be nowhere safe to stand in melee range. The ranged players need to have plenty of room to avoid the plants that are spawned during the ground phases and should spread out on the sides.
From 100% to 75% of his health, Lord Greenscale will do his normal abilities and spawn Strangle Plants. The off tank needs to run through one of the 3 pits on the side of the room and get the Fire debuff which will increase their running speed, while pulsing an AoE that will kill Strangle Plants they run across, and also cause damage to the off tank. This needs to be done throughout the fight. The Fire debuff will also damage the off tank and can be cleansed off if the stacks become too high, but DO NOT CLEANSE this off after the third air phase because the debuff cannot be picked up during the fourth ground phase. It is best to let the off tank cleanse themselves; there is no reason to cleanse during this fight unless specifically asked.
The main tank will get a 75% healing debuff which can make it difficult to heal them. A purifier healing spec is very helpful in mitigating damage for this fight. The main tank will need to move out of any additional damage from plants that spawn to make sure they do not take more damage than can be healed.
Air Phase
During the Air phase Greenscale will rise up into the air and a bunch of adds will spawn that will need dealing with..
Verdant Annihilator – Kill to create safety bubble – Uses the abilities Lifebound Rage which is a purgeable DPS buff and a cleave called Debilitating Strike, once dead, will spawn the protective bubble needed to survive Mortal Extermination.
Lifebound Mender – Kill + interrupt -Has two abilities, Spirit Bolt which deals single target damage and Word of Mending which heals her target, Word of Mending has to be interrupted or the Verdant Annihilator will not die in time and the raid will wipe.
Lifebound Warlord – Mind the cleave – Uses Furious Shockwave which is a frontal cone cleave that does damage and a knockback.
Lifebound Scoundrel – Kill – Uses two abilities, Shadow Assault which teleports him behind a random player dealing damage and Cruel Backstab which is used right after Shadow Assault doing additional damage to the target.
When Greenscale’s health hits 75% (and again at 50% and 25%), he will rise into the air and move to a corner of the map and destroy one of the 3 pools that provides the Fire debuff. The air phase adds will spawn directly across the room from Greenscale. Once they are picked up, they should be positioned under Greenscale and AoE’d to maximize DPS. The raid needs to be aware of positioning during this phase to avoid being cleaved by the adds. The main things to remember for the air phases are to interrupt the Lifebound Mender’s Word of Mending and to kill the Verdant Annihilator. After the Verdant Annihilator has died, spawned the bubble, and the raid has survived Mortal Extermination, Lord Greenscale will absorb the health of any adds that were not killed, healing himself, and he will land back on the ground. The main tank needs to move him back into position and start the cycle over again.
Lord Greenscale
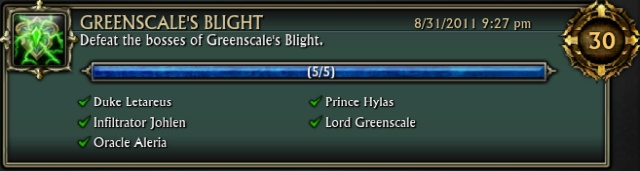
Achievements Available
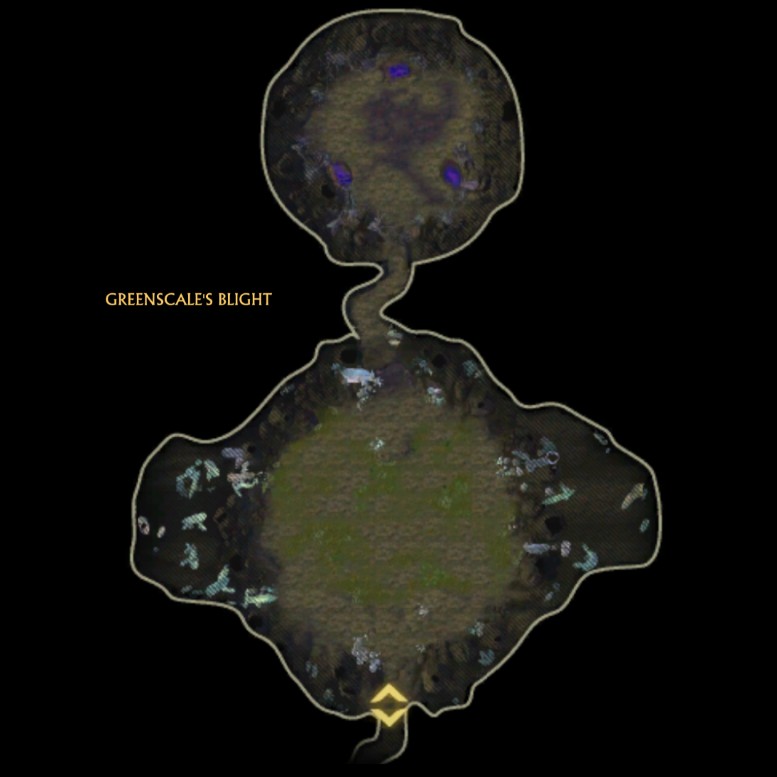
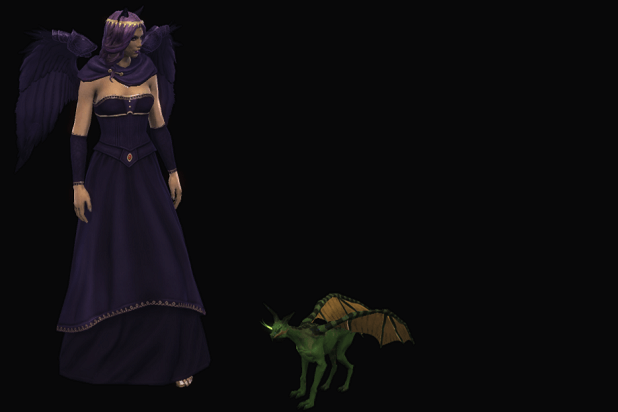
Conqueror: Greenscale's Blight
Do all the things!
Completing this cheevo award the Pet: Gweenscale.
Greenscale's Blight
Kill all the bosses.
Rapid Assault: Greenscale's Blight
Kill all the bosses very fast!
Duke Letareus
Put Down Your Duke
Kill Duke Letareus.
Keeping it Clean
Groups with high DPS and a tank that kites like a boss should be able to pull this off!
That's Not Fair
The Fluttering Pixies can mostly be ignored, but you will still need to keep interrupting the Ground Faeries. It’s a good idea to have a tank pull these adds out of the raid so that they don’t get splashed with damage accidentally.
Infiltrator Johlen
Infuriating the Infiltrator
Kill Infiltrator Johlen.
Look into the Light
Everyone face the bomb! It’s best to do this early on in the raid with one of the first blinding bombs before it gets too chaotic with the wisps. Be sure to have your healers on standby to quickly cleanse everyones debuff.
Head on a Swivel
This is a personal achievement.. stay out of the bad!
Droppin' Bombs
If a players moves out of the bomb within 2 seconds of it being placed then it wont explode. Then you should DPS it from range to get rid of it.
Oracle Aleria
She Should Have Seen It Coming
Kill Oracle Aleria.
Low Pollen Count
Don’t let any of the wisps reach the boss. It’s best to assign specific DPS players to ensure the wisps die quickly!
High pollen Count
Allow 12 or more of the wisps to reach the boss. you will need to be careful not to AoE them down. Some players may need to hold off DPS while the wisps are near the centre.
Prince Hylas
The Hylas Formerly Known as Prince
Kill Prince Hylas
Slowly Burning Life
Get all 3 add bosses to low health and then kill them all together!
Critical Critter
During the ‘Run back as critters’ stage of the fight, pull 4 or less adds on the way back to Prince Hylas. You may need to wait for adds to path away and will need to be sure you stick together as a group to avoid random pulls.
Crazy Critter
During the ‘Run back as critters’ stage of the fight, pull 8 or more adds on the way back to Prince Hylas.
Lord Greenscale
Dragonslayer: Lord Greenscale
Kill Lord Greenscale
Running on Fumes
Be sure that only the 2 tanks go near the front of Greenscale.
Avoiding Extermination
Make sure everyone is stood in the bubble at the end of the Air Phase.