Cheevos found in H > Raids > Rift > Gilded Prophecy
Quick Links for Guides on This Page
Boss 1 – Anrak the Foul Boss 2 – Guurloth Boss 3 – Thalguur Boss 4 – Uruluuk Cheevos
General
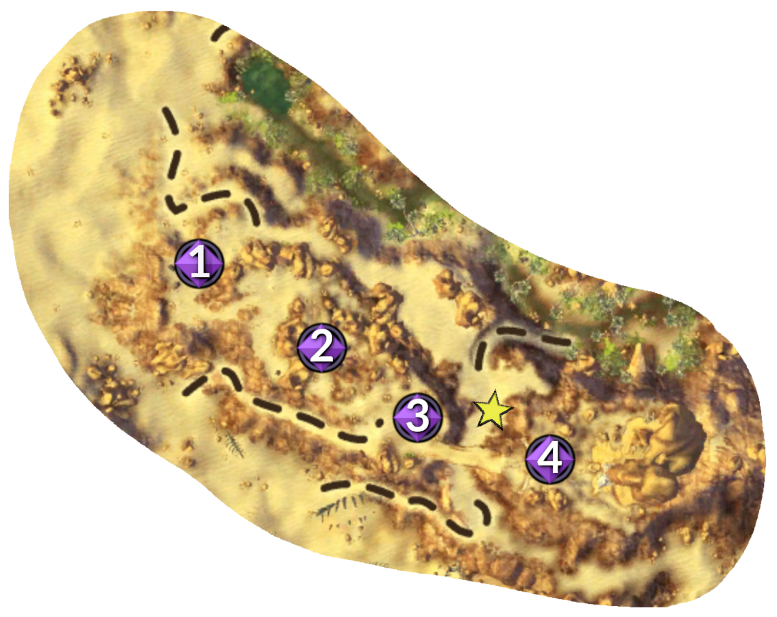
Location: Shimmersand
Waypoint: /setwaypoint 7099 6901
Difficulty Tier: Tier 1
Hit Requirement: N/A
Level of bosses: 52
Number of bosses: 4
Max Group Size: 10
Recommended Minimum Group Size for Level 70 cheevo run: 1
Solo at 70?: Yes
All cheevos while solo?: No, you will need 10 players for ‘Can’t Take it With You’.
You can enter this raid solo, you do not need other players in the group.
This raid is a Sliver, so you will need the buff from Quantum Sight or Omen Sight to be able to see the entrance.
A group of level 70 players can easily kill everything in this raid.
This guide is mainly designed to show you how to get the cheevos.
If the content becomes ‘relevant’ again then I will expand the boss guides as needed and add more detail.
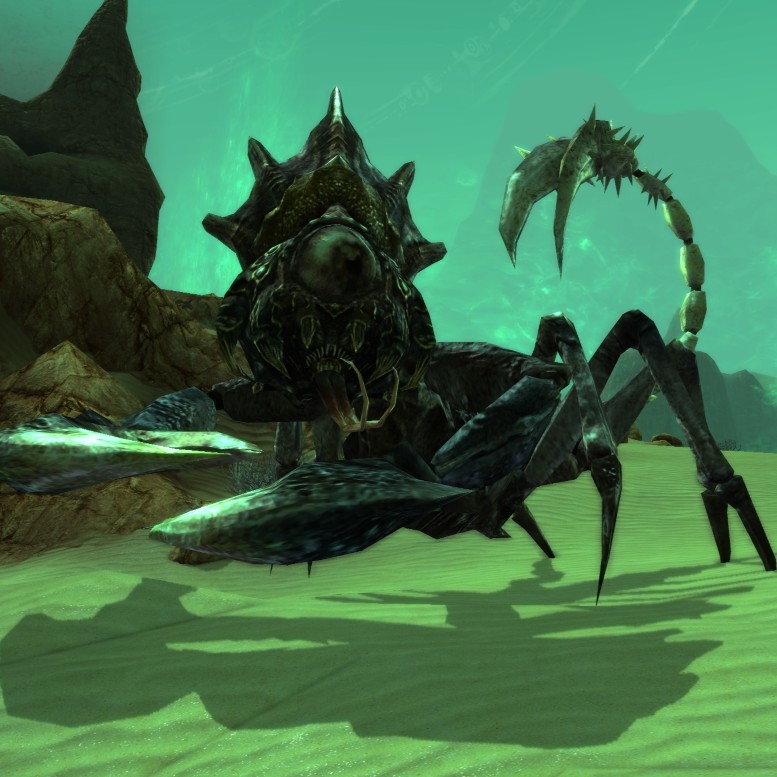
Boss 1 - Anrak the Foul
For Level 70s
A level 70 solo player can easily kill this boss without having to worry about any tactics.
Main Abilities
- Brittle – Tank Swap at 3-5 stacks – Stacking debuff on the tank which increases damage taken by 10% per stack.
- Vicious Tail Strike – Don’t stand in front of him – Significant frontal cleave for 180 degrees.
- Eye Beam – ST big heals – Channelled beam on a random player, dealing damage per second.
- Spines of Earth – Spread out – Places a yellow bubble AoE ground effect around each player, deals raid-wide damage which increases if any player is within another bubble.
- Explosive Venom – Cleanse – Exploding debuff on a random player which must be cleansed.
- Call of Anrak – DPS the adds – Spawns several smaller Spawn of Anrak adds.
- Bond of Earth – Move Boss – Rune ground effect that gives the boss a buff of reducing incoming damage by 20%.
- Earthen Rage – Kill boss before this gets too high – Stacking buff on the boss which increases his damage dealt by 3% per stack.
Basic Tactics
The first tank takes Anrak and faces him away from the raid (often he is tanked facing the cliff wall), with the rest of the raid spreading out behind the boss. Once everyone has spread out, and has LoS of everyone else (small hills and dips can affect this), everyone but the tanks should remain in their spot for the rest of the fight.
Throughout the encounter, Anrak will gain stacks of the Earthen Rage buff. This increases his outgoing damage by 3% per stack, functioning as a soft enrage mechanic.
The tank will begin receiving stacks of Brittle, a debuff which increases their damage taken by 10% per stack. Once these start building up, a tank swap is generally required every 3-5 stacks depending on gear. Periodically, there will be an emote “Anrak the Foul’s tail twitches as it prepares to strike”, signaling that a Vicious Tail Strike is about to occur. This is a significant 180 degree frontal cleave, and the tank should avoid it by walking straight through the boss to the back, so that no one is in front of the boss when the cleave hits. This provides an ideal opportunity for the tank swap to occur, as the other tank can taunt him off once the cleave has hit.
Anrak frequently casts Eye Beam, signaled by the emote, “Anrak the Foul gazes at [playername].” This ability channels a beam to the named player, dealing damage per second, so heals need to be focused on them (and anyone who is too close to them).
When Spines of Earth is cast, there will be a yellow bubble AoE ground effect around every player. Raid-wide damage will be dealt, and if any player is too close to another, the damage increases. While the yellow bubbles can overlap each other, they cannot overlap another player without increasing the damage.
When Anrak is past 50% health, he casts Explosive Venom (“Anrak the Foul flings a bolt of poison at [playername]”). This places a debuff (green bubble) on the afflicted player which must be cleansed immediately, or when their debuff expires they will explode and kill nearby players.
Anrak will periodically use his Call of Anrak. This summons 3-4 smaller Spawn of Anrak adds. These cannot be tanked, and ranged DPS should focus these down.
Finally, after a certain period of time, Anrak will cast Bond of Earth, placing a rune ground effect below him which gives him a buff reducing his damage taken by 20%. It is possible to kite the boss out of the effect, but is generally not needed.
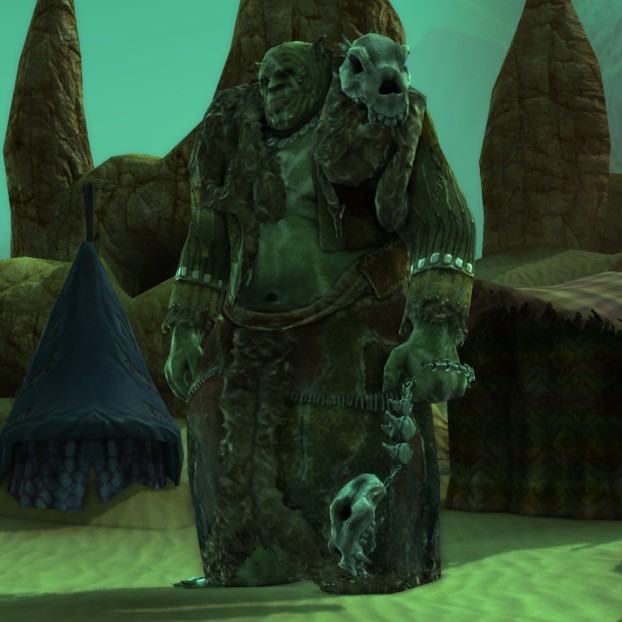
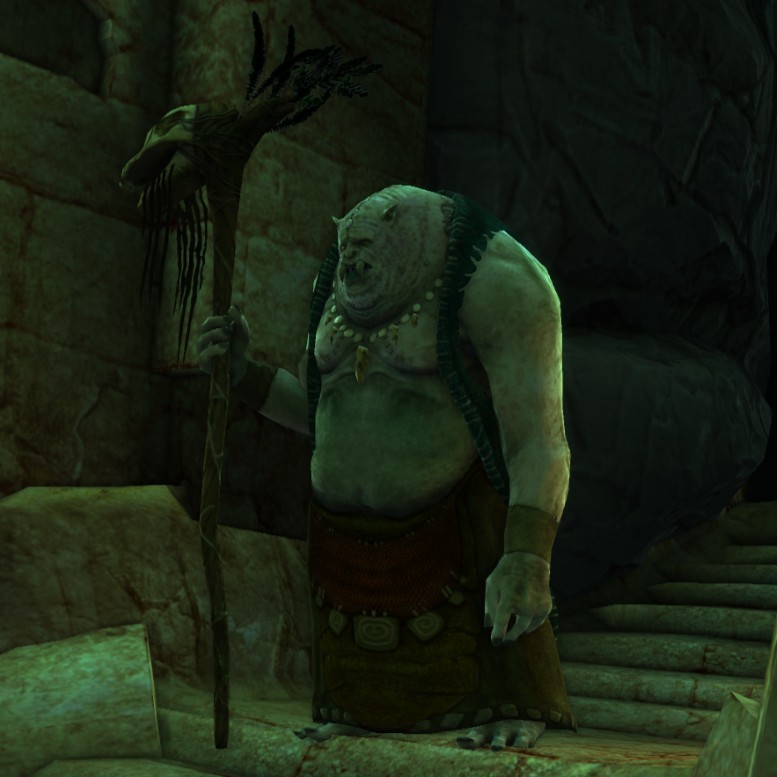
Boss 2 - Guurloth
For Level 70s
A level 70 solo player can easily kill this boss without having to worry about any tactics.
Guurloth will always be known as the ‘Simon Says’ boss. The raid needs to follow instructions given by Guurloth, to run around, face away, stop DPS etc. It’s a really fun fight!
Main Abilities
- Rumbling Earth – Jump! – All players must jump to avoid damage. Waves will emanate from the boss that should be jumped ‘over’ this can be difficult to time, if you find yourself getting hit, wait a beat before you start spamming jump again.
- Earthen Punishment – Stop pushing buttons – Cast on a random player, gives the player a debuff that lasts 10 seconds. If the player uses abilities while the debuff is active then they will hurt the raid.
- Call of Guurloth – Kill the add – Spawns a Friend of Guurloth add, this add must be taken away from the boss or it will buff the bosses damage by 100%. If the Friend is not killed quickly enough then it will summon more friends, which is not good!
- Orb of Searing Power – Look away! – The boss will hold up an orb on a chain, all players must look away from the orb for the 10 second duration of the cast or risk taking raid wide damage.
- Earthen Toll – Run around! – Channelled cast that requires all players to run or move for the duration.
- Boulder of Destruction – Big heals! – Massive damage attack on the highest threat target requiring the use of cooldowns or heavy mitigation.
- Explosive Crystal – Move out – Yellow ring cast on a random player’s location, Player needs to move out and the crystal that spawns can be DPSd down.
- Earthen Geyser – Move out the bad – AoE ground effect (yellow bubble) cast on a random player’s location.
- Earth Barrage – Heal that tank! – Auto attack on highest threat target.
Basic Tactics
The main tank (Only one tank is required for the fight) takes Guurloth where he stands and faces him away from the raid. Melee DPS can stand directly behind the boss, with the rest of the raid spread throughout the area.
The first ability Guurloth will cast is Rumbling Earth, signaled by the emote “Guurloth screams, ‘Jump little fools.’” Throughout this channelled cast, all players need to jump continuously to avoid taking damage.
Next he will cast Earthen Punishment, signalled by the emote “Guurloth screams, ‘[Playername] will do nothing or all will suffer!’” This player needs to stop all abilities for the length of the debuff or they will deal AoE damage to the raid.
Periodically, the boss will cast Call of Guurloth, spawning a crystalline add. This event is signalled by the emote “Guurloth screams, ‘Say hello to my friend, little ones!’” This add must be tanked away from Guurloth to avoid buffing his damage by 100%. Because Guurloth is ranged, the main tank can take the add away from him and hold aggro on both at the same time. All DPS should focus the add when it is up. If the add is not killed quickly enough, the Friend of Guurloth will cast Refer a Friend and spawn a second add, Friend of a Friend. This add will buff the first add’s damage.
The boss will cast Orb of Searing Power, signalled by the emote “Guurloth screams, ‘Dare you gaze up on the Orb of Power?’” For the duration of this cast, all players must face away from the boss or the raid will take damage.
At certain times throughout the fight, the boss will spawn 4 Cyclones and they will stay active for about 45 seconds. These will move randomly through the encounter area and when they come in contact with a player, will toss them 30 meters into the air resulting in falling damage. These adds should simply be avoided.
The boss will cast Earthen Toll, signalled by the emote “Guurloth screams, “Run little fools.’” All players must run or move continuously during the cast.
Once a minute, the boss casts Boulder of Destruction, signalled by the emote “Guurloth gathers the strength of earth and focuses on [playername]!” This ability is targeted at the tank and does massive damage. It will require either a great deal of mitigation or the use of cooldowns to survive. The tank should receive extra healing for this ability.
Guurloth also casts Explosive Crystal and Earthen Geyser, both of which create yellow AoE ground effects that need to be avoided.
All of these instructions are easy enough to follow one at a time, but as the bosses health goes down, the rotation of abilities will get quicker and quicker until they start overlapping, with the last 20% being a pretty intense and manic fight!
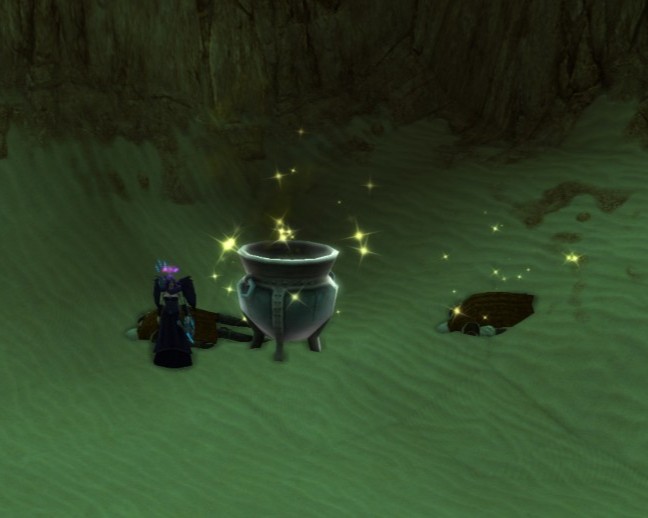
Defile the Offering (Pissing in the Pot)
Next you will need to destroy the barrier protecting boss 3. This part was usually the job of a stealthed rogue with some stun abilities, or you can just bring the whole raid to kill the few trash mobs that are along the way.
Drop down from the second boss to the path along the north of the instance, follow it round to a clearing beneath the bridge, stun or kill the two dudes guarding the pot, then click the pot.
Now you have to go all the way back around the north and up the path past boss 1 and 2 areas to get boss 3. Don’t forget you can mount!

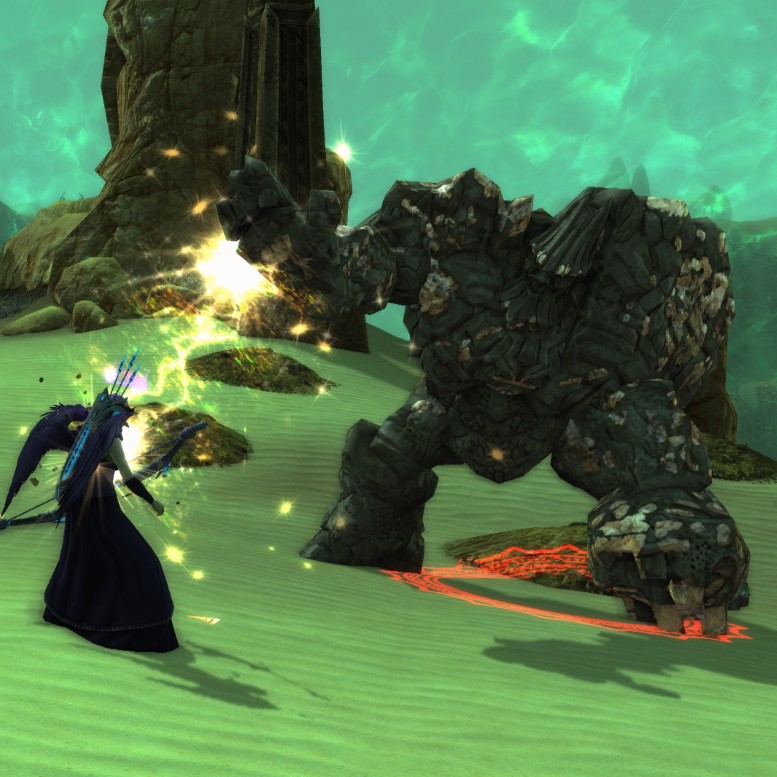
Boss 3 - Thalguur
For Level 70s
A level 70 solo player can easily kill this boss without having to worry about any tactics. You will be left with a bunch of ghosts attacking you, just cross the bridge to the next boss and they will leave you alone.
Thalguurs damage will increase throughout the encounter, the raid will be able to pick up crystals to reduce their damage taken, be sure to share the crystals evenly, giving extra to squishy players. If a player dies then their crystal buff will be removed, if this happens early then they can be given extra crystals to bring their stacks back up, but a player that dies towards the end of the fight is generally best left dead.
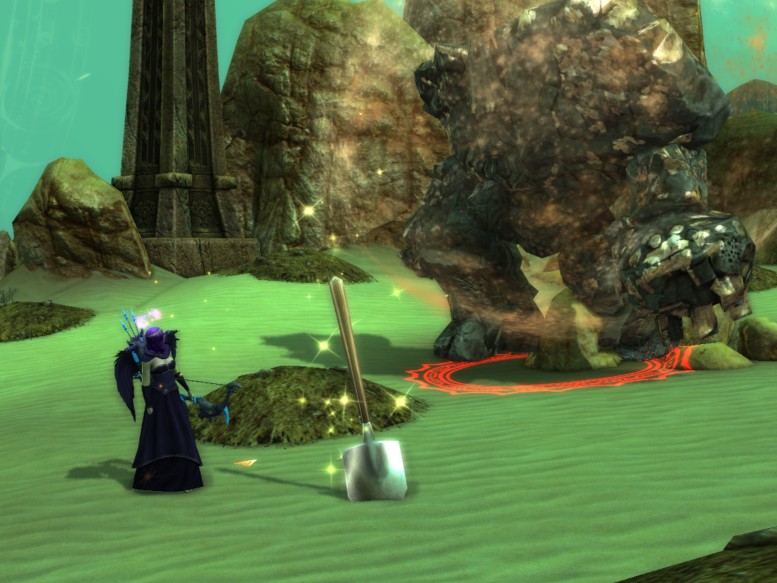
You will need to assign a specific player to do grave digging to manage the ghost adds. This is usually a job for your support role or your lowest DPS.
Main Abilities
- Earthquake – Big Heals – AoE damage that gets progressively higher.
- Touch of the Core – Big Heals – Single target channelled beam on a random player, deals massive damage.
- Crushing Force – Careful now – Cone effect that targets a random player and deals them damage and a 20-meter knockback.
- Absorb Power – Pick up crystals– Starting at 90% health (and every 20% thereafter), Thalguur smashes a pillar into Luxury crystals and receives another stack of the Power of Laethys buff.
- Power of Laethys – Pick up crystals – Stacking buff that increases the amount of damage the boss deals.
- Power of Luxury – Enjoy the buff! – Player buff gained when you pick up crystals from the ground, increases the player’s health, healing, and damage output. The colour of the crystals does not matter, only the amount.
- Greed is Good – Move away from players – Debuff placed on a random player which appears as a yellow swirling effect under their feet, removes stacks of nearby players Power of Luxury buff.
- Beam of Power – Move to the pillar – A yellow beam from a random player to a random pillar, the targeted player must run to the targeted pillar within 8 seconds and receive a debuff reducing incoming heals by 50%, otherwise the entire raid receives the healing debuff.
Ghostly adds
- Greedy Telaran Spirit – Dig their graves! – Spawn in increasing numbers (1 at 90% to 5 at 10%) after each Absorb Power, have a cleave, despawn individually once they are attracted to an unearthed treasure.
Basic Tactics
Thalguur initially appears as a pile of rocks on the ground in the centre of 5 pillars. The tank should take him where he stands with the melee DPS spread behind the boss and the ranged players spreading out around the remaining area. No one should stand along the northeast or southwest edges of the encounter area, because knockbacks could send players over the cliff to die.
Thalguur has a significant raid-wide AoE ability called Earthquake. This starts dealing damage, and as the fight goes on, gets buffed to bmore damage, but the players’ health gets buffed as well. It is important to heal up from this damage quickly as he may cast one of the other abilities immediately after.
One of these abilities is Touch of the Core, which is signaled by the emote “Thalguur focuses his energy on [playername].” This is a single target channelled beam on a random player, dealing massive damage which must be healed through. Another is Crushing Force, a cone effect targeted on a random player (but hitting other players in the cone), which deals damage and a 20-meter knockback. Again, players should not stand near the cliff edges or this knockback could send them to instant death. Players should back themselves up to walls or rocks if possible to avoid being knocked too far out of the fight.
At 90% (and again at 70%, 50%, 30% and 10%), Thalguur will perform Absorb Power. The boss will move to one of the pillars and smash it, spawning about 45 coloured crystals all over the encounter area. After a 10-second channel, he receives a stack of the Power of Laethys buff, which increases his outgoing damage. Players should gather up crystals (the color is irrelevant) with the tank and DPS taking 4 each time, and healers taking 5 each time. Each crystal provides the player with a stack of the Power of Luxury buff, which increases their health, healing received, and damage output. These buffs are necessary to survive the increasing damage of the encounter.
Finally, Absorb Power will cause a Greedy Telaran Spirit add to spawn (1 at 90%, 2 at 70%, 3 at 50%, 4 at 30%, and 5 at 10%). While the boss does not cleave, the adds do. The tank should gather them up, and the DPS should ignore them. One player should be assigned to pick up the sparkling Impressive Shovel and watch for the dirt mounds to become active and sparkle. That player needs to interact with the active dirt mound to unearth a treasure, so that one of the adds is attracted to it and despawns.
Once Absorb Power has occurred, there are two debuffs the players need to watch for. The first is Greed Is Good, which removes stacks of Luxury of Power from nearby players. When a player has this debuff, they will see a yellow swirling effect under their feet, and they should move away from other players. The second is Beam of Power, which is indicated by a yellow beam of light from one of the pillars to a random player. This player has 8 seconds to move to the indicated pillar and then they will receive a debuff which reduces incoming healing by 50%. If they don’t make it to the pillar in time, the entire raid receives the healing debuff. Both of these debuffs will appear on raid frames and can be called out in voice chat.
Boss 4 - Uruluuk
For Level 70s
A level 70 solo player can easily kill this boss without having to worry about any tactics.
Main Abilities
- Storm of Force – Move in – Significant damage to all players outside of red pulsing circle effect on boss.
- Crystal Imprisonment – Move away from boss – Targets a random player and after a cast they become crystallized, will heal the boss if within 10 meters.
- Crushing Boulder – Big heals – Raid-wide AoE damage.
- Explosive Crystal – Move away – AoE damage cast on a random player, dealing damage to other players in a 5 meter radius.
- Fist of Laethys – INTERRUPT! – Instantly kills the tank if not interrupted or reflected.
- Crystalline Impact – Stand in the bubble – Puts a crystal on a random player, which provides a protective bubble against Rage of Laethys.
- Rage of Laethys – Stand in the bubble – Massive raid-wide AoE damage.
- Shield of Gold – Kill the Shrine – Stacking buff that increases the boss’ outgoing damage.
- Power of Greed – Kill the Shrine + Purge boss – Stacking buff that increases the boss’ outgoing damage, can be purged.
- Shield of Protection – Kill the Shrine + Purge boss – Stacking buff that reduces the boss’ incoming damage, can be purged.
Shrines and other adds
- Shrine of Gold – Kill First – Applies a stack of the Shield of Gold buff to the boss every 5-10 seconds that it is active.
- Shrine of Greed – Kill Second – Applies a stack of the Power of Greed buff to the boss every 5-10 seconds that it is active.
- Shrine of Protection – Kill Third – Applies a stack of the Power of Greed buff to the boss every 5-10 seconds that it is active.
- Orelings – Watch their cleave – Spawn in a pair every air phase, they have a frontal cleave.
- Skeletons – Mgggg – Spawn during final phase (after 30%), 2-3 spawn every 3-5% health. They should be killed before they reach the boss or they will heal him. Occasionally one will get bigger and buffed, the buff should be purged off and the Skeleton killed.
Basic Tactics
Uruluuk starts at the top of the stairs (the eastern point on the map). During the fight he will teleport randomly to the northern, western and southern points, as well as the centre point during the air phase. The tank will need to tank him where he stands, with the rest of the raid spread out behind him as much as possible.
Throughout the fight, all players will appear physically larger than normal. Occasionally they will receive a debuff, shown in the raid frames, which shrinks them to normal size and reduces their damage output. This should be cleansed every time it comes up.
Phase 1 – Ground Phase
For the first 10 seconds of the encounter, the raid can simply DPS him before he teleports to his first random location. The raid should follow and position themselves as before after each teleport.
After the teleport, Uruluuk will cast Storm of Force, signaled by the emote, “Uruluuk forms an expanding bubble of force.” A red pulsating circle will surround the boss and the entire raid must collapse and stack immediately behind him. Any player outside of this circle will be subject to massive damage. After the damage has hit, players should return to their previous positions.
Next he will cast Crystal Imprisonment, signaled by the emote “Uruluuk points at [playername].” The targeted player needs to run away from the boss (toward the centre point, just west of the pedestal) before they are encased in a crystal. If the player does not move at least 10 meters from the boss, the crystal will begin to heal the boss. The player will need focused healing and all DPS needs to immediately break them out, unless Storm of Force is cast, in which case they need to wait for the damage to hit before releasing them.
Crushing Boulder causes raid-wide AoE damage which must be healed through.
Explosive Crystal targets a random player, placing an AoE on them which deals damage to them and players within a 5 meter radius of them, making it important to spread out whenever possible.
Uruluuk will cast Fist of Laethys, which must be interrupted or reflected, otherwise it will instantly kill the tank.
Phase 2 – Air Phase
The boss will begin this phase by teleporting high up on his structure. At this point, the whole raid should stack on the centre point, just west of the pedestal, unless a player is crystallized, in which case the raid should stack on the crystal. Uruluuk will cast Crystalline Impact, signaled by the emote, “Uruluuk directs a massive crystal at [playername].” A small green crystal will appear at that player’s location, and the whole raid needs to be stacked at it.
The next ability is Rage of Laethys, which deals massive raid-wide pulsing damage which is mitigated by standing at the green crystal. Anyone not protected by the crystal will receive increasing damage per tick. The boss will also spawn 2 Oreling adds which need to be picked up by the tank. They can be ignored by the DPS, except to watch for their cleave, and will eventually despawn.
Phase 3 – Ground Phase with Shrines
Immediately following Rage of Laethys, Uruluuk will teleport down to the centre point pedestal and take 20% more damage for about 15 seconds. All DPS should burn him during this phase before the shrines spawn, being sure not to LoS the healers with the pedestal.
Three earthen idol shrines will spawn at the northern, western, and southern map points. The northern shrine is the Shrine of Gold and it applies a stack of the Shield of Gold buff for every 5-10 seconds that it is active. The Shield of Gold is a stacking buff that increases the boss’ outgoing damage and it is not purgeable, so all DPS should attack the Shrine of Gold first. The western shrine is the Shrine of Greed, and similar to the first shrine, it applies a stacking Power of Greed buff that increases the boss’ outgoing damage; however this one can be purged. Lastly the southern shrine is the Shrine of Protection, which applies a stacking Shield of Protection buff that decreases the boss’ incoming damage, which can be purged. A dedicated purger should remain on the boss throughout this phase. All other DPS should attack the shrines in order: Shrine of Gold (northern), Shrine of Greed (western) and then Shrine of Protection (southern).
While the shrines are still being attacked, Uruluuk will begin teleporting and casting again, so all players should be sure to be in range if Storm of Force is cast, and be aware of the other abilities he casts as well.
Phases 1, 2 and 3 will repeat until the boss reaches about 30% health.
Phase 4 – Stairs Phase with Skeletons
At around 30% health, Uruluuk will teleport back to his original location at the top of the stairs. He will almost immediately cast Fist of Laethys, so a dedicated interrupter or reflector (other than the tank) should be prepared to be in range for it. At this point the boss no longer needs to be tanked. He will continue to cast Crushing Boulder, Explosive Crystal and Fist of Laethys, but his other mechanics are done. The raid should spread out on the stairs and burn him down.
During this time, Skeleton adds will begin spawning at the western point which will need to be picked up and tanked away from the boss. About 2-3 adds will spawn for every 3-5% of the boss health. If these adds are near Uruluuk, they will heal him for about 1% health per second. In addition, the adds can enrage, but this can be purged and a dedicated purger should watch out for this.
Achievements Available
Note: This cheevo will pop as soon as you have achieved the objective during the fight – You do not have to wait for boss to die.
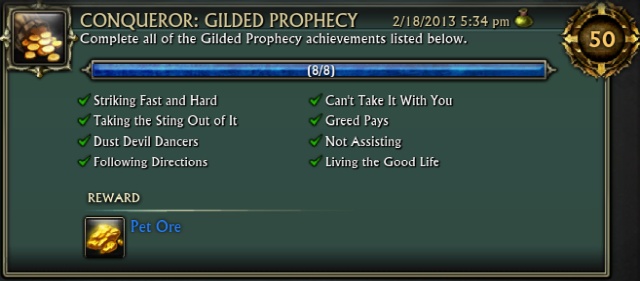
Conqueror: Gilded Prophecy
Complete the cheevos listed

This cheevo reward the Pet Ore companion pet.
Gilded Prophecy
Kill all 4 bosses in Gilded Prophecy
Rapid Assault: Gilded Prophecy
Complete Gilded Prophecy within 30 minutes.
Anrak the Foul
Anrak's Sting
Kill Anrak the Foul.
Striking Fast and Hard
Kill Anrak the Foul within 3 minutes and 30 seconds.
Taking The Sting Out Of It
Don’t die!
Guurloth
Obedience
Kill Guurloth
Dust Devil Dancers
Kill Guurloth without any raid members being struck by a dust devil.
There were some ‘safe spots’ for this cheevo, including between two of the tents or in the alcove in the cliff face, these spots are generally unreliable, and make all the other tactics harder. The best thing to do is just stay alert of where the dust devils are and keep well away from them.
Following Directions
Don’t die!
Thalguur
Wealth Management
Kill Thalguur
Can't Take it With You
Firstly, don’t die!
Secondly.. to get leftover crystals you need to not pick them up during the final crystal phase at 10%. However you will need players in the group to get them to spawn in the first place. I believe that 3 crystals will spawn for each player in the raid, thus you will need a full group of 10 players to get 30 to spawn, however guides I have read say that players can pick up 4 or 5 crystals per phase, so it may be possible to get 30 or more with less than 10 players.
Greed Pays
Don’t die!
Uruluuk
Rage of Uruluuk
Kill Uruluuk.
Not Assisting
Spread your DPS over the 3 shrines, getting them to low health and then killing them within 10 seconds of each other.
Living the Good Life
Don’t die!